Recording GET Inspections on the Mobile App
Inspections can be entered via the Mobile Application or from the Web Application (web browser). Equipment and Implements must be setup in the system prior to the inspection.
For more information about setting up equipment please refer to the article "Setting up & finding equipment".
For more information about setting up implements please refer to the article "Creating, Editing & Setting up Implements".
For more information about installing the mobile app please refer to the article "Installing the Mobile App".
Inspection
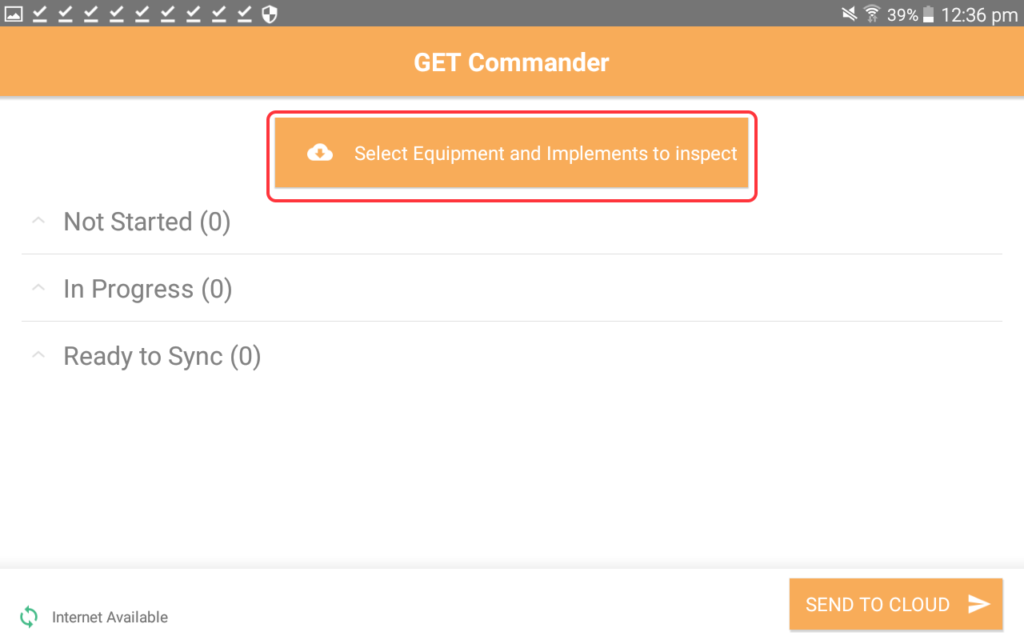
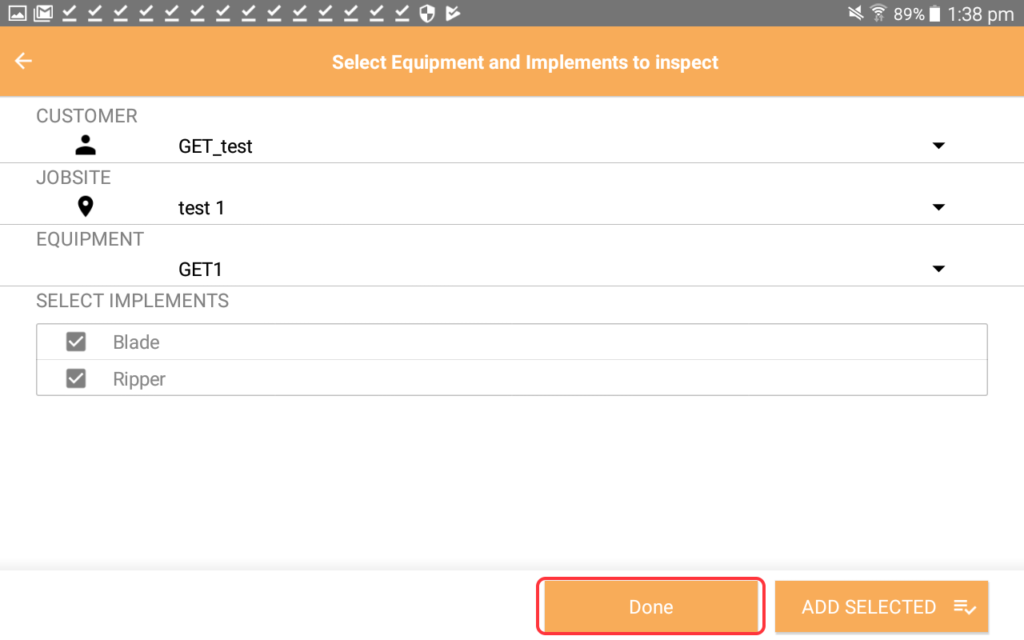
- Press 'Select Equipment and Implements to inspect'
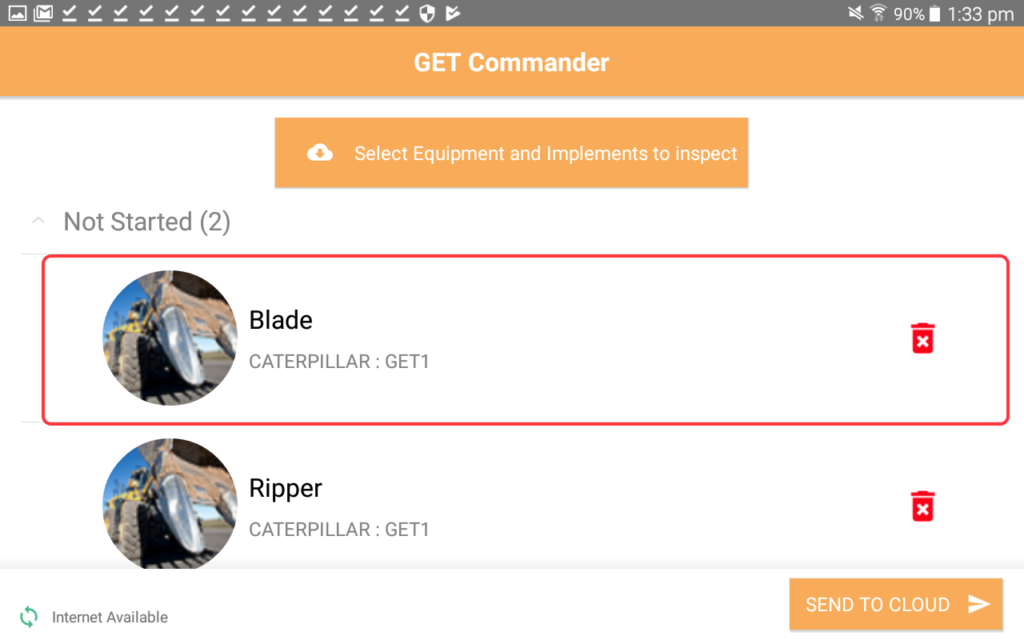
At the bottom left corner you can see whether the application has access to internet.Internet connection is required to select the equipment. Once the equipment has been loaded to the mobile device (see instruction further down this document) you can commence the inspections without internet reception.
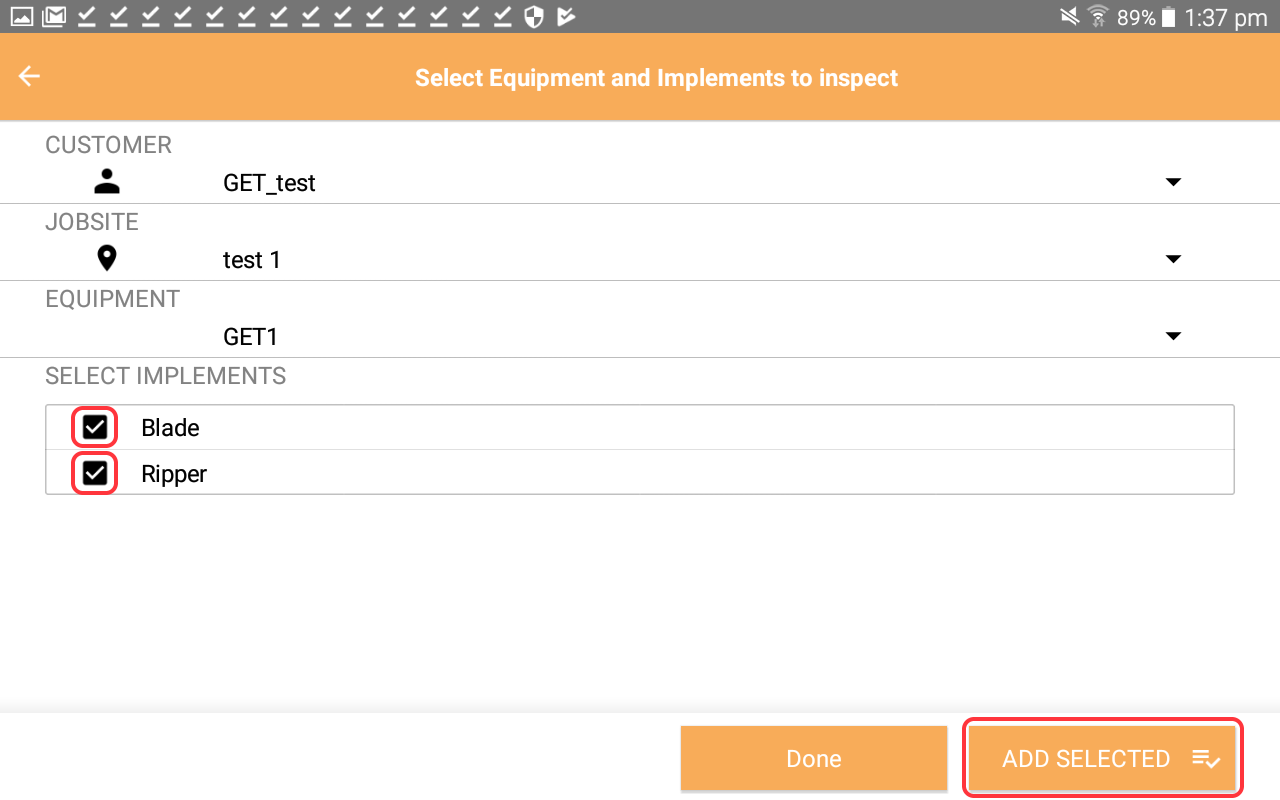
- Select the customer, jobsite and the equipment the implement you are going to inspect is attached to. Tick the box next to the implement name and press ‘Add Selected’.

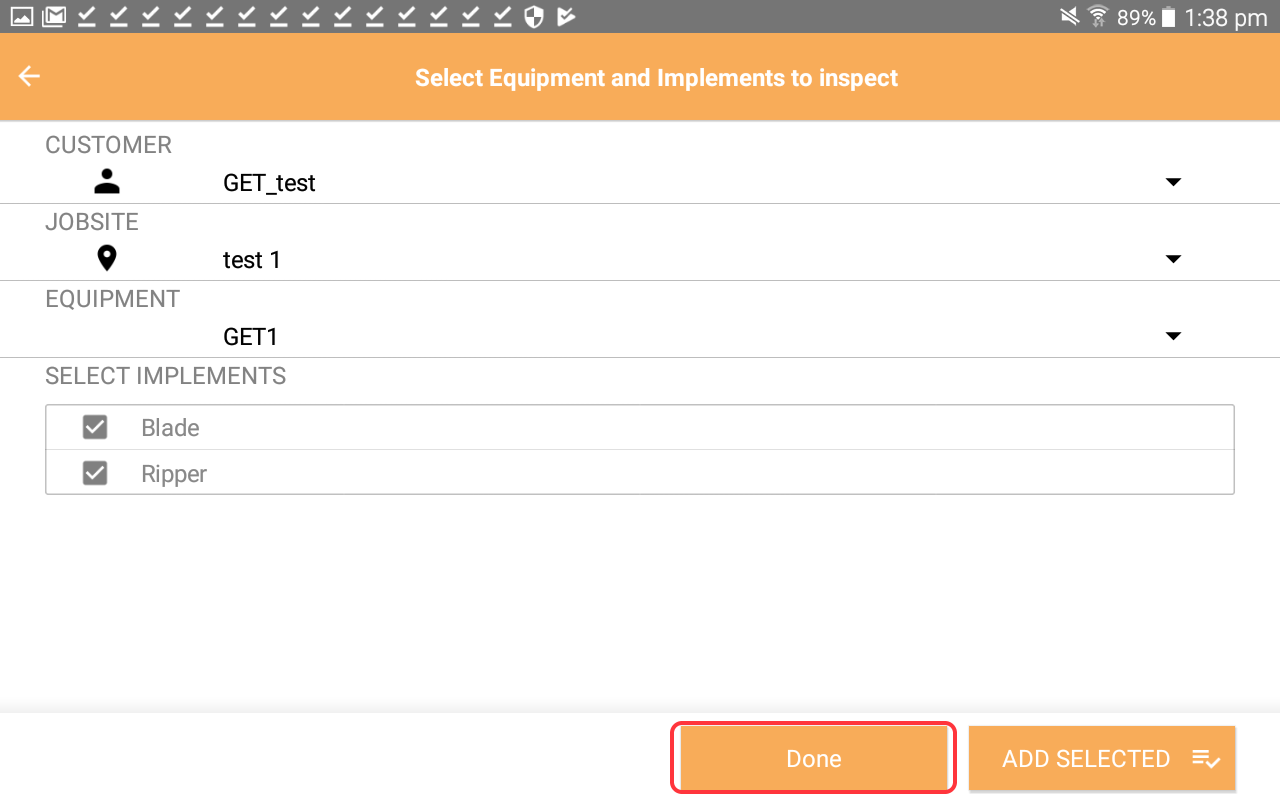
- The application will download all the equipment and implement details and once finished the selected implement will turn grey to indicate that the data now is available on the mobile device.You can choose as many implements as you are going to inspect and also add multiple implements at once (if there are multiple implements attached to one equipment). Press done to return.
- You will now see all downloaded implements ready to be inspected. No more internet is required from this point on wards until the stage where you are going to upload the finished inspections to the cloud. Select the first implement you would like to inspect.
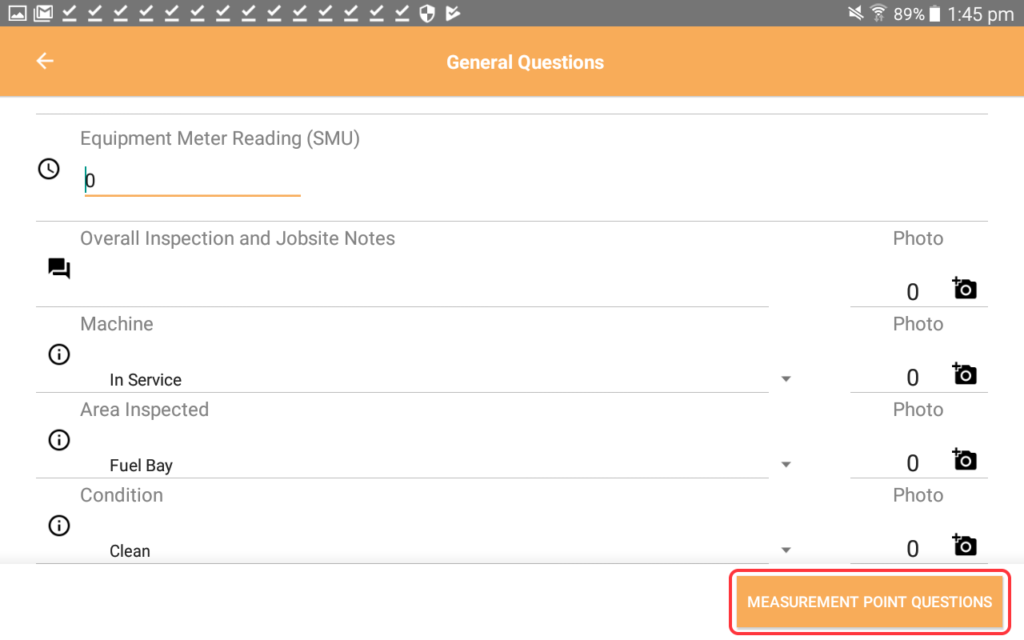
- Enter general information about the equipment used and the environment it is being used in. Once all information has been entered press 'Measurement Point Questions'.
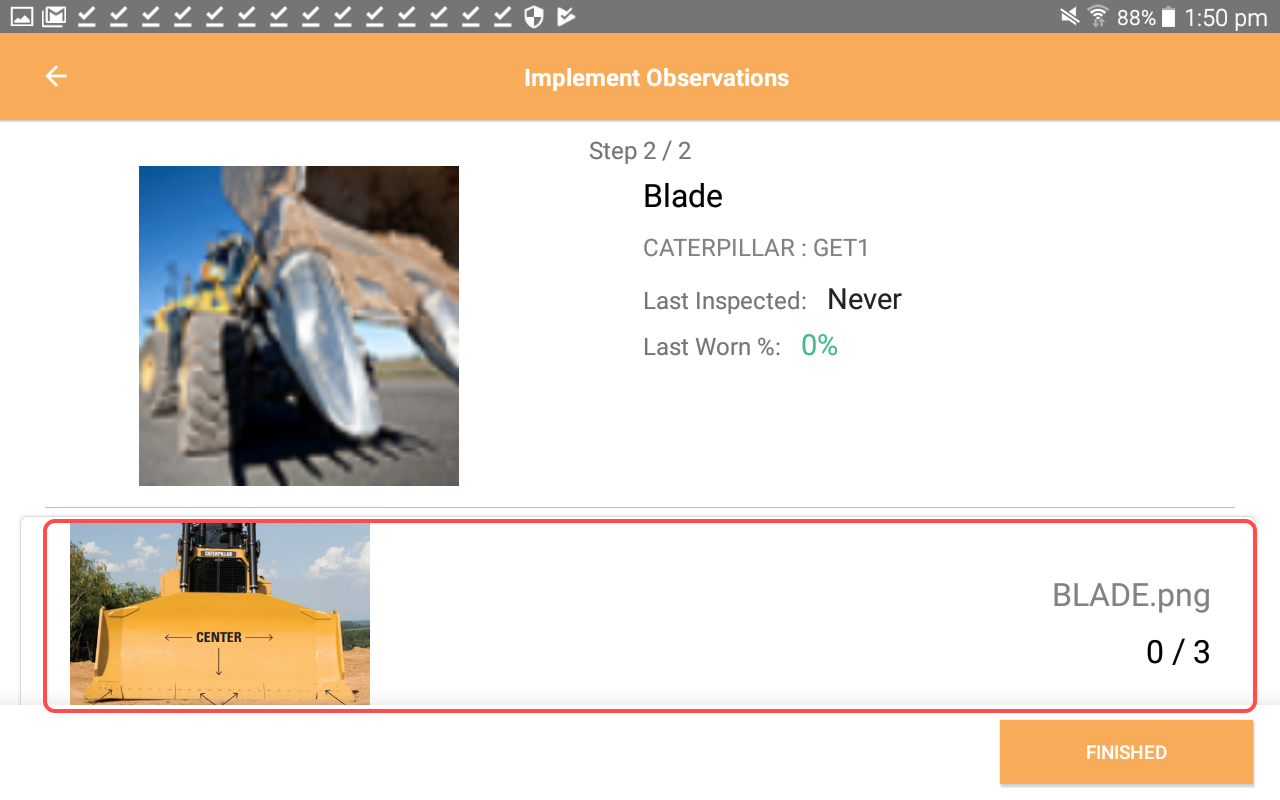
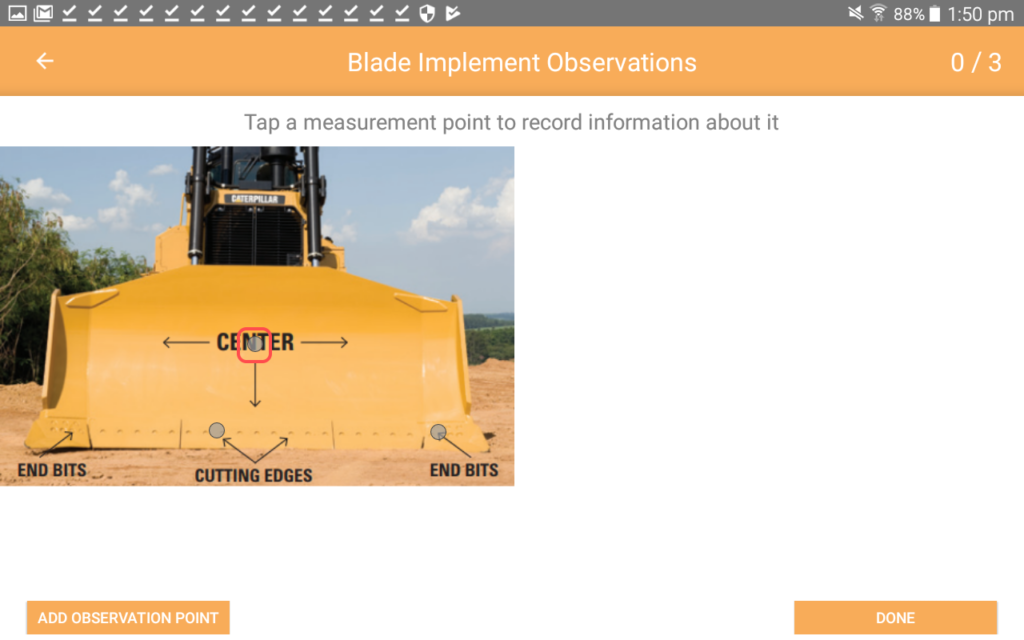
- Select the schematic.

- Select an observation point to inspect.
- Enter measurements, add images, comments and flag an issue if required
- Selecting the flag will change the colour from grey to red.
- The number next to the camera logo indicates how many pictures have been taken.
Note: Depending on the device settings pictures can have a big data size which can have great impact on the upload duration when syncing the data with the cloud.

- Save and continue.
- Continue until all observation points you want to inspect are displayed as a green dot.

- If you are unable to inspect an observation point press the red button next to save.
when an observation point can't be inspected it changes to a red dot on the schematic.

- To add an additional observation point press button in bottom left corner.

- Tap on the screen where observation point appears on the schematic.

- Give the observation point a name, connect it to a component and add images, messages, comments and initial and worn lengths.
- Press save.
- Press done.

- Press finished.

- Select implements.
- Send to cloud.