On the Main Menu, navigate to Workshop Repair Estimate
Click on + New WSRE

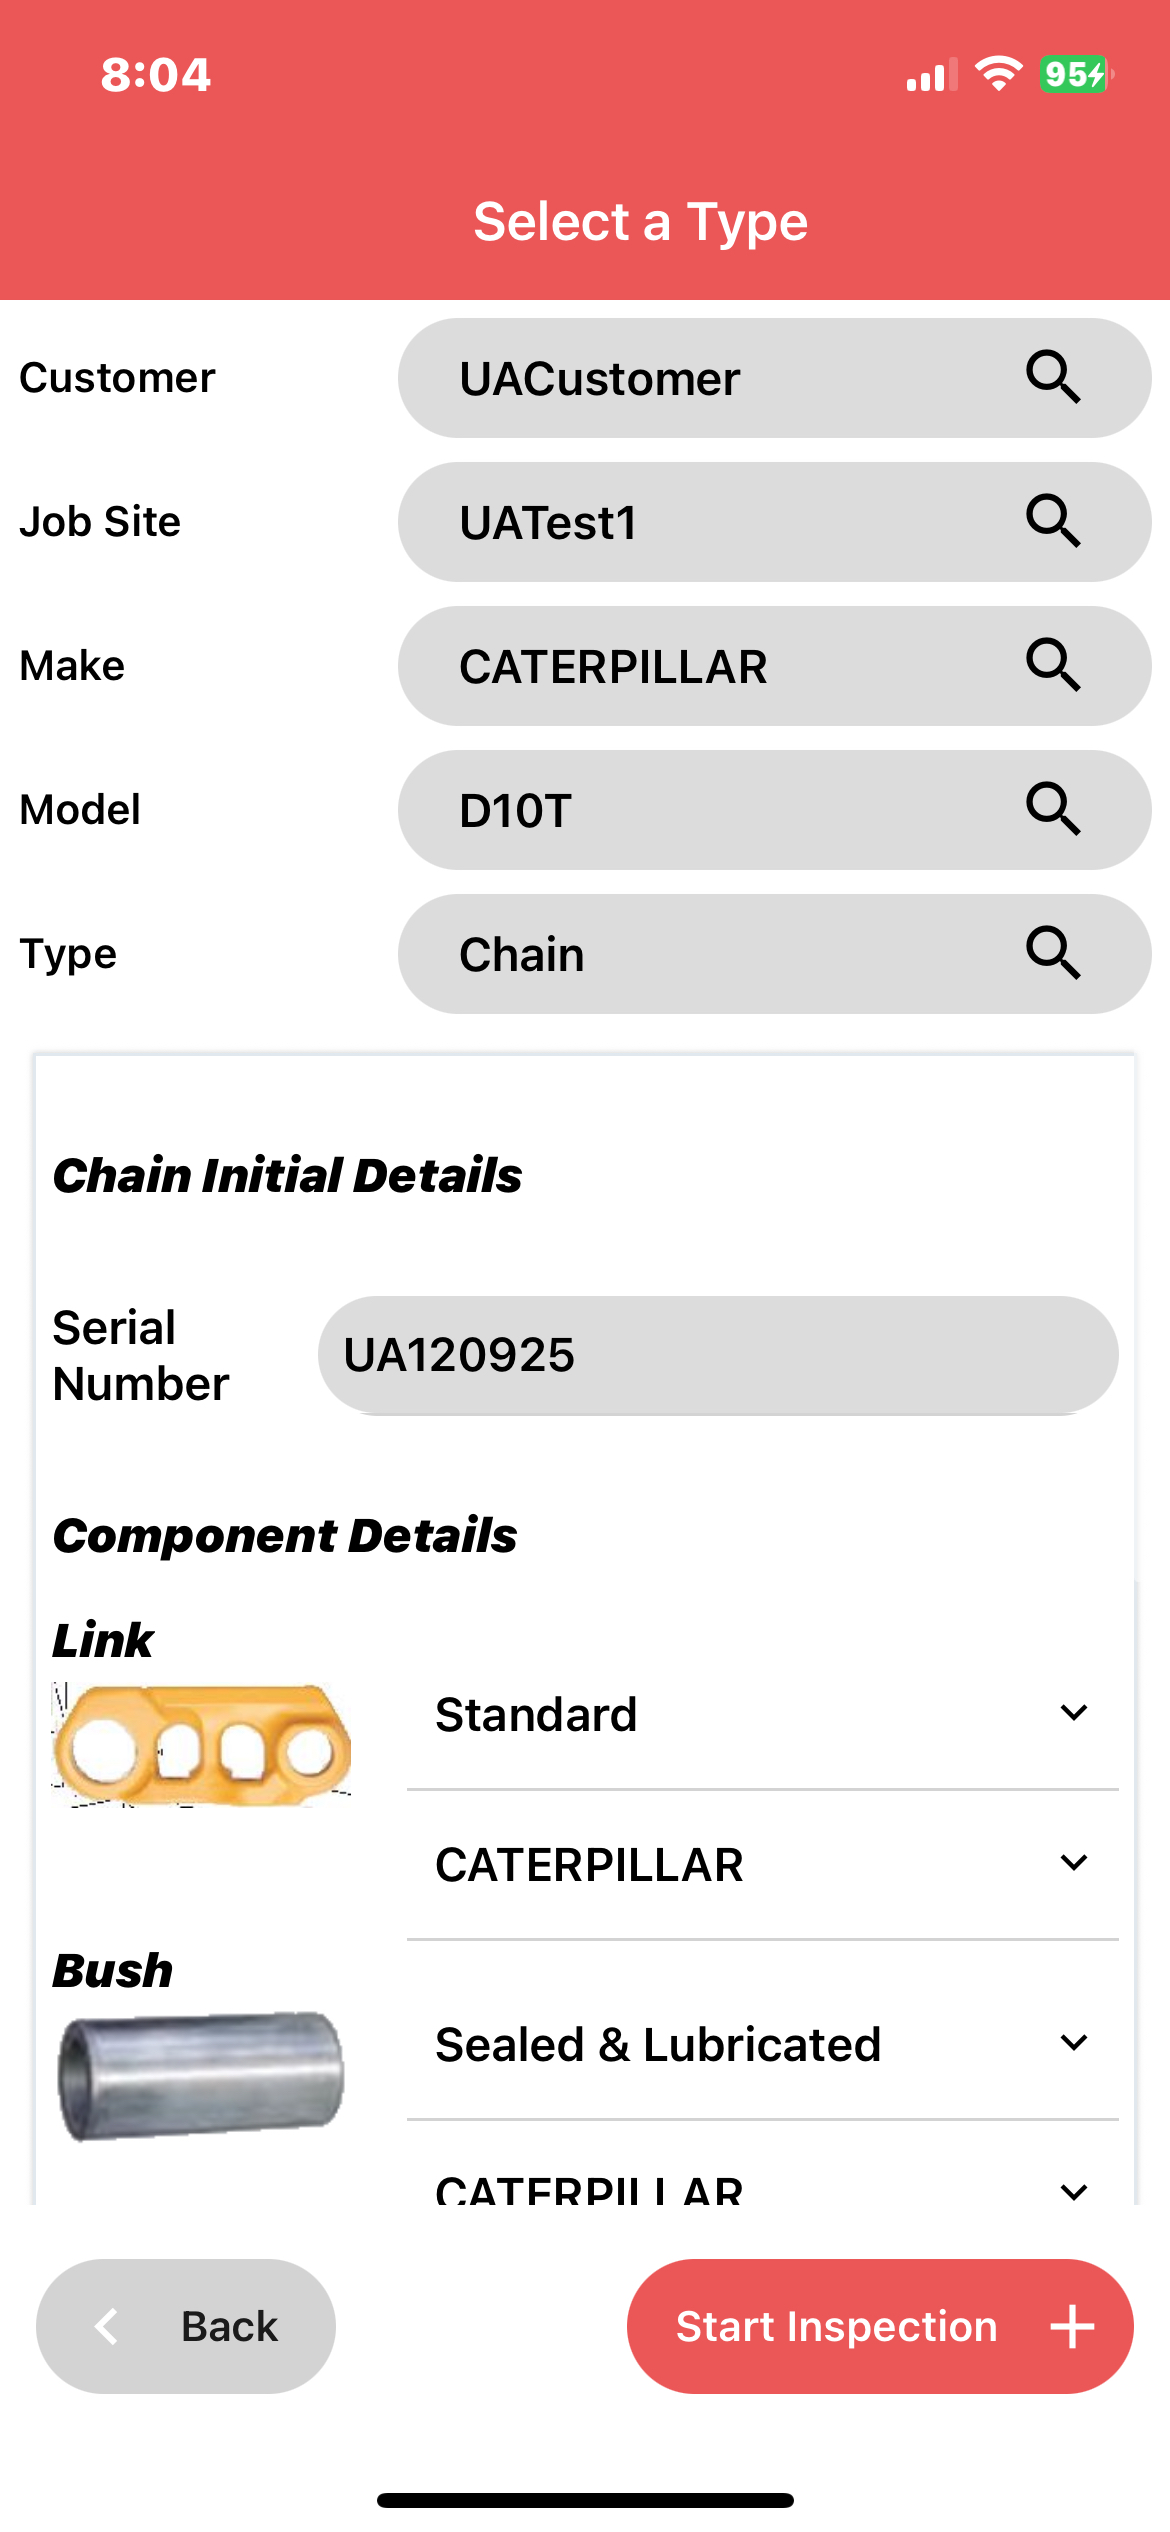
This will take you to the Select a Type screen
- Type in the Customer, alternatively use the magnifying glass to search for the customer
- Type in the Jobsite if it does not fill in automatically
- Enter the Make and Model of machine
- Select Type which is either Chain or Frame, in this case, select Chain
- Enter chain Serial Number and
- Select Component Details (Link, Bush and Shoe)
- Finally enter the WSRE reference details
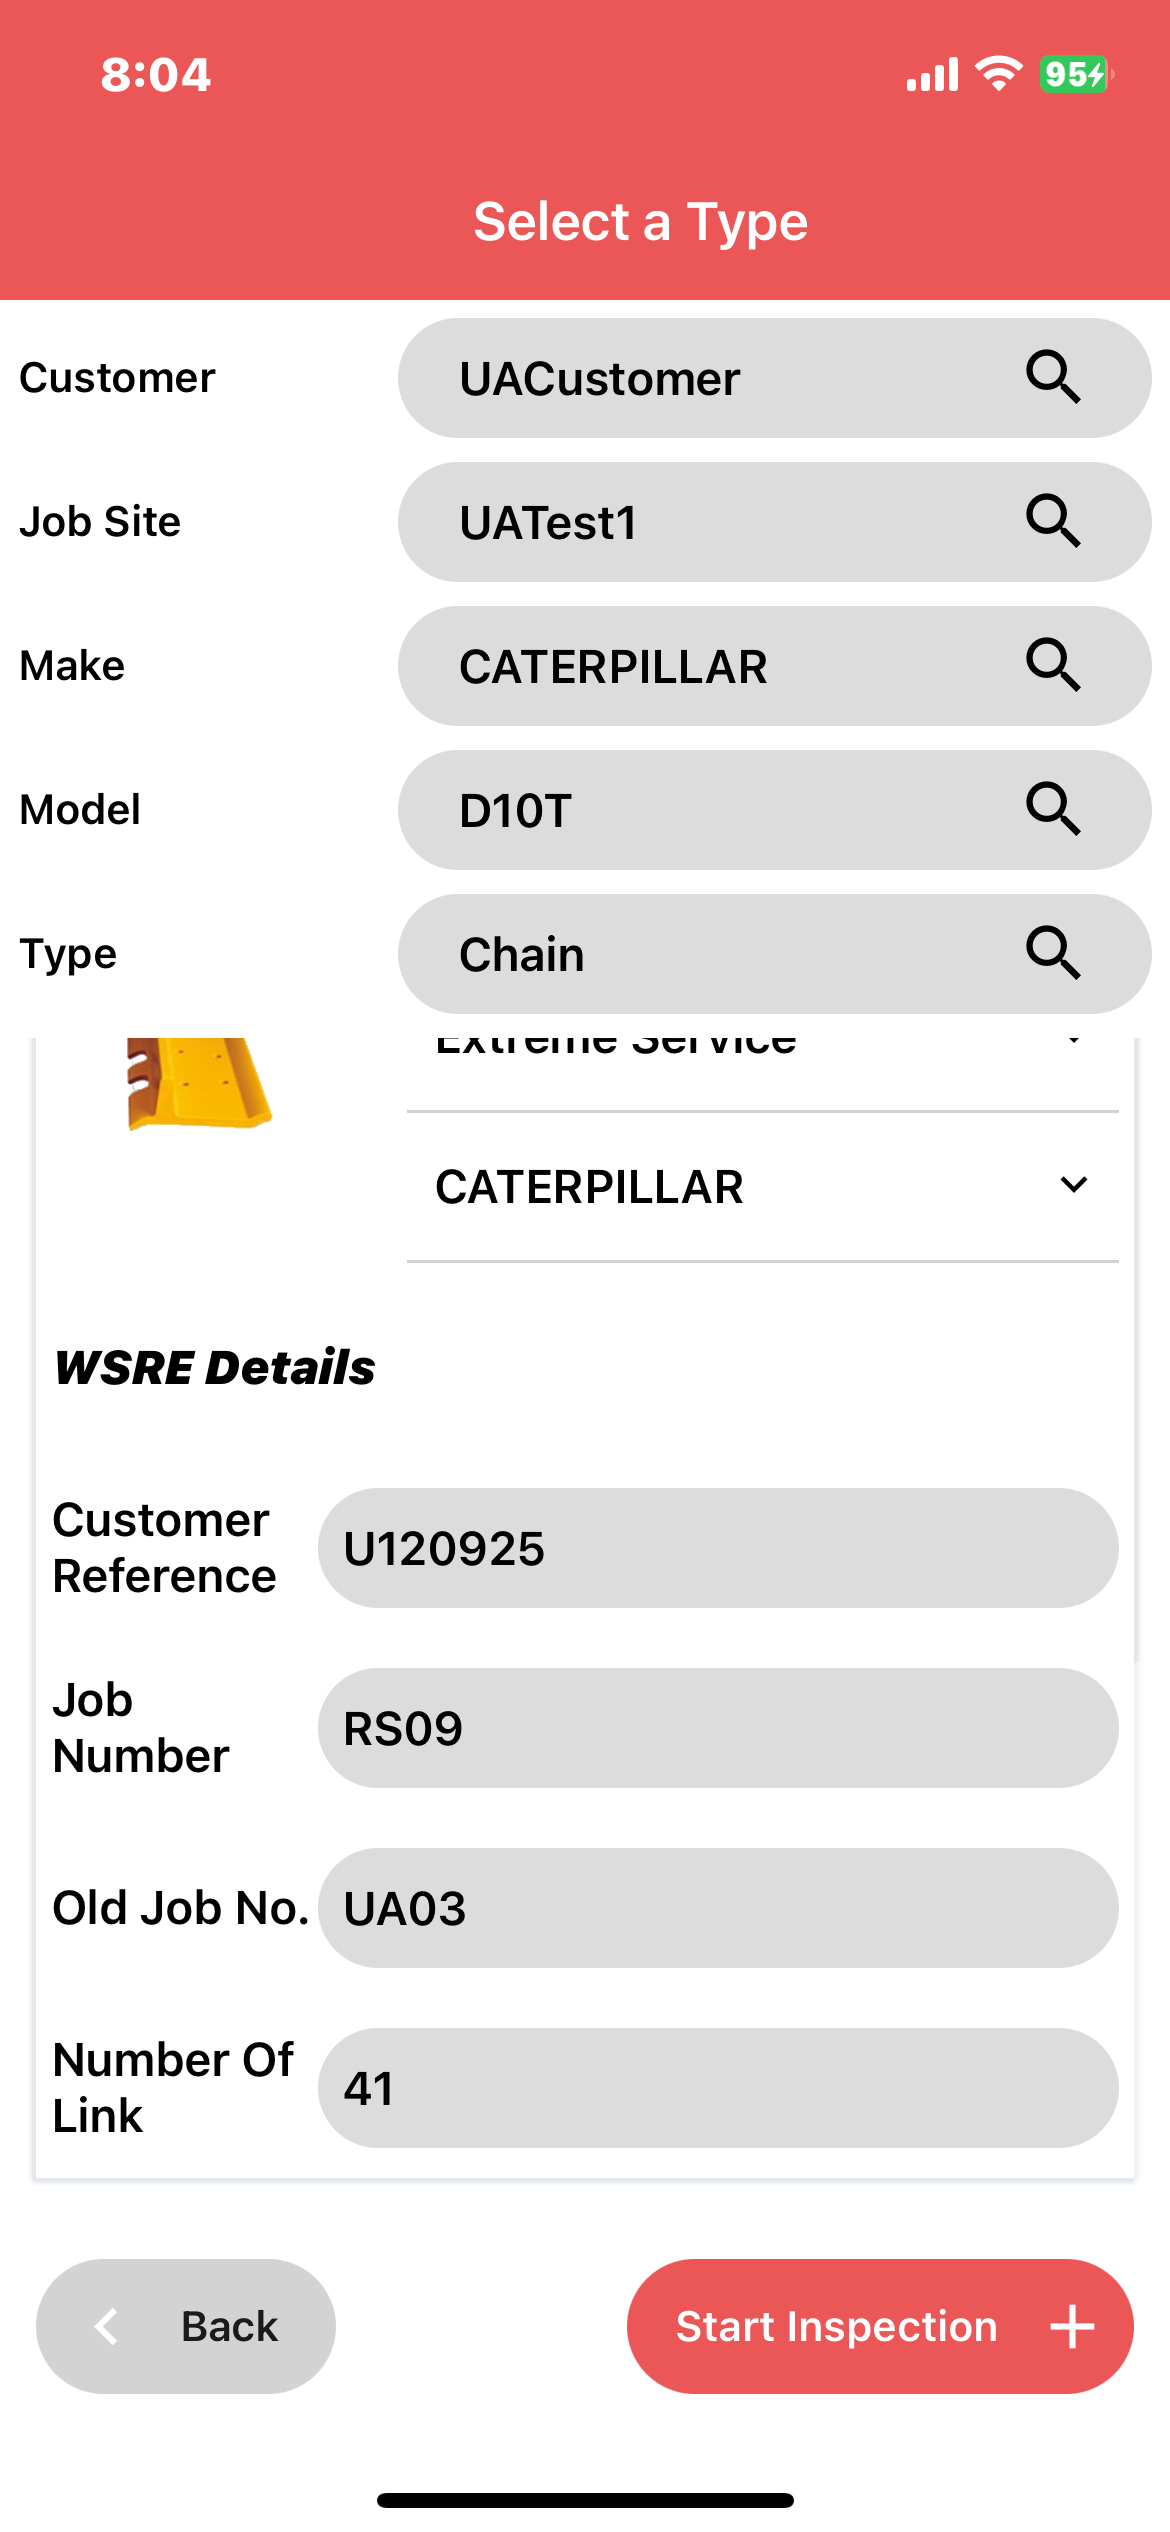
Then click Start Inspection
This will take you to the Initial Details screen, where you can add arrival images, Tag numbers and images
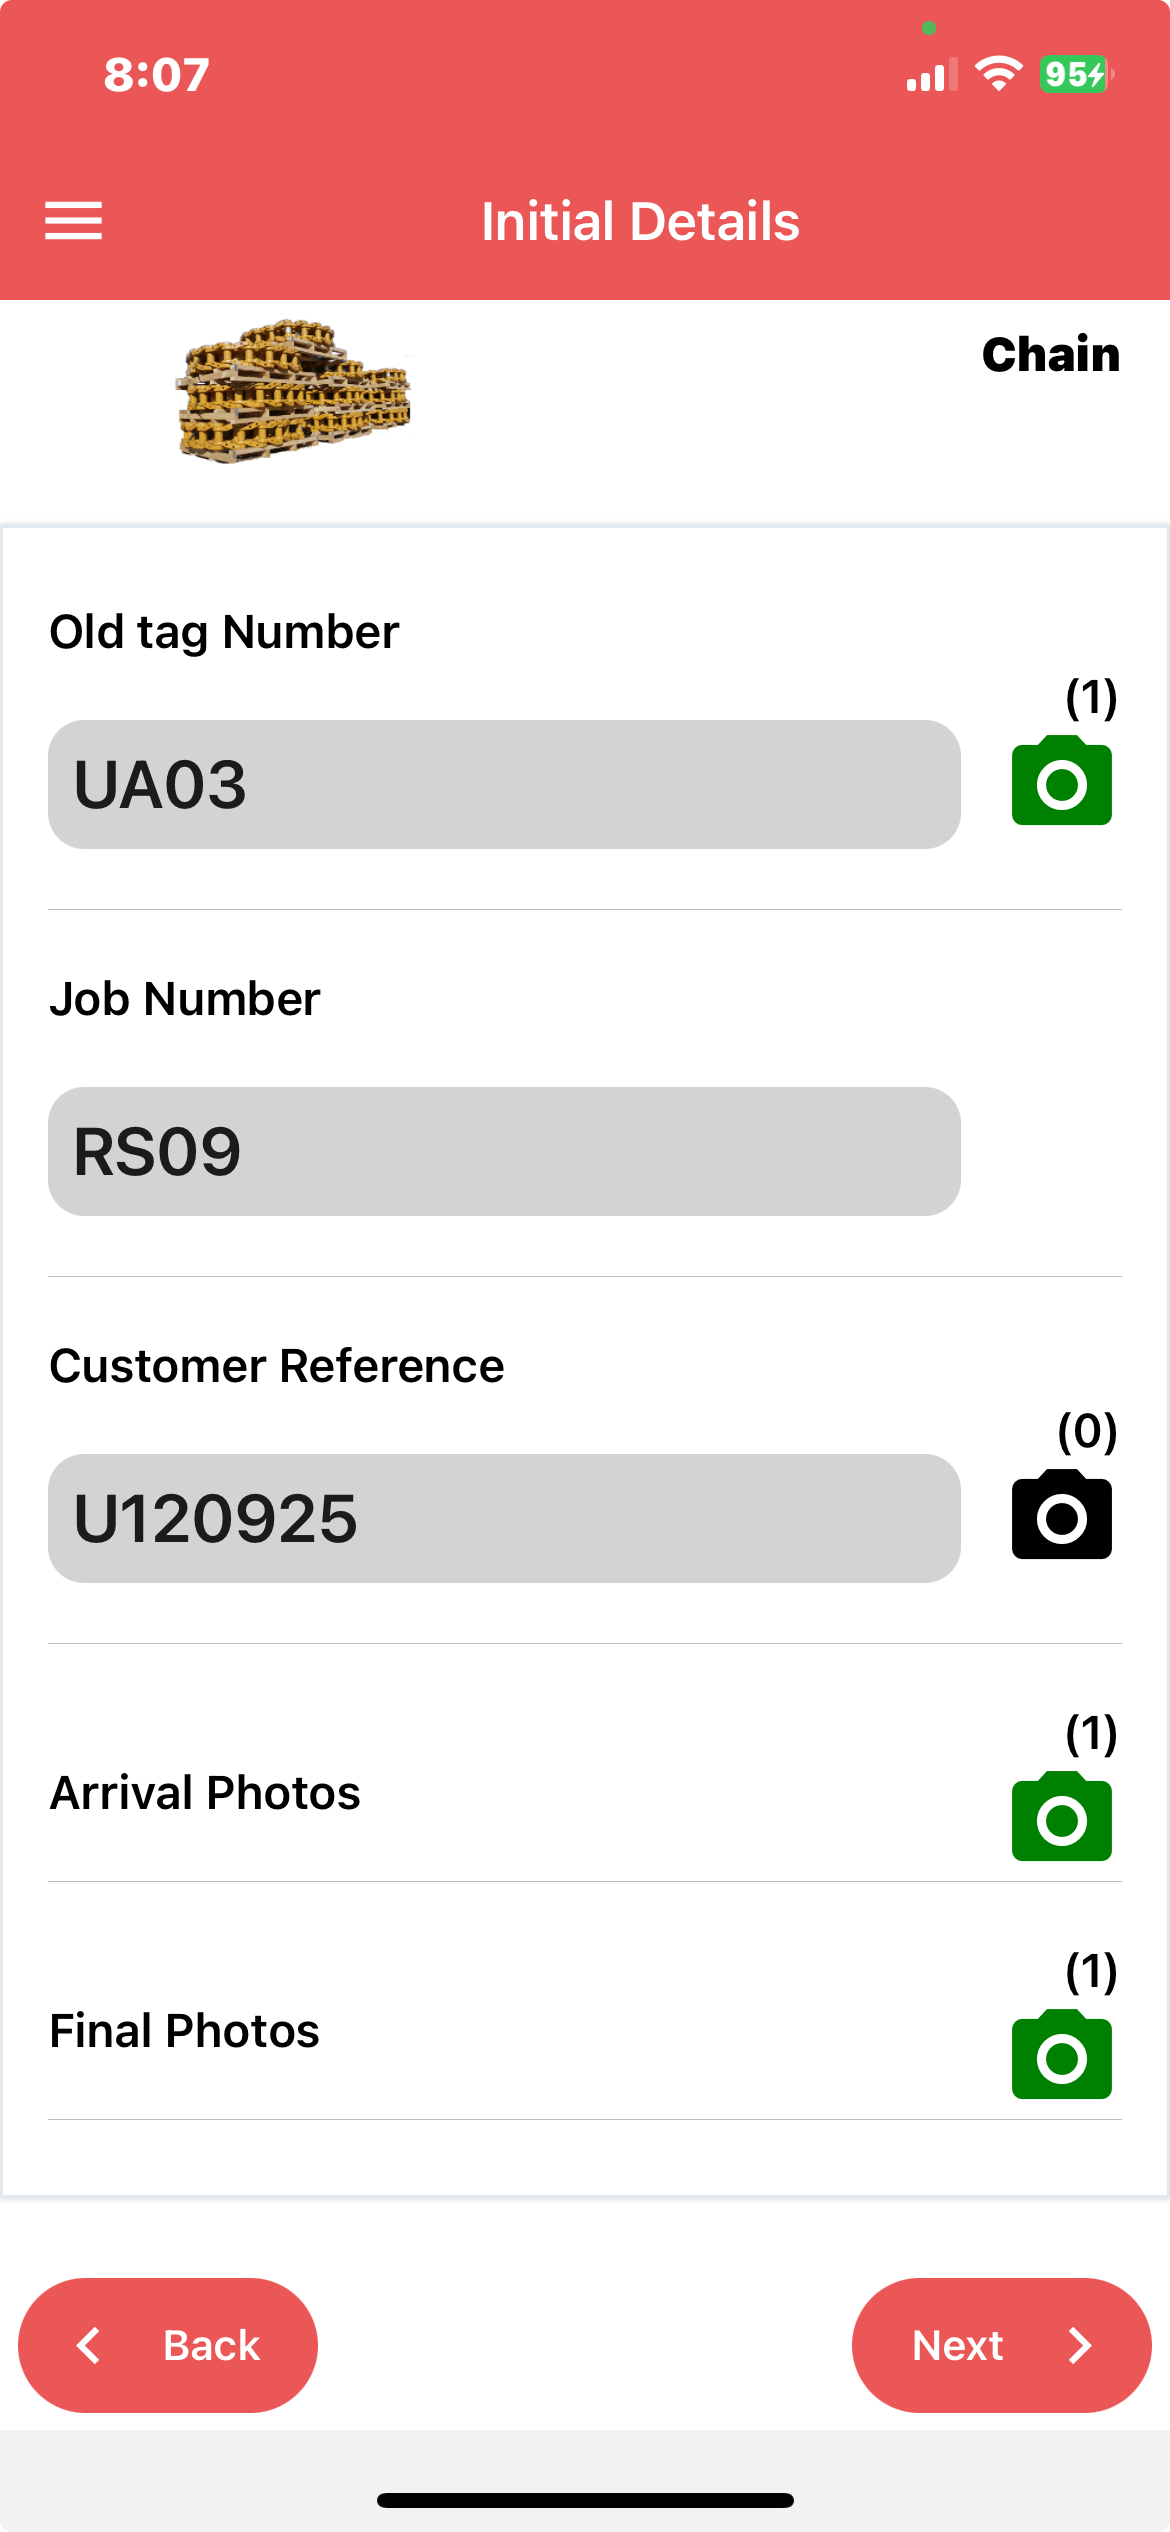
Then click Next
This will open the Components screen, for entering data for Links, Bushes, and Shoes
Enter component Measurements, Images, Comments as well as any additional information under each component as shown in the following screens. Make sure you scroll down the screen to complete all data entry
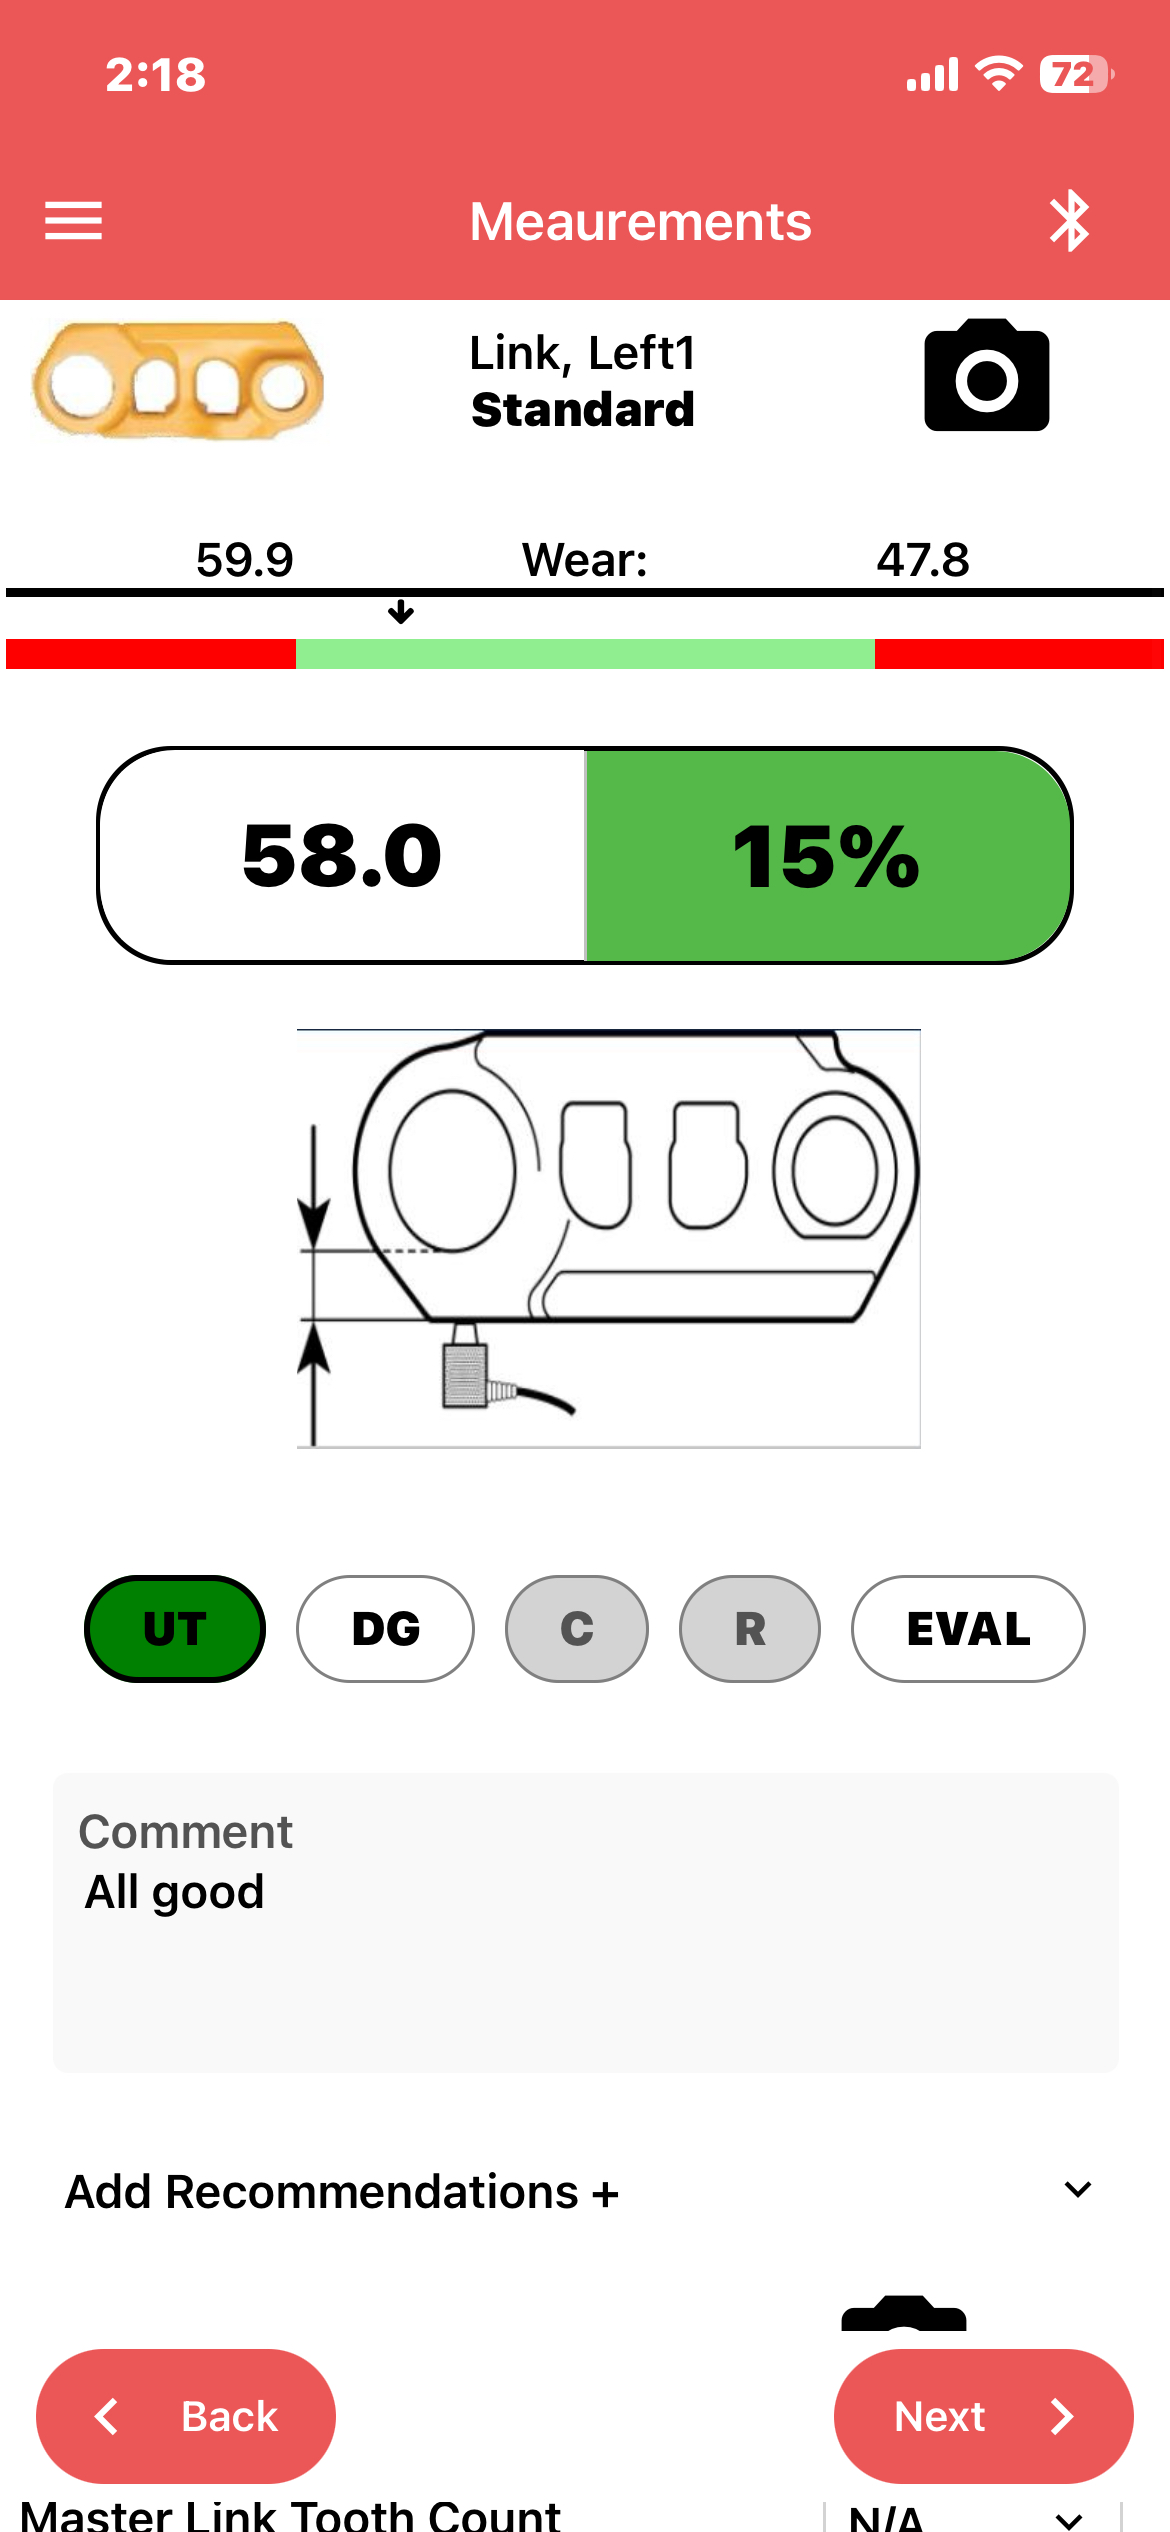
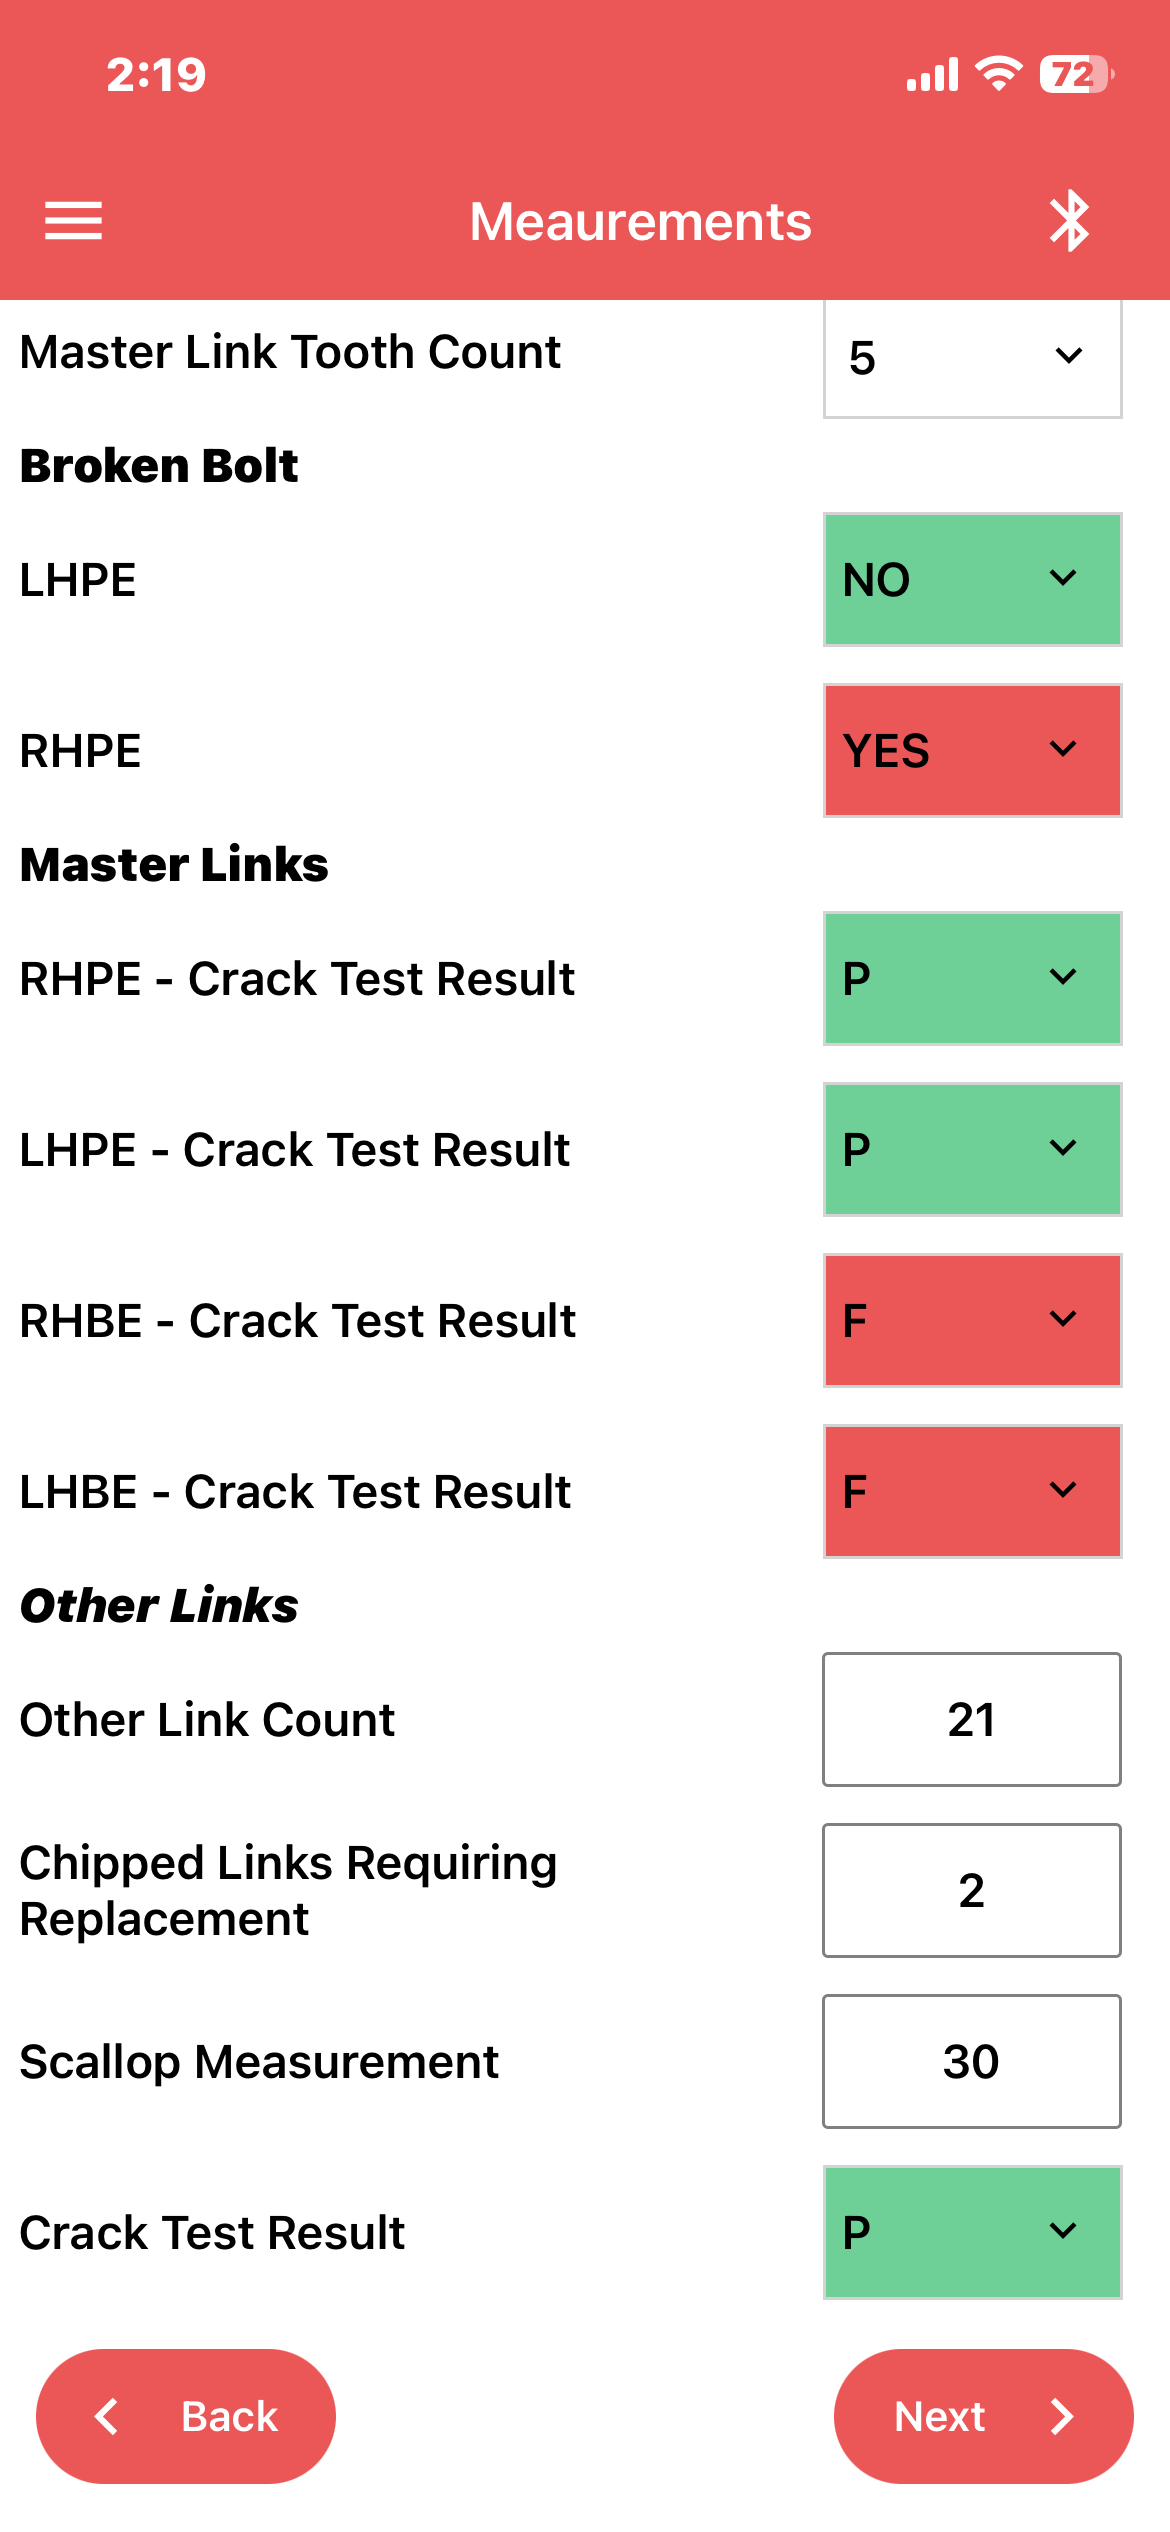
Complete entry for the Links, bushes and Shoes, and once all component measurements and additional measurements are added click on Done
You will be directed to the Dip Tests screen
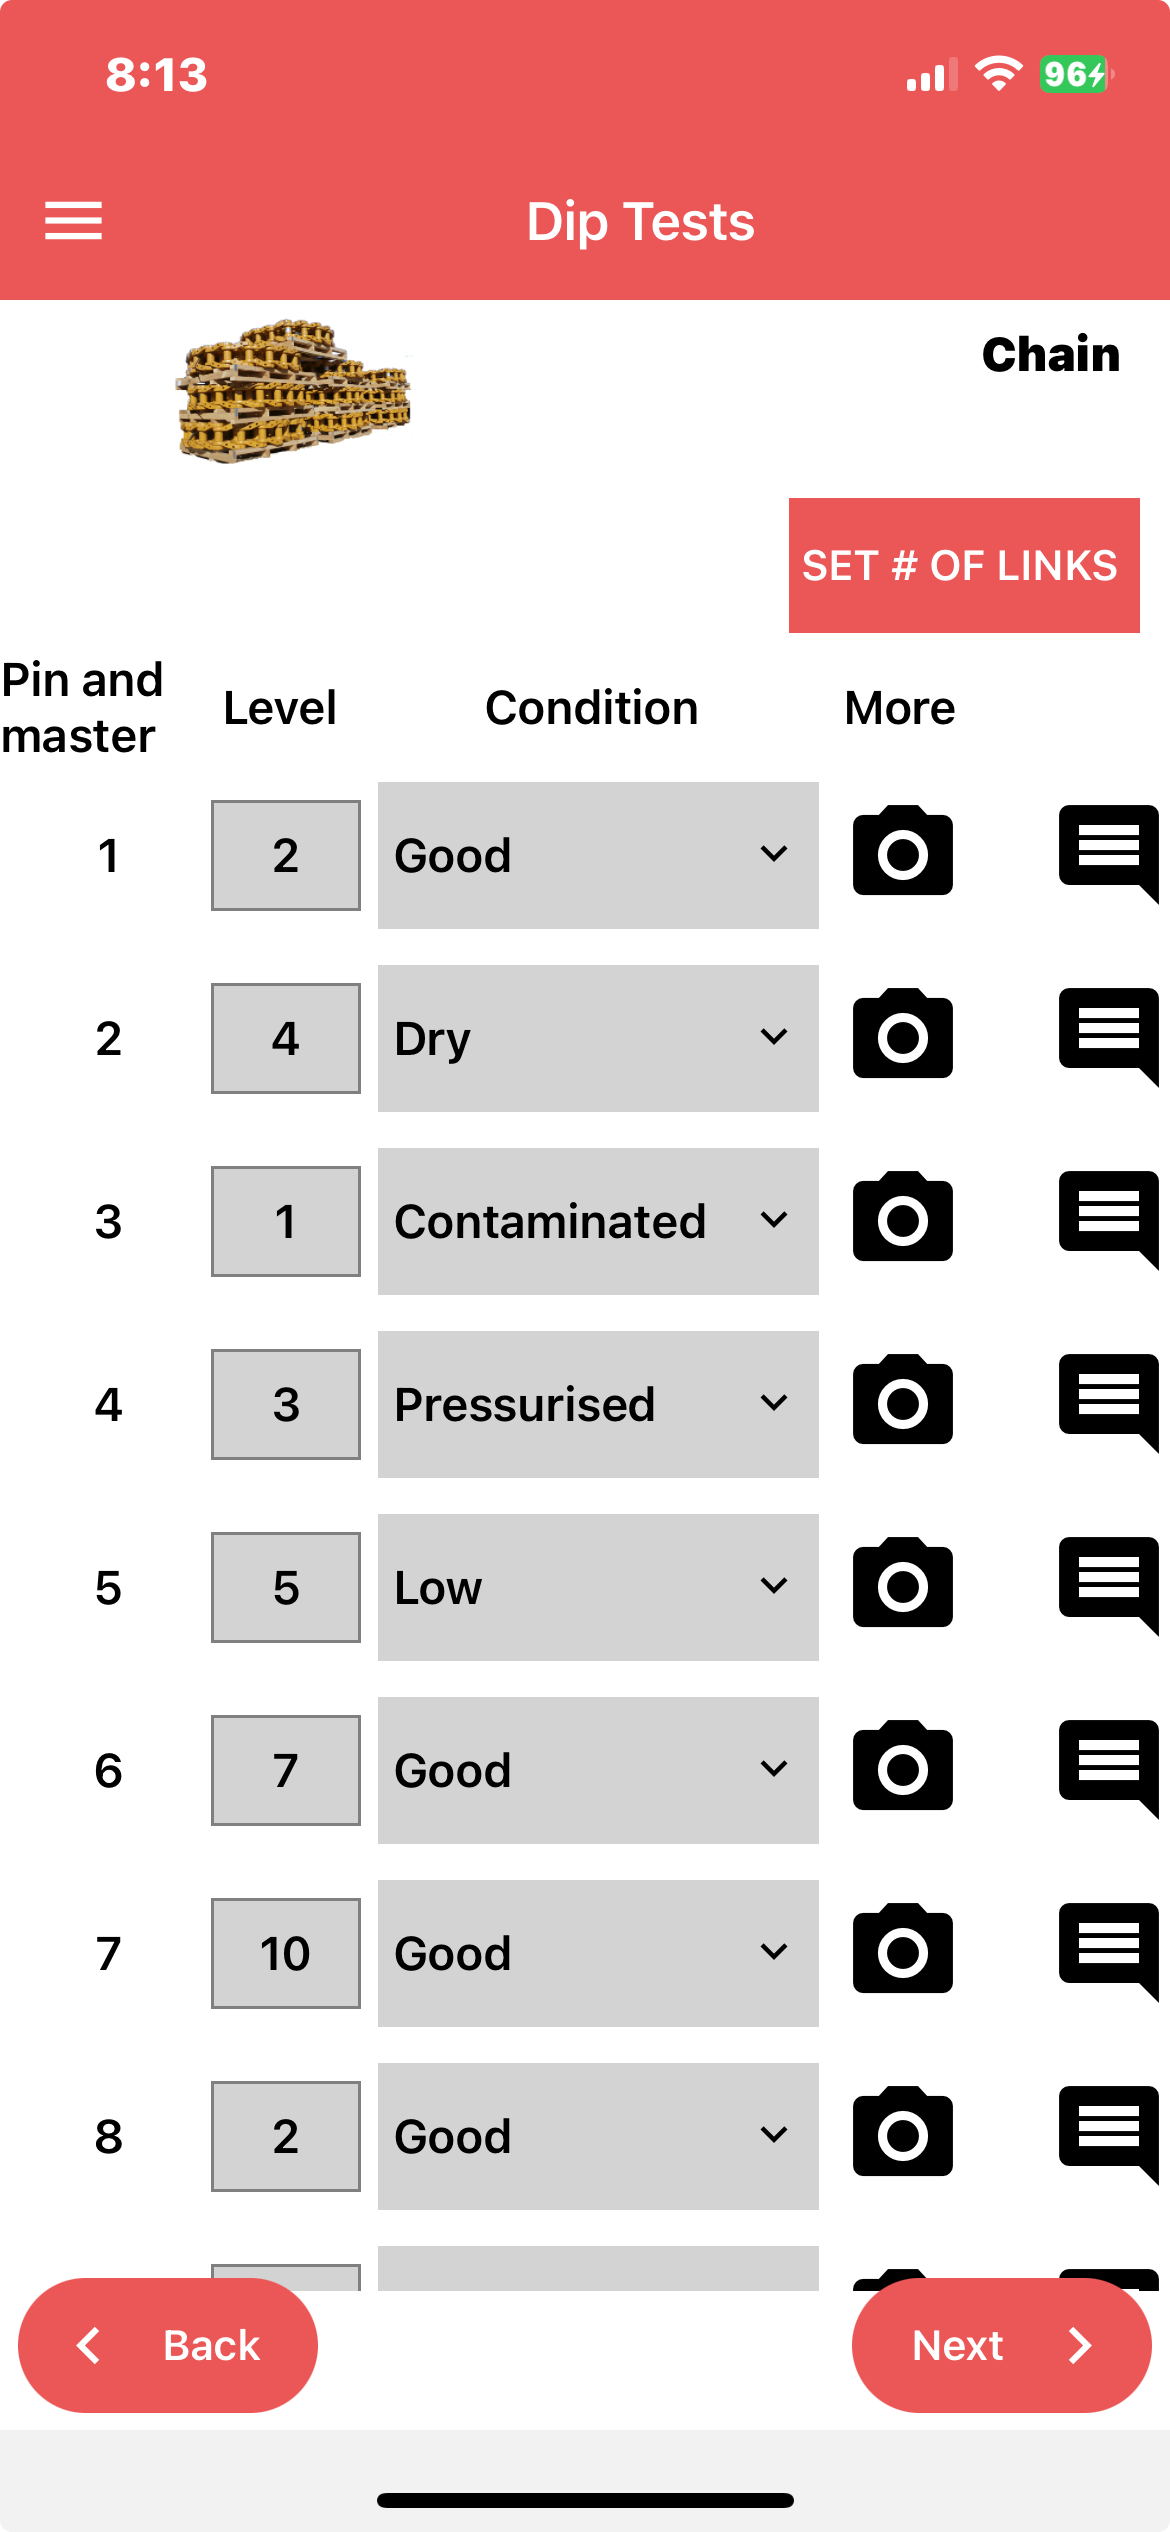
Enter the pin Levels, Conditions and optionally you can add images and comments for each pin.
Once complete, click Next
The last screen enables entry of additional comments
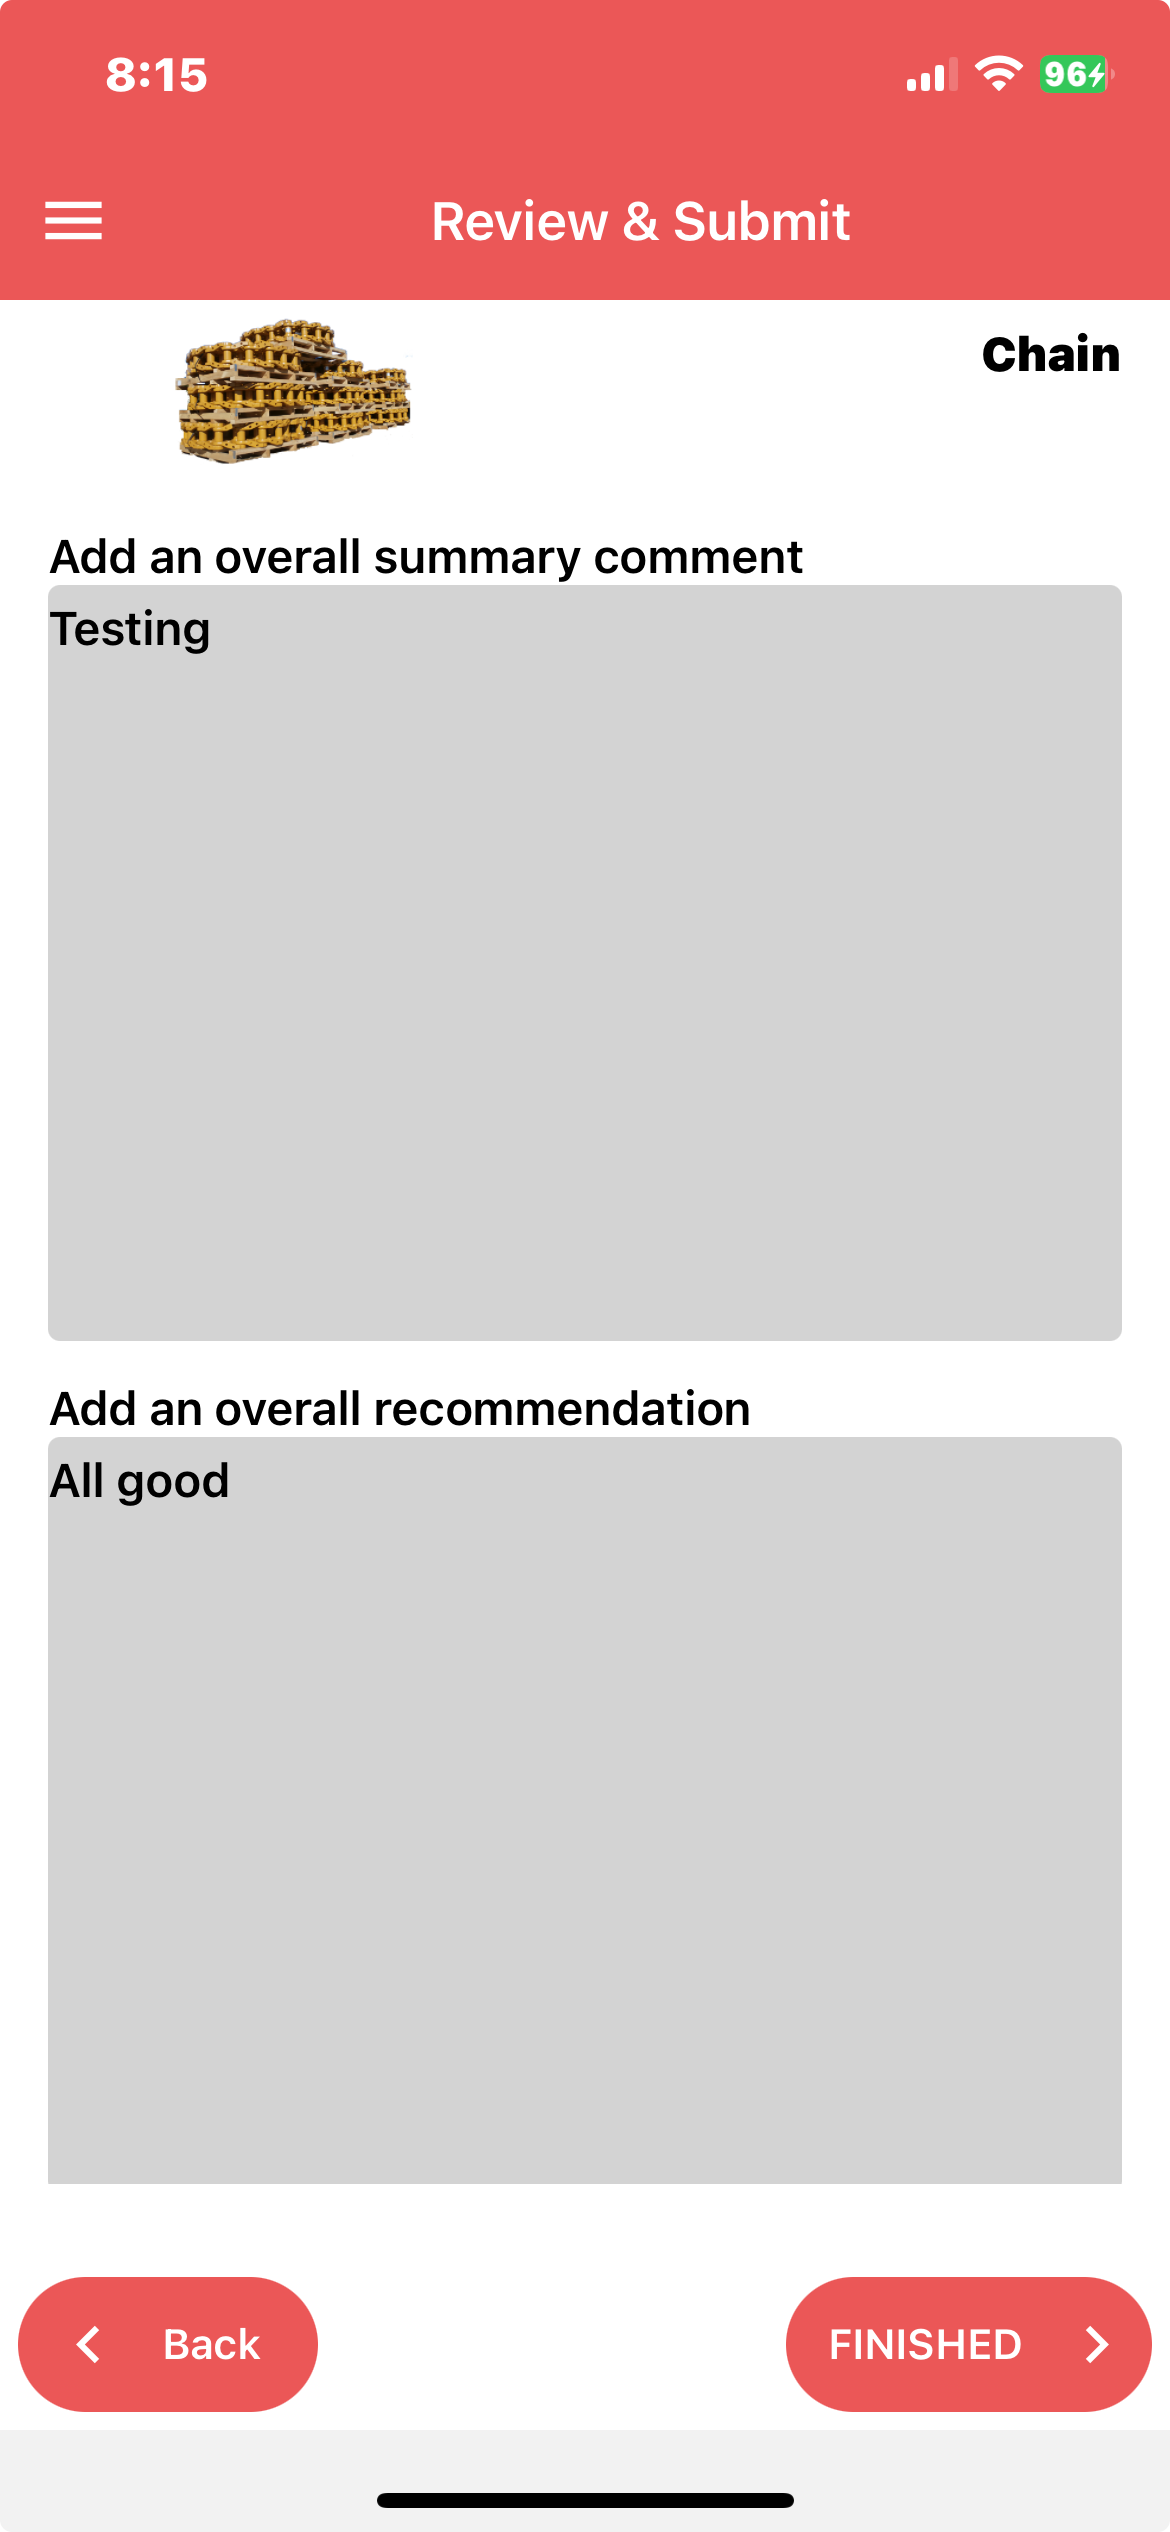
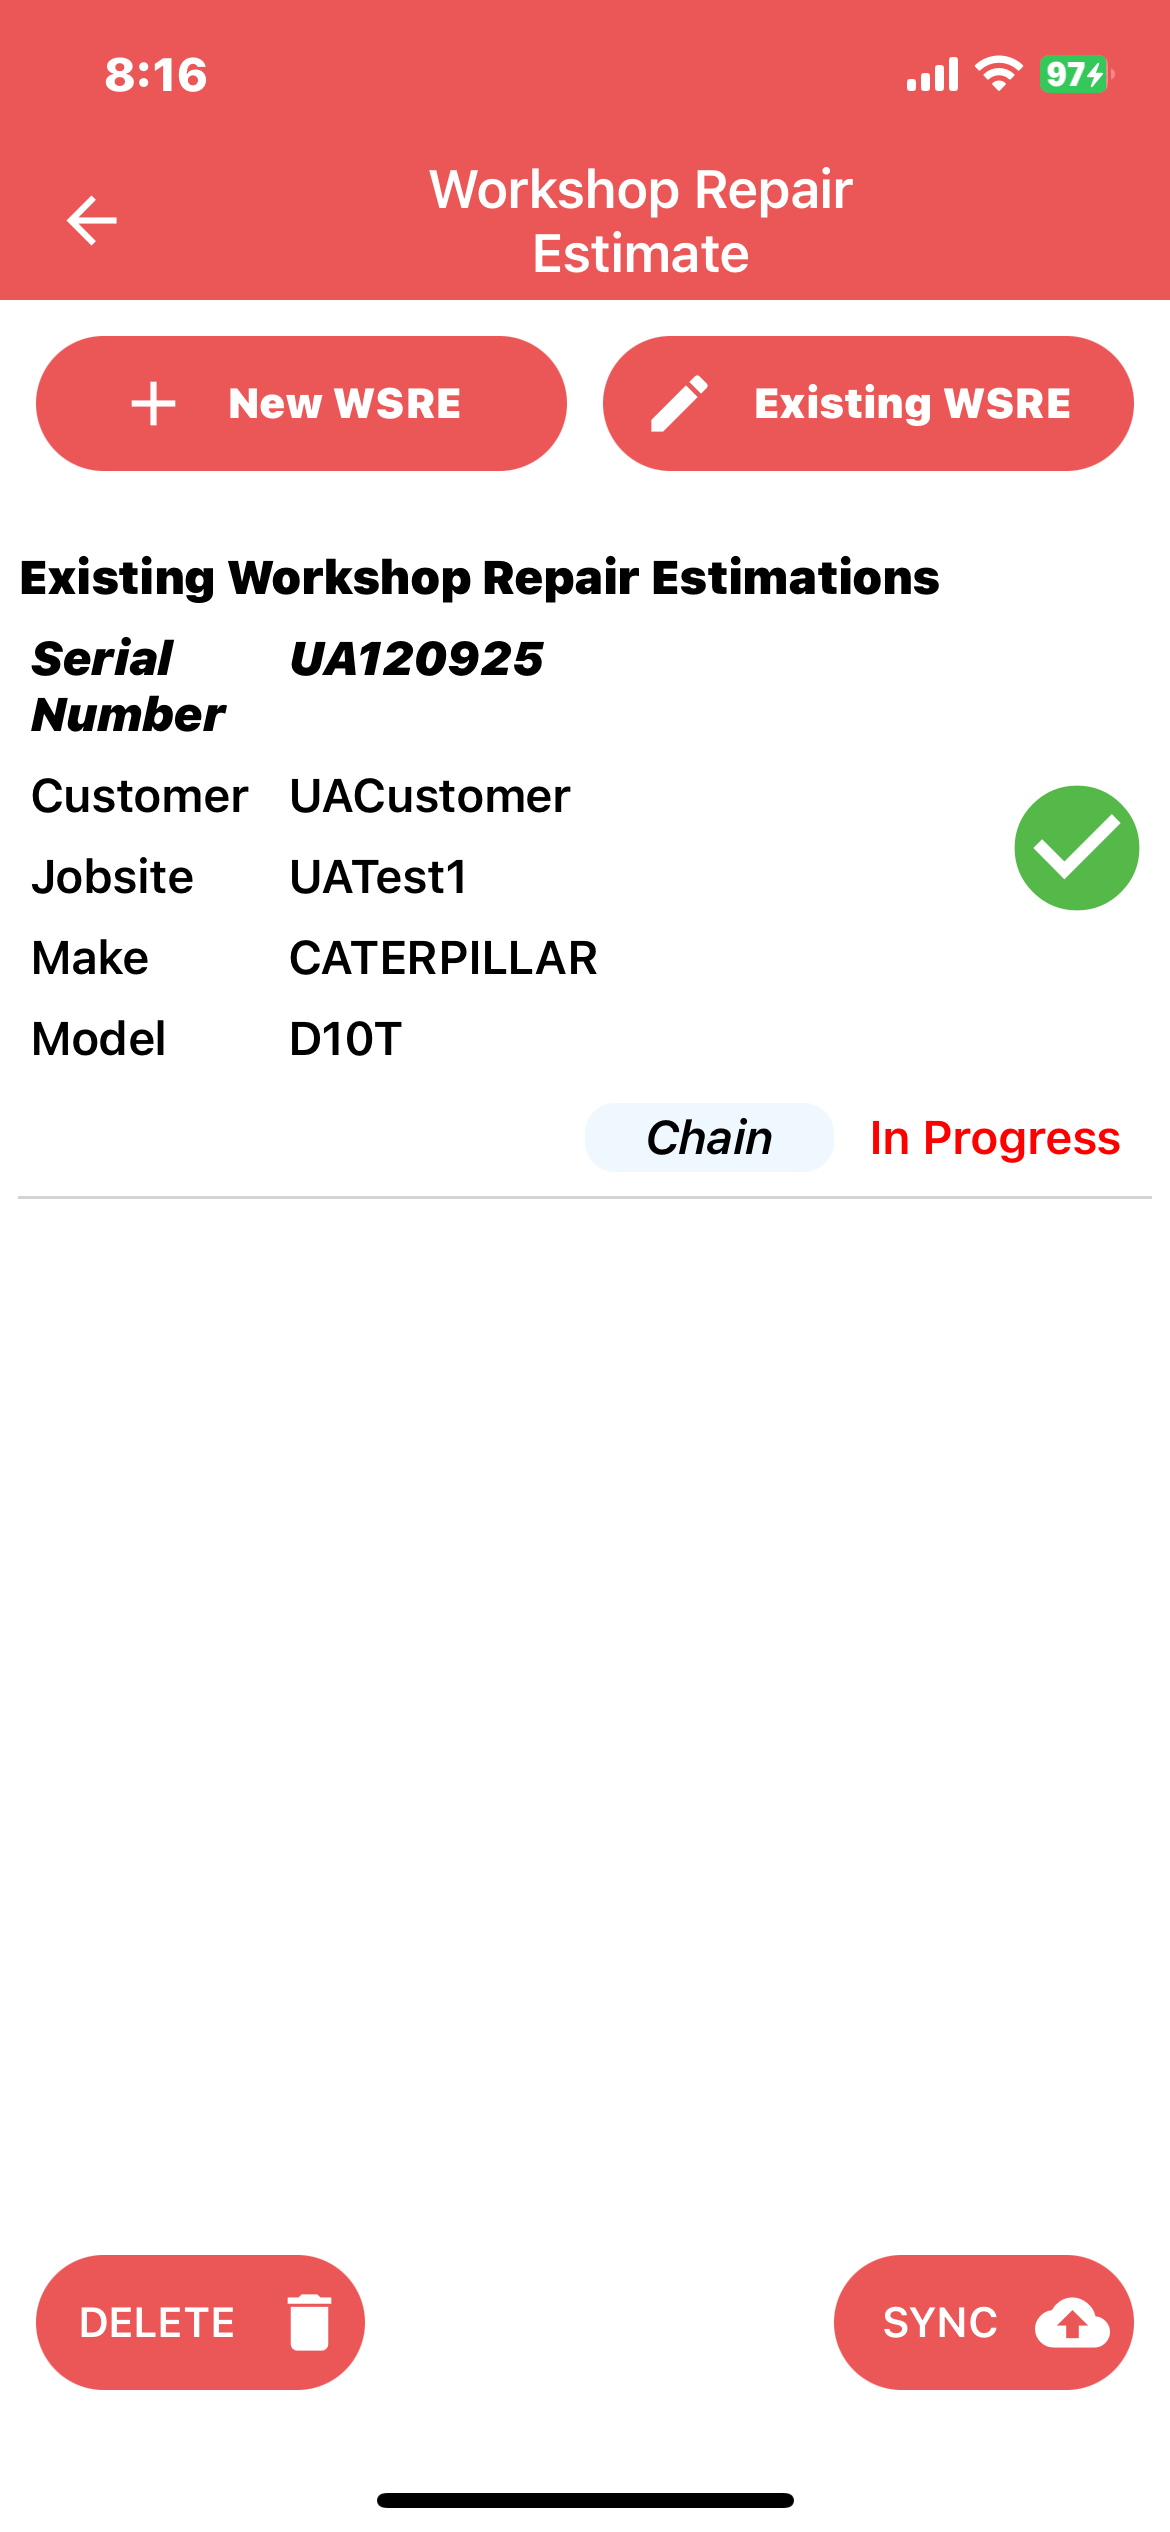
Once completed click on Finished. This will direct the user back to the Workshop Repair Estimate main screen displaying the chain that has been inspected.
Click on the circle next to the equipment to select it for syncing and at the bottom of the screen, Click on Sync
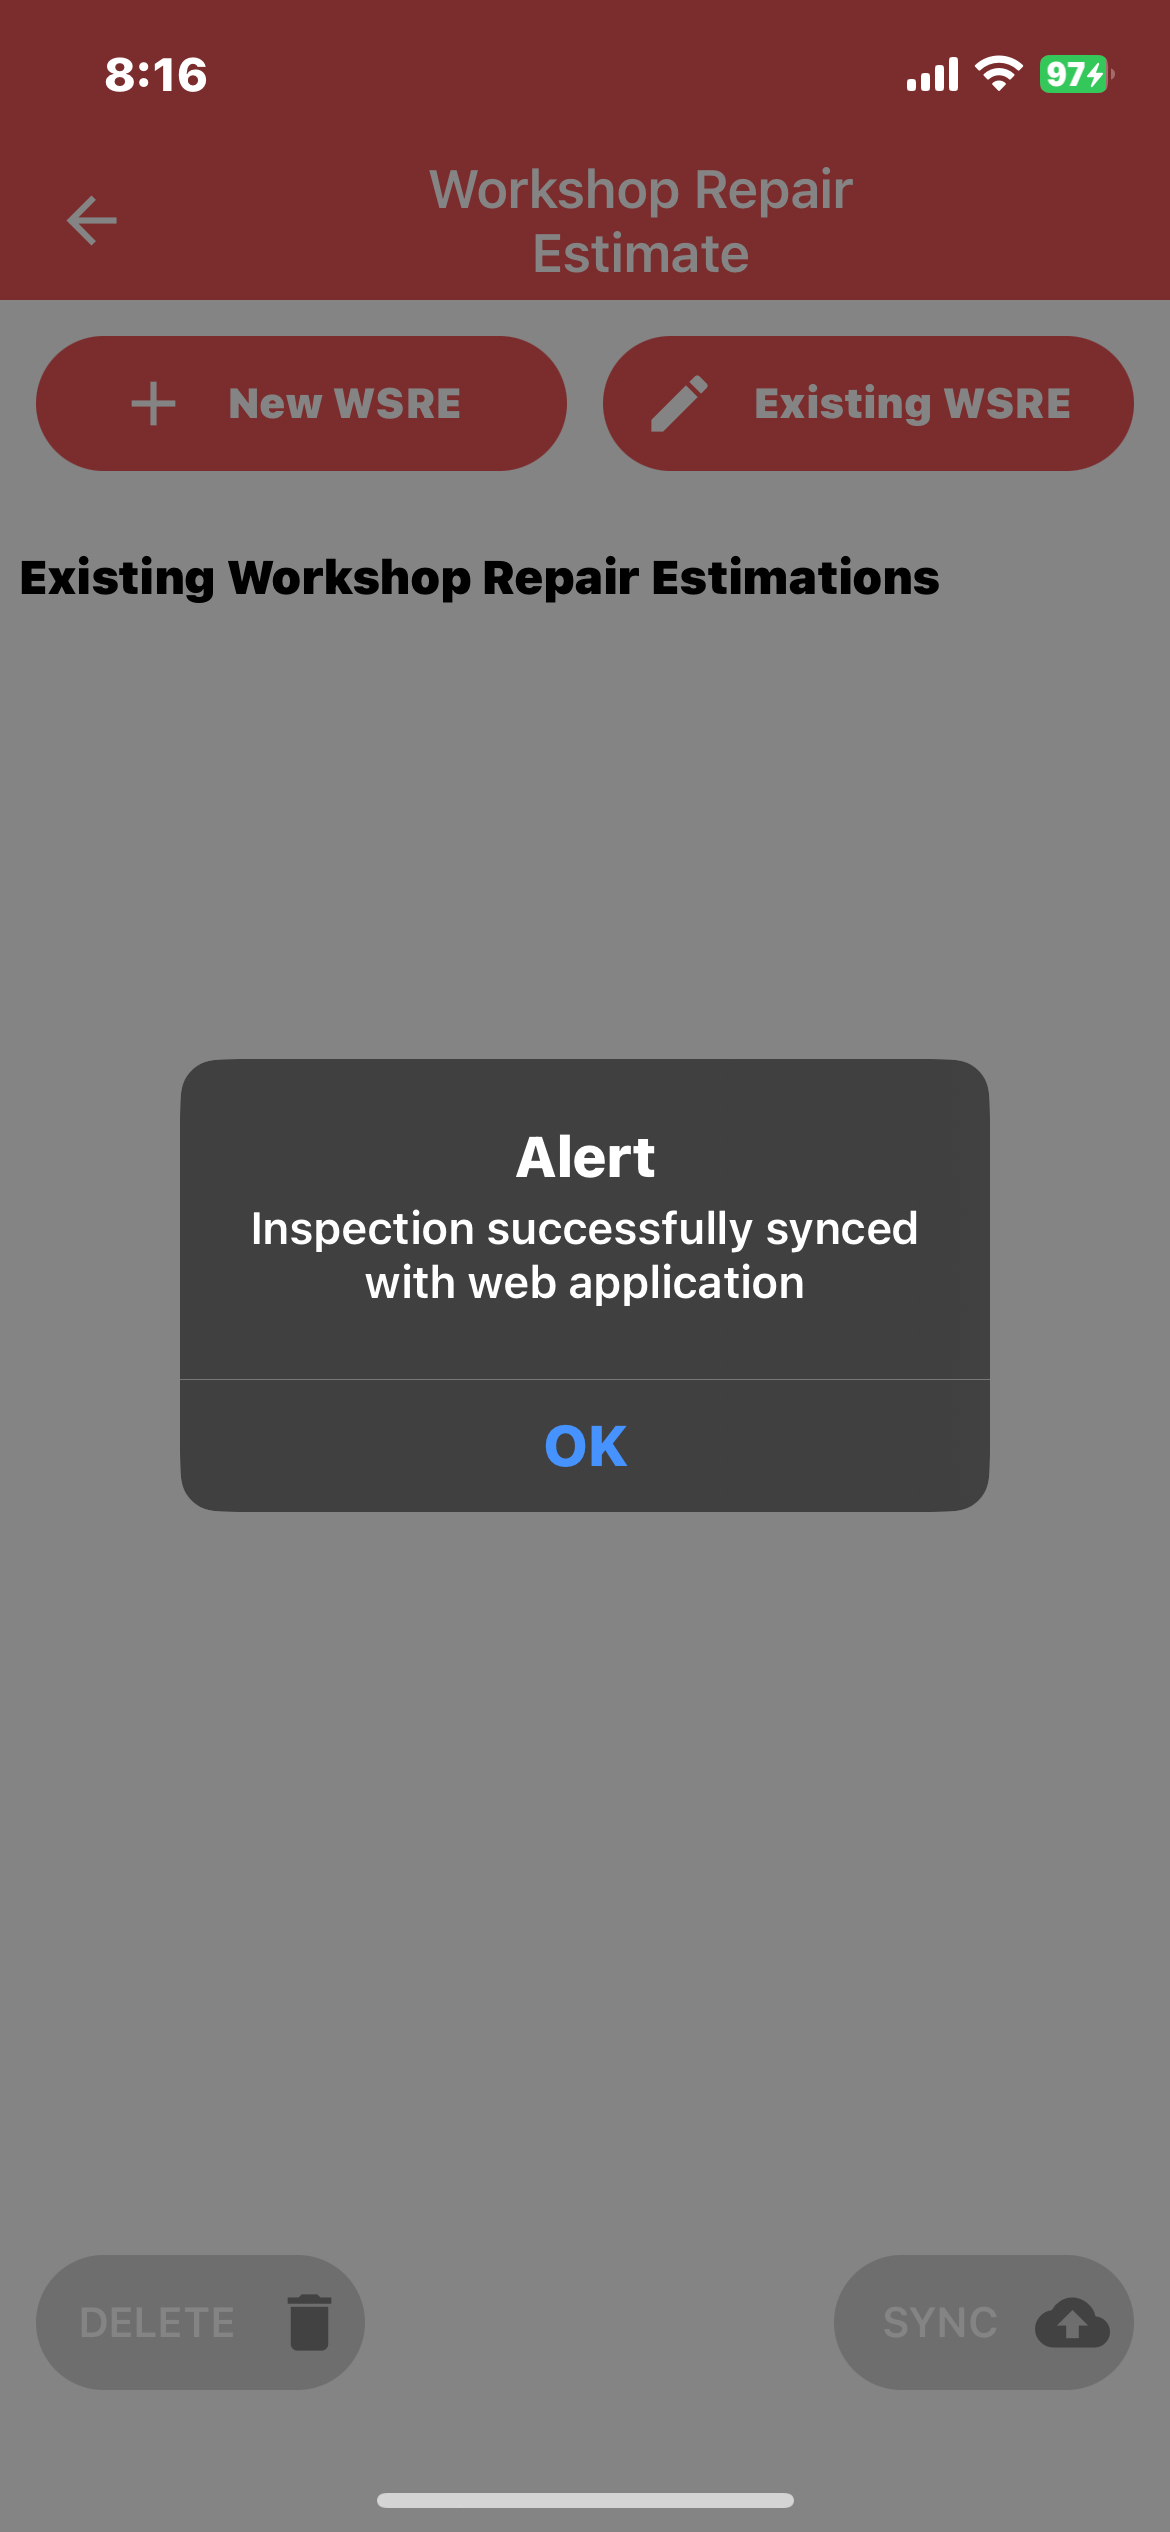
Once it is synced to the Web you will see a popup notification informing you the file was successfully synced to the Web
Once you have completed the syncing of the Inspection
Proceed to the Web Portal and login followed by navigation to Undercarriage, sub-menu – WSRE and then select Search WSRE
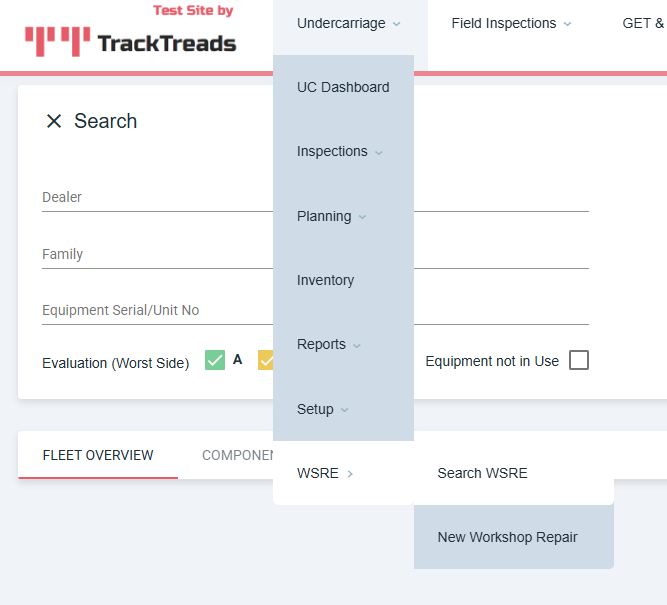
This will take you to the Find Inspection screen where you can search for the synced job
Scroll down and look for the equipment you have estimated
Alternatively use the search criteria to find your equipment

If the inspection does not sync click on the back arrow
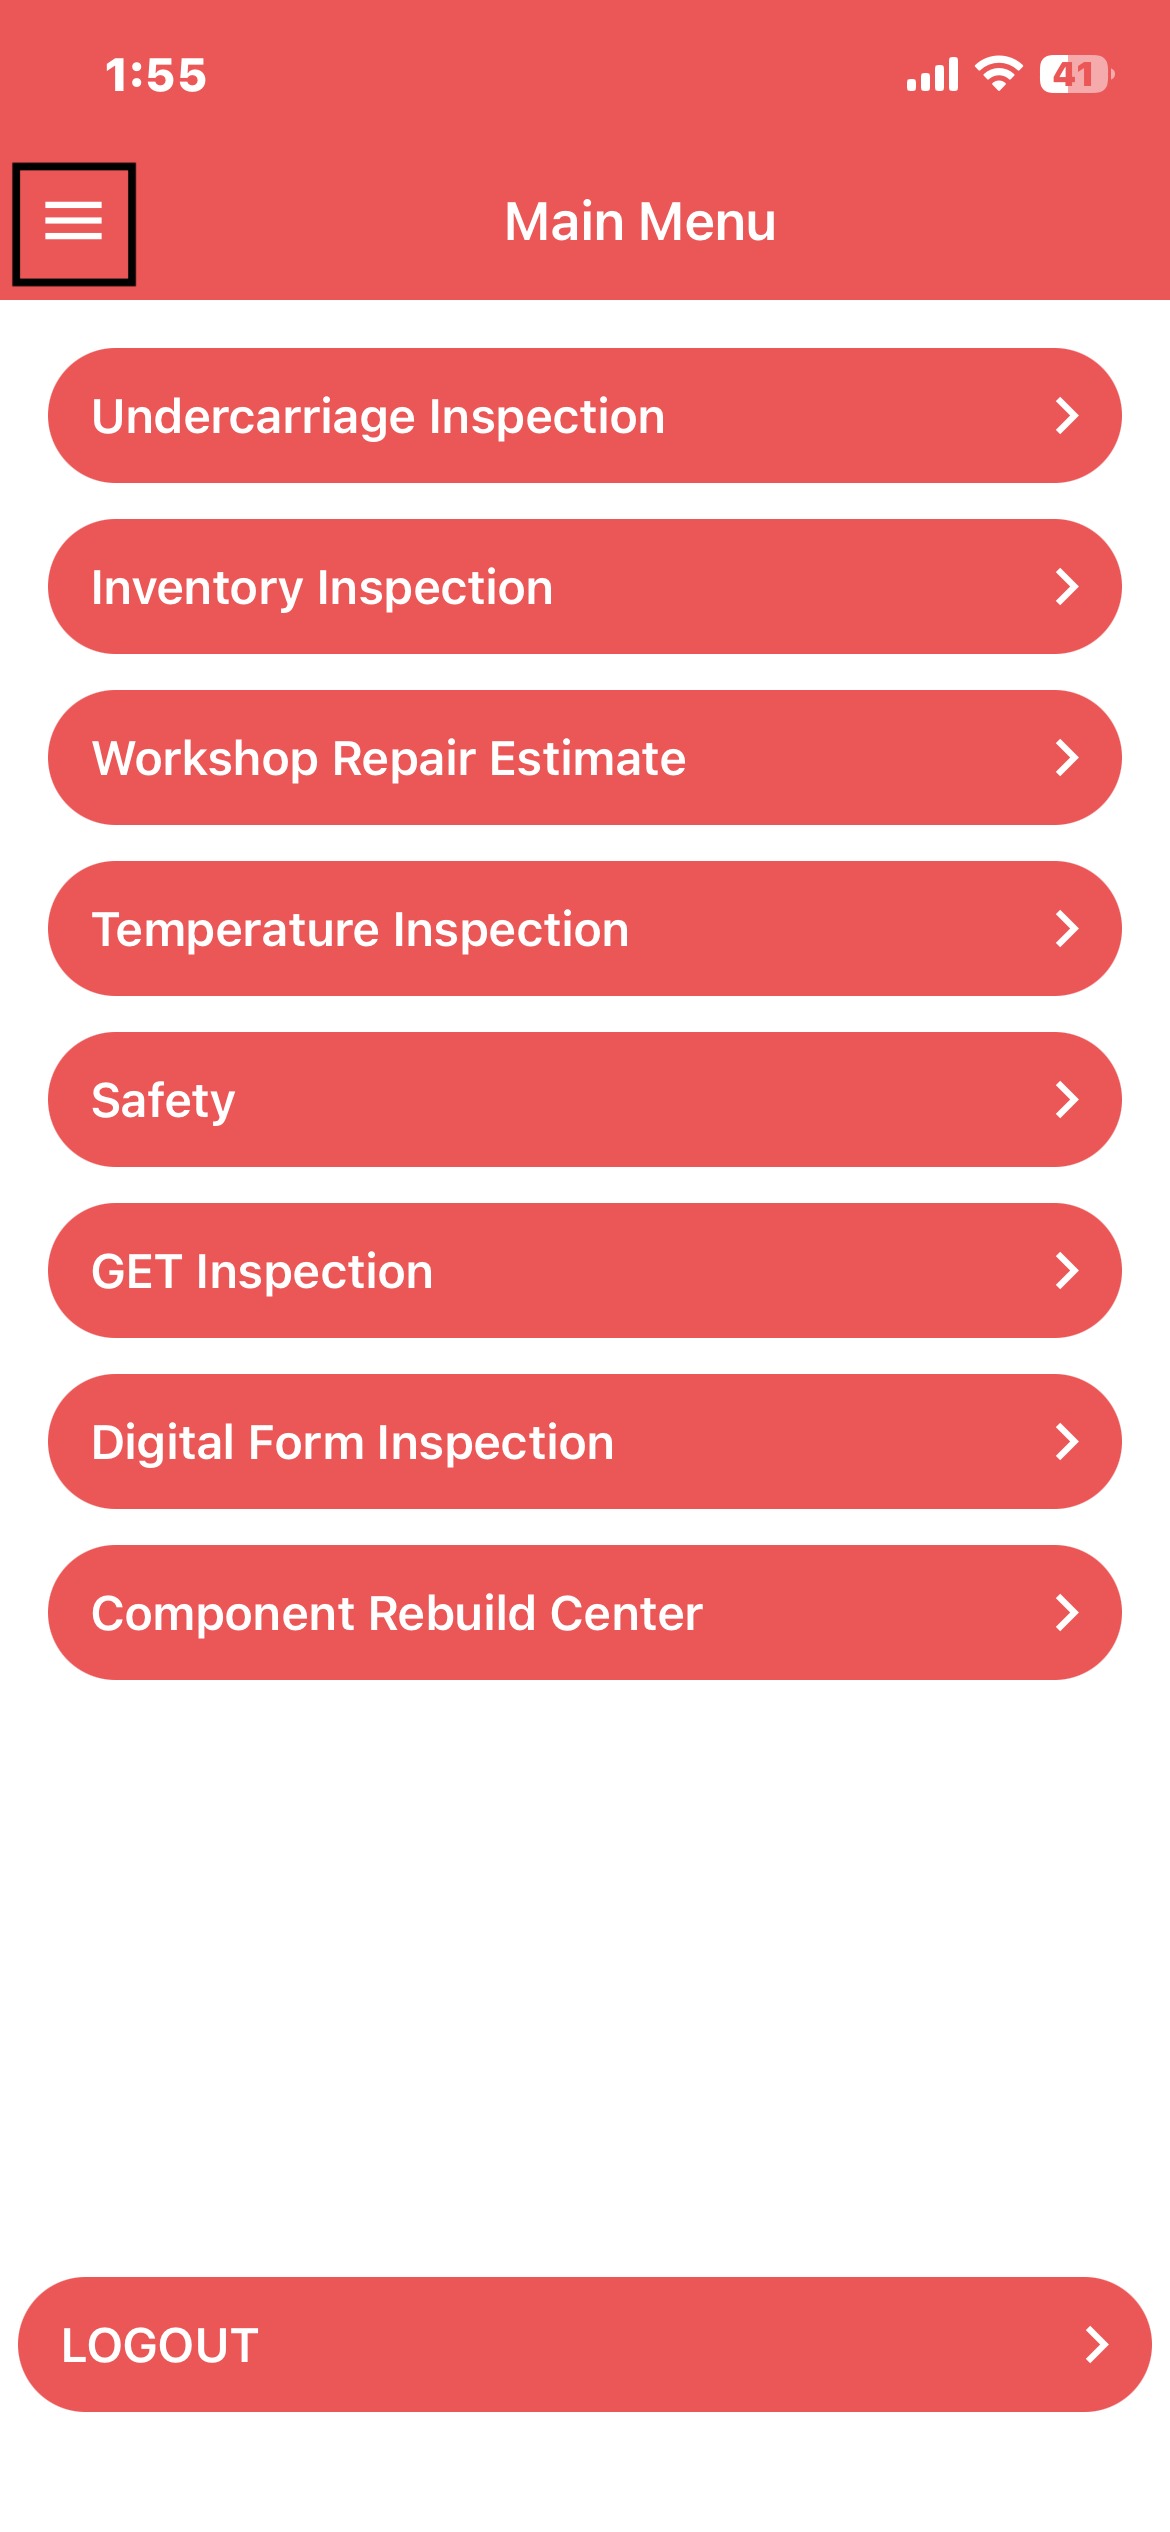
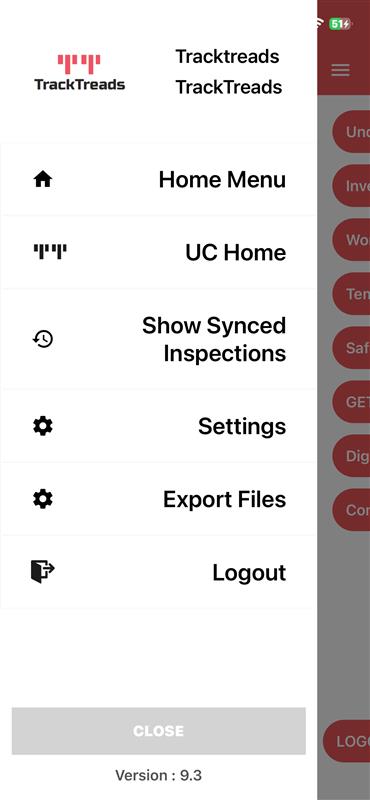
Then click on the 3 lines at the top left-hand corner of the main screen
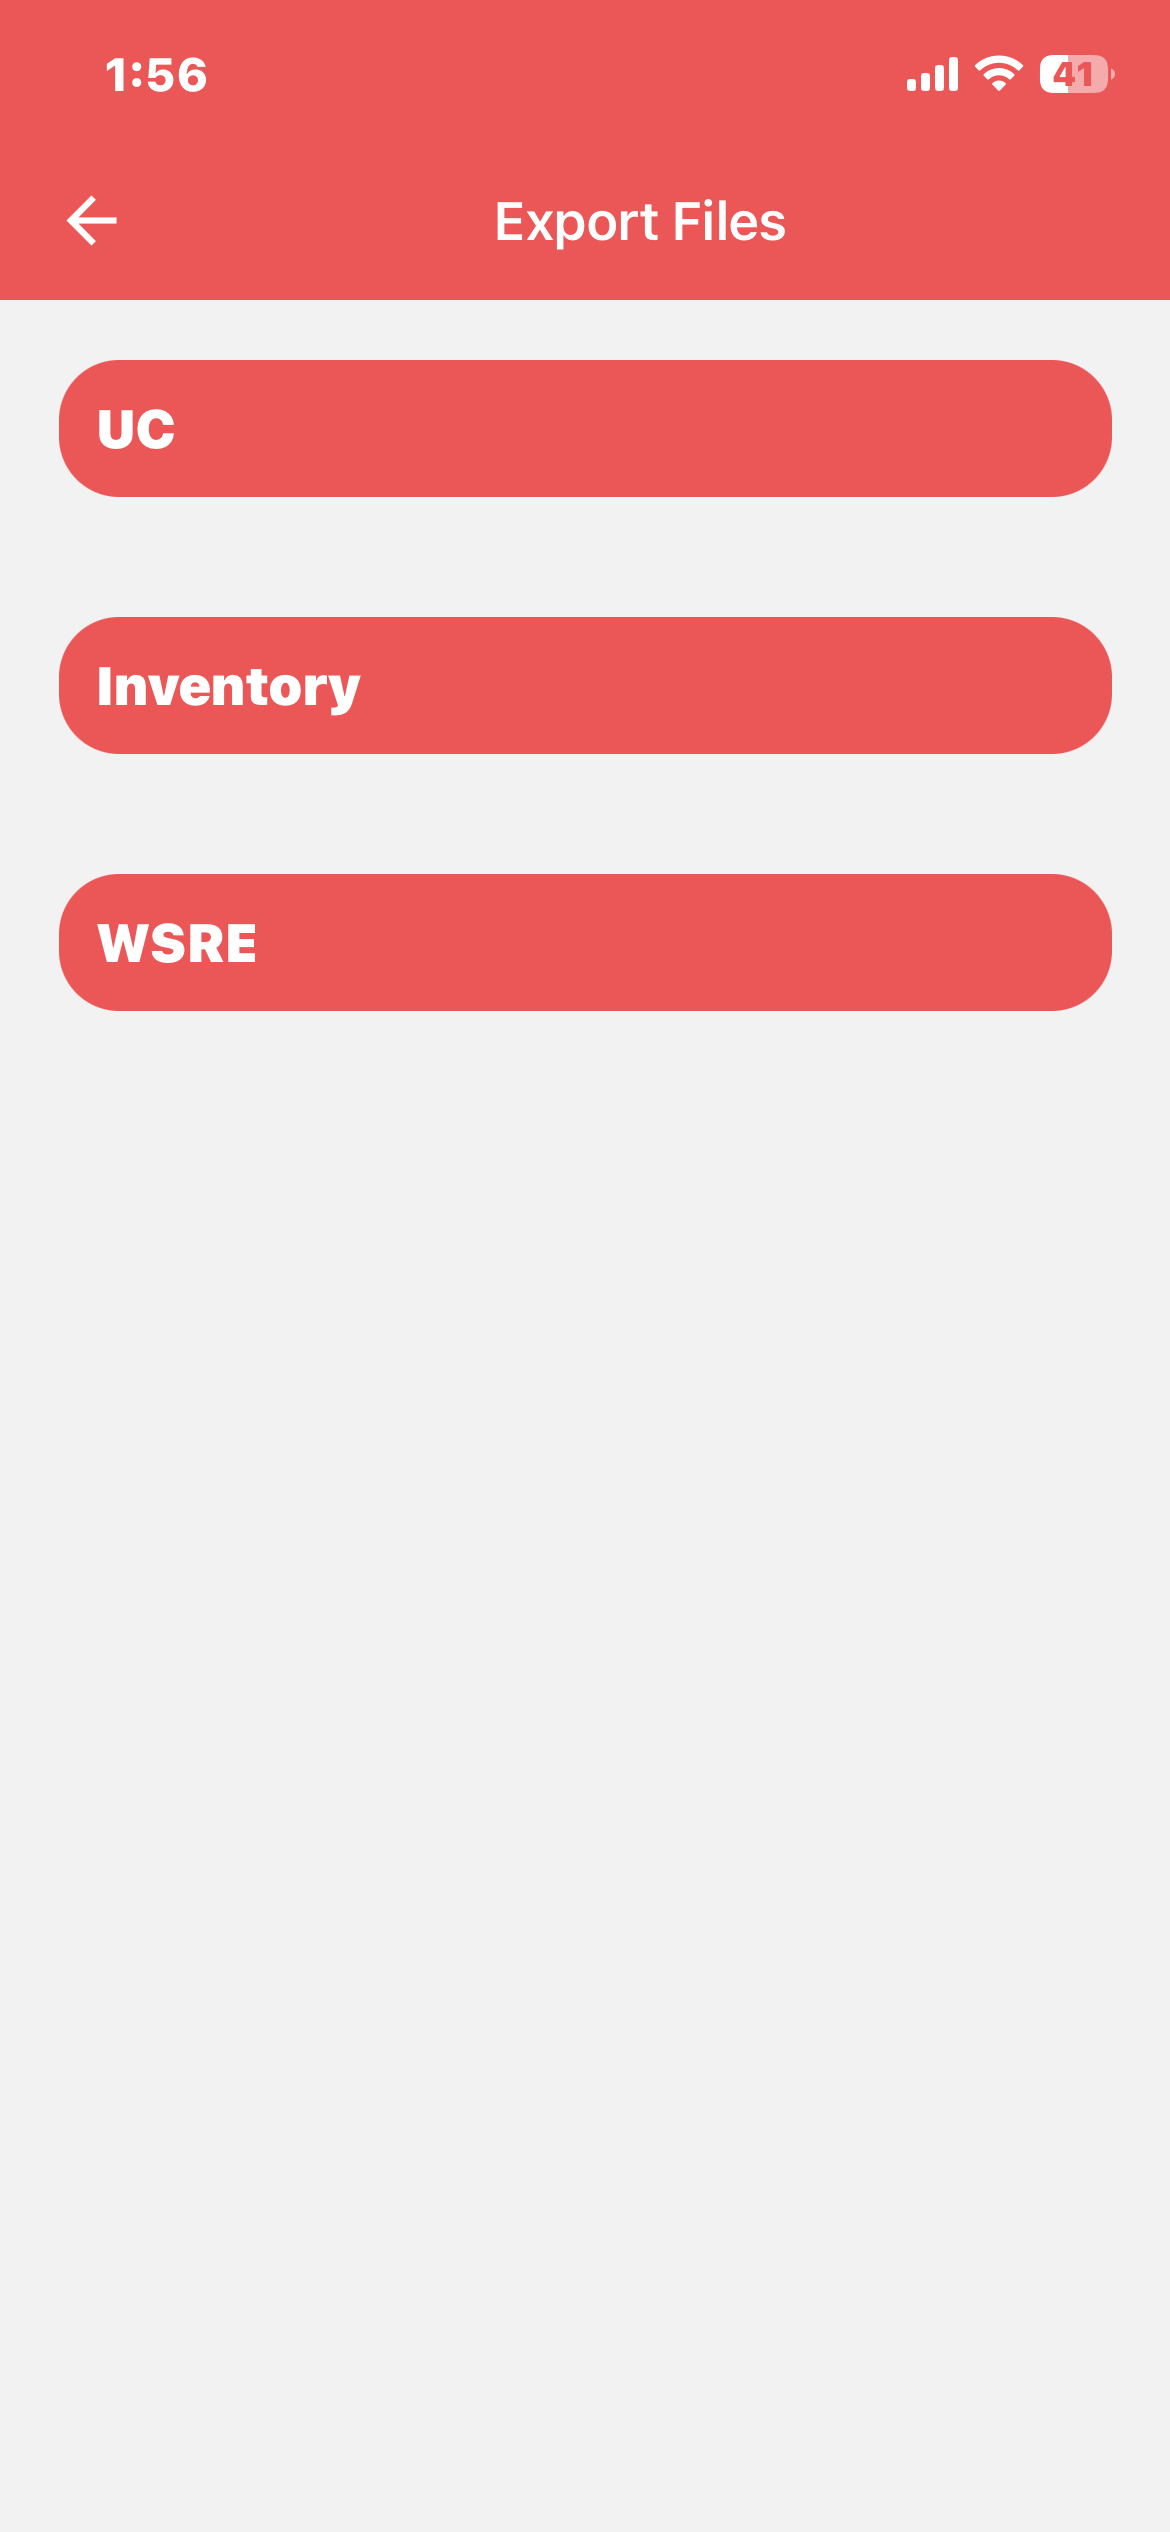
Then click on Export Files
You will be directed to the export files screen
Then click on WSRE
You will be directed to your un-synced inspections
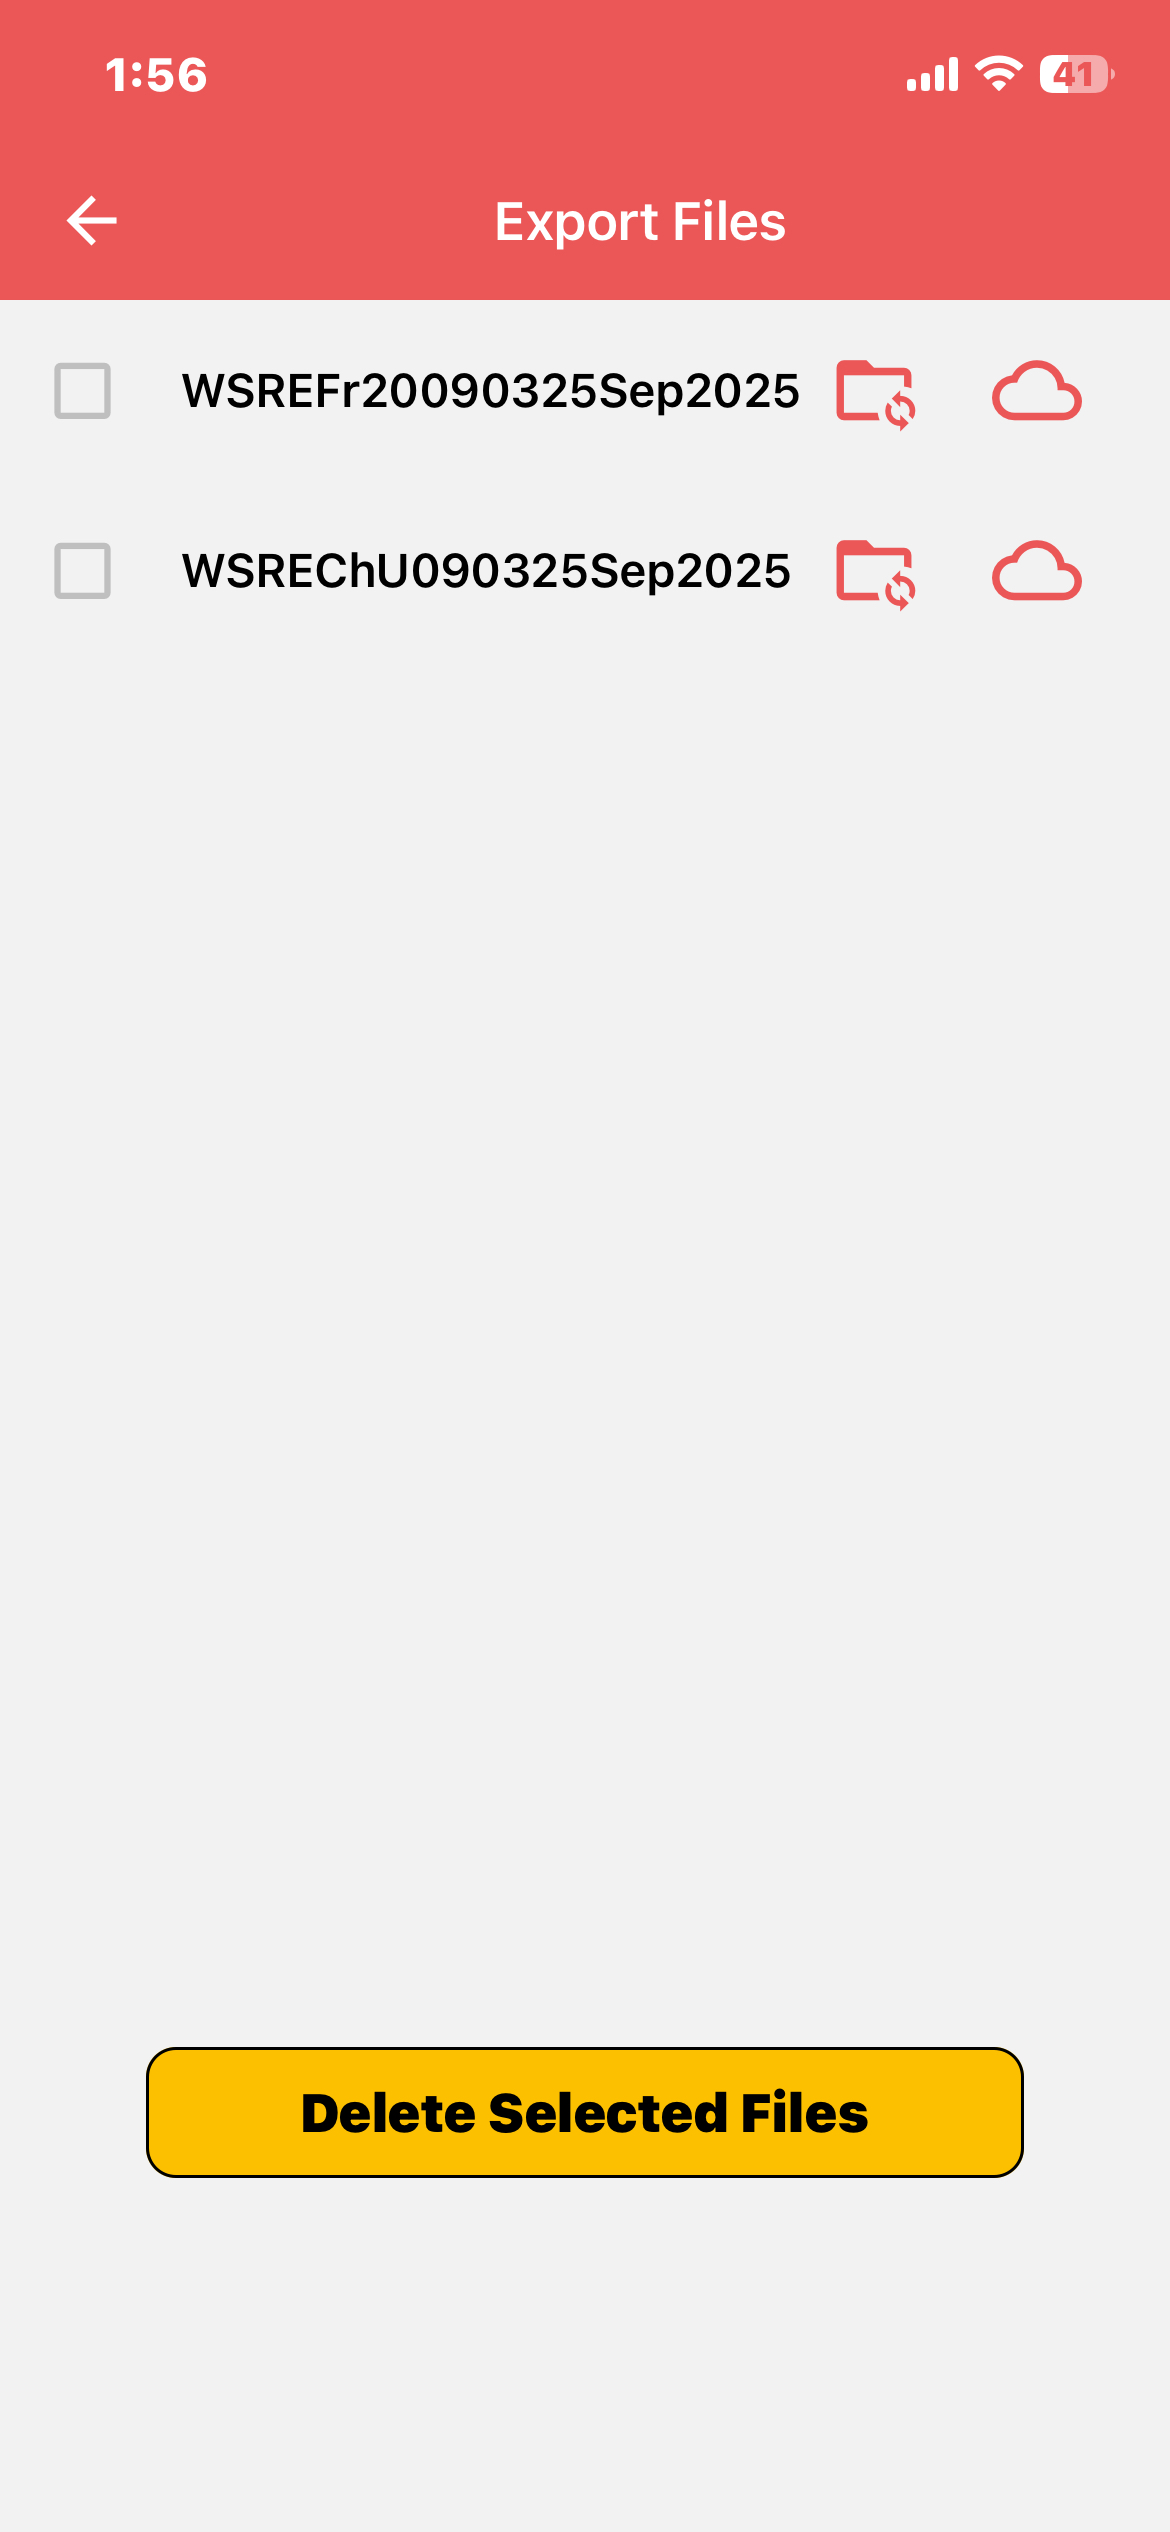
Click on the file icon
You will be taken into your files app on your device
Go to browse
And select the site you did the inspection on
Then click on WSRE
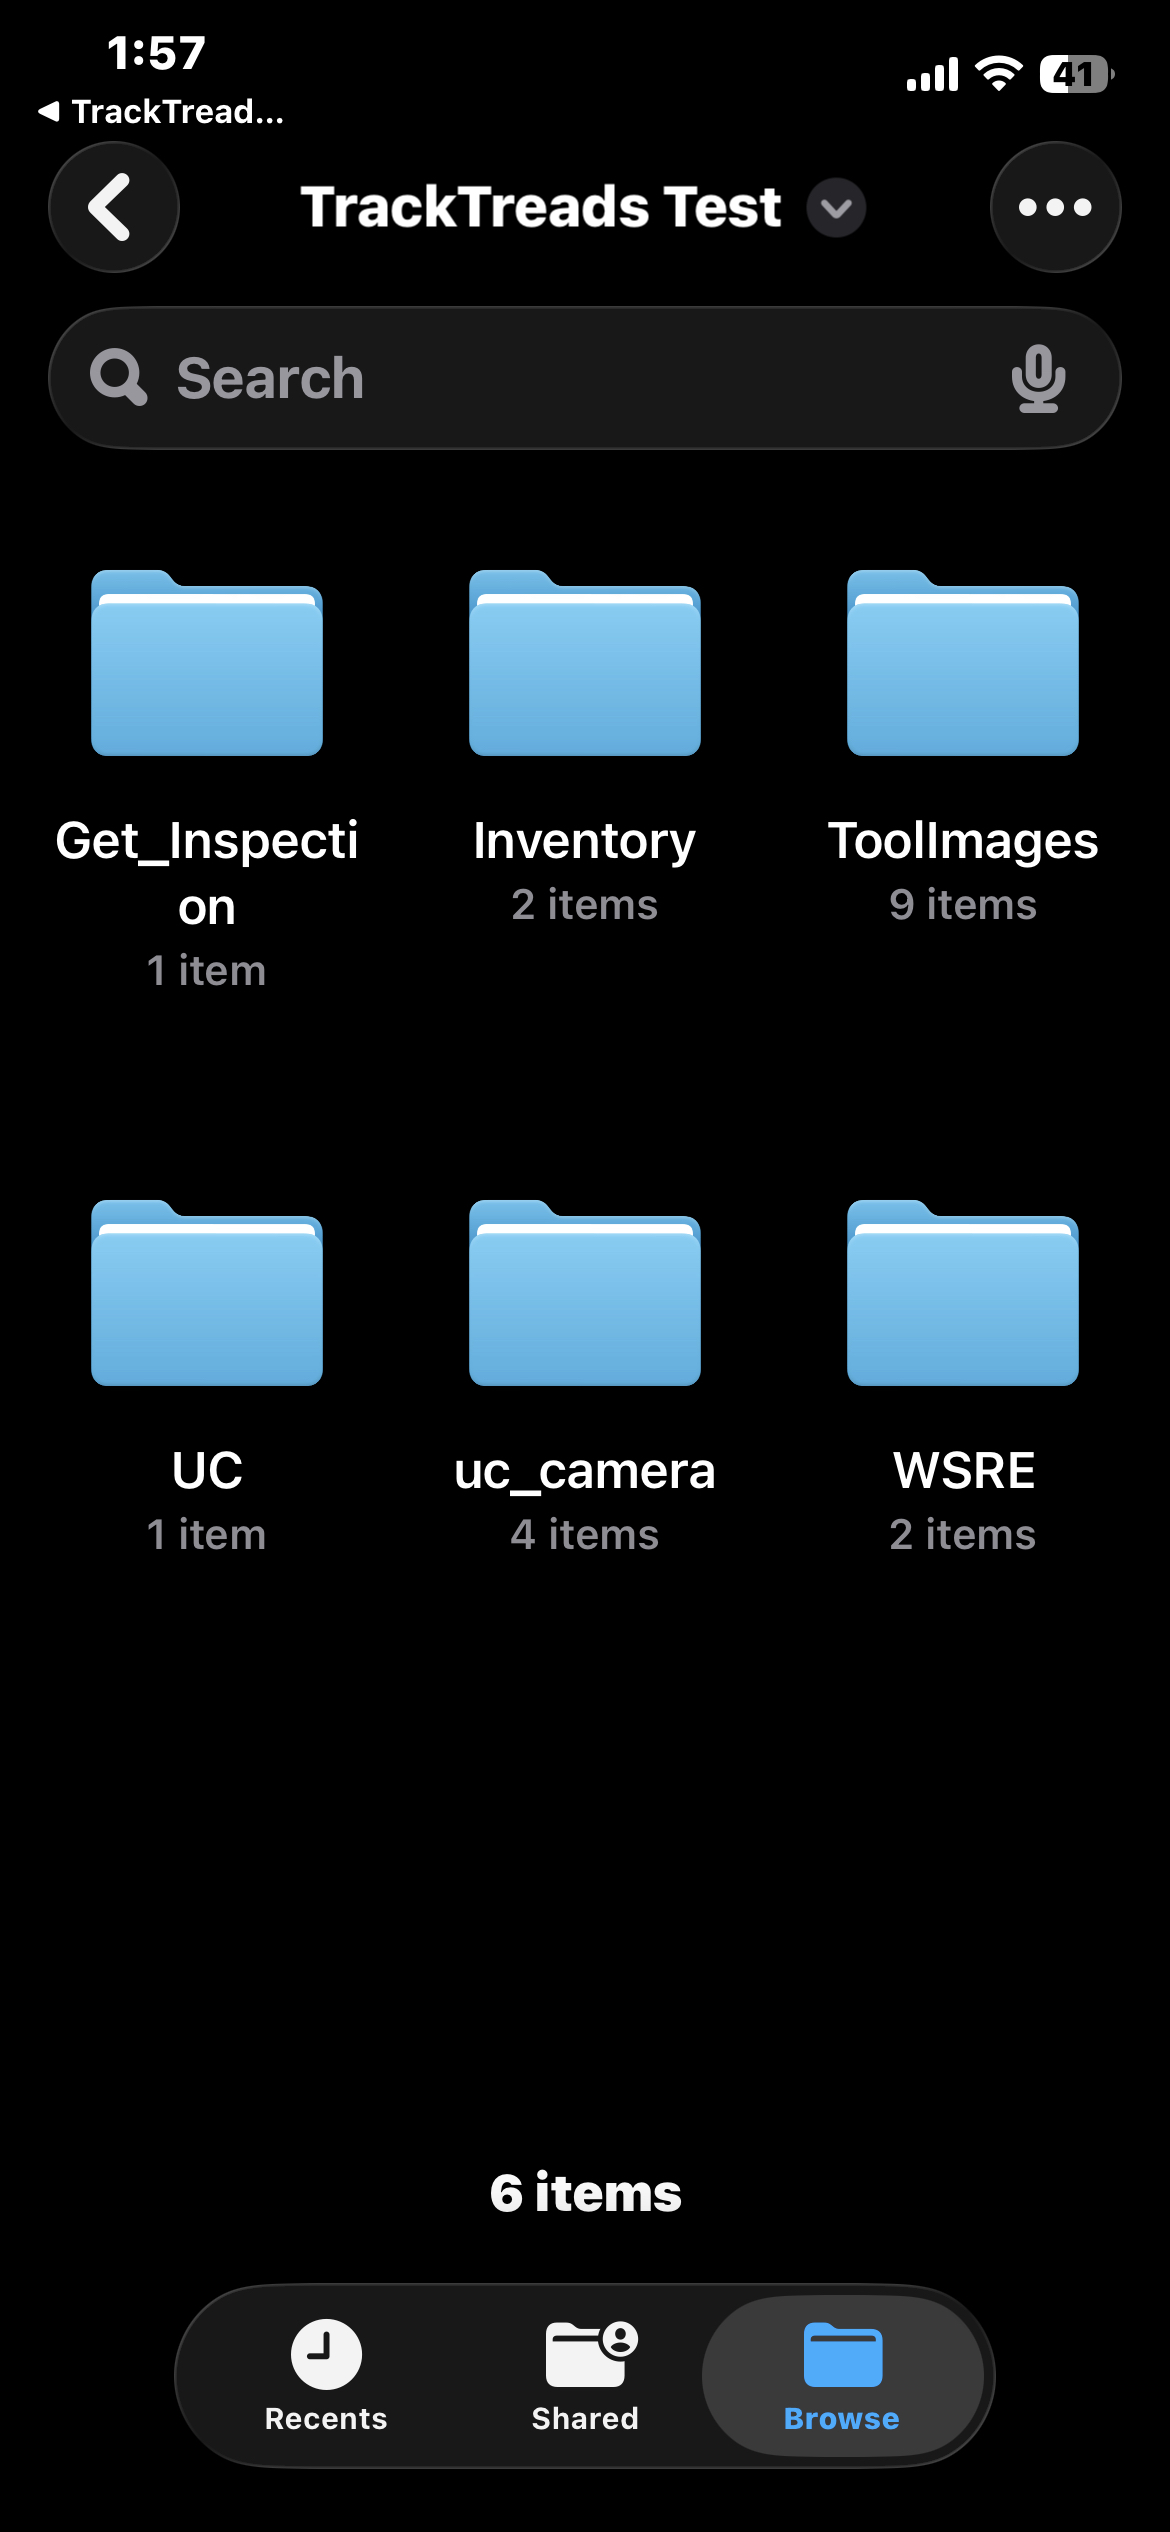
Find the inspection with the correct date on it
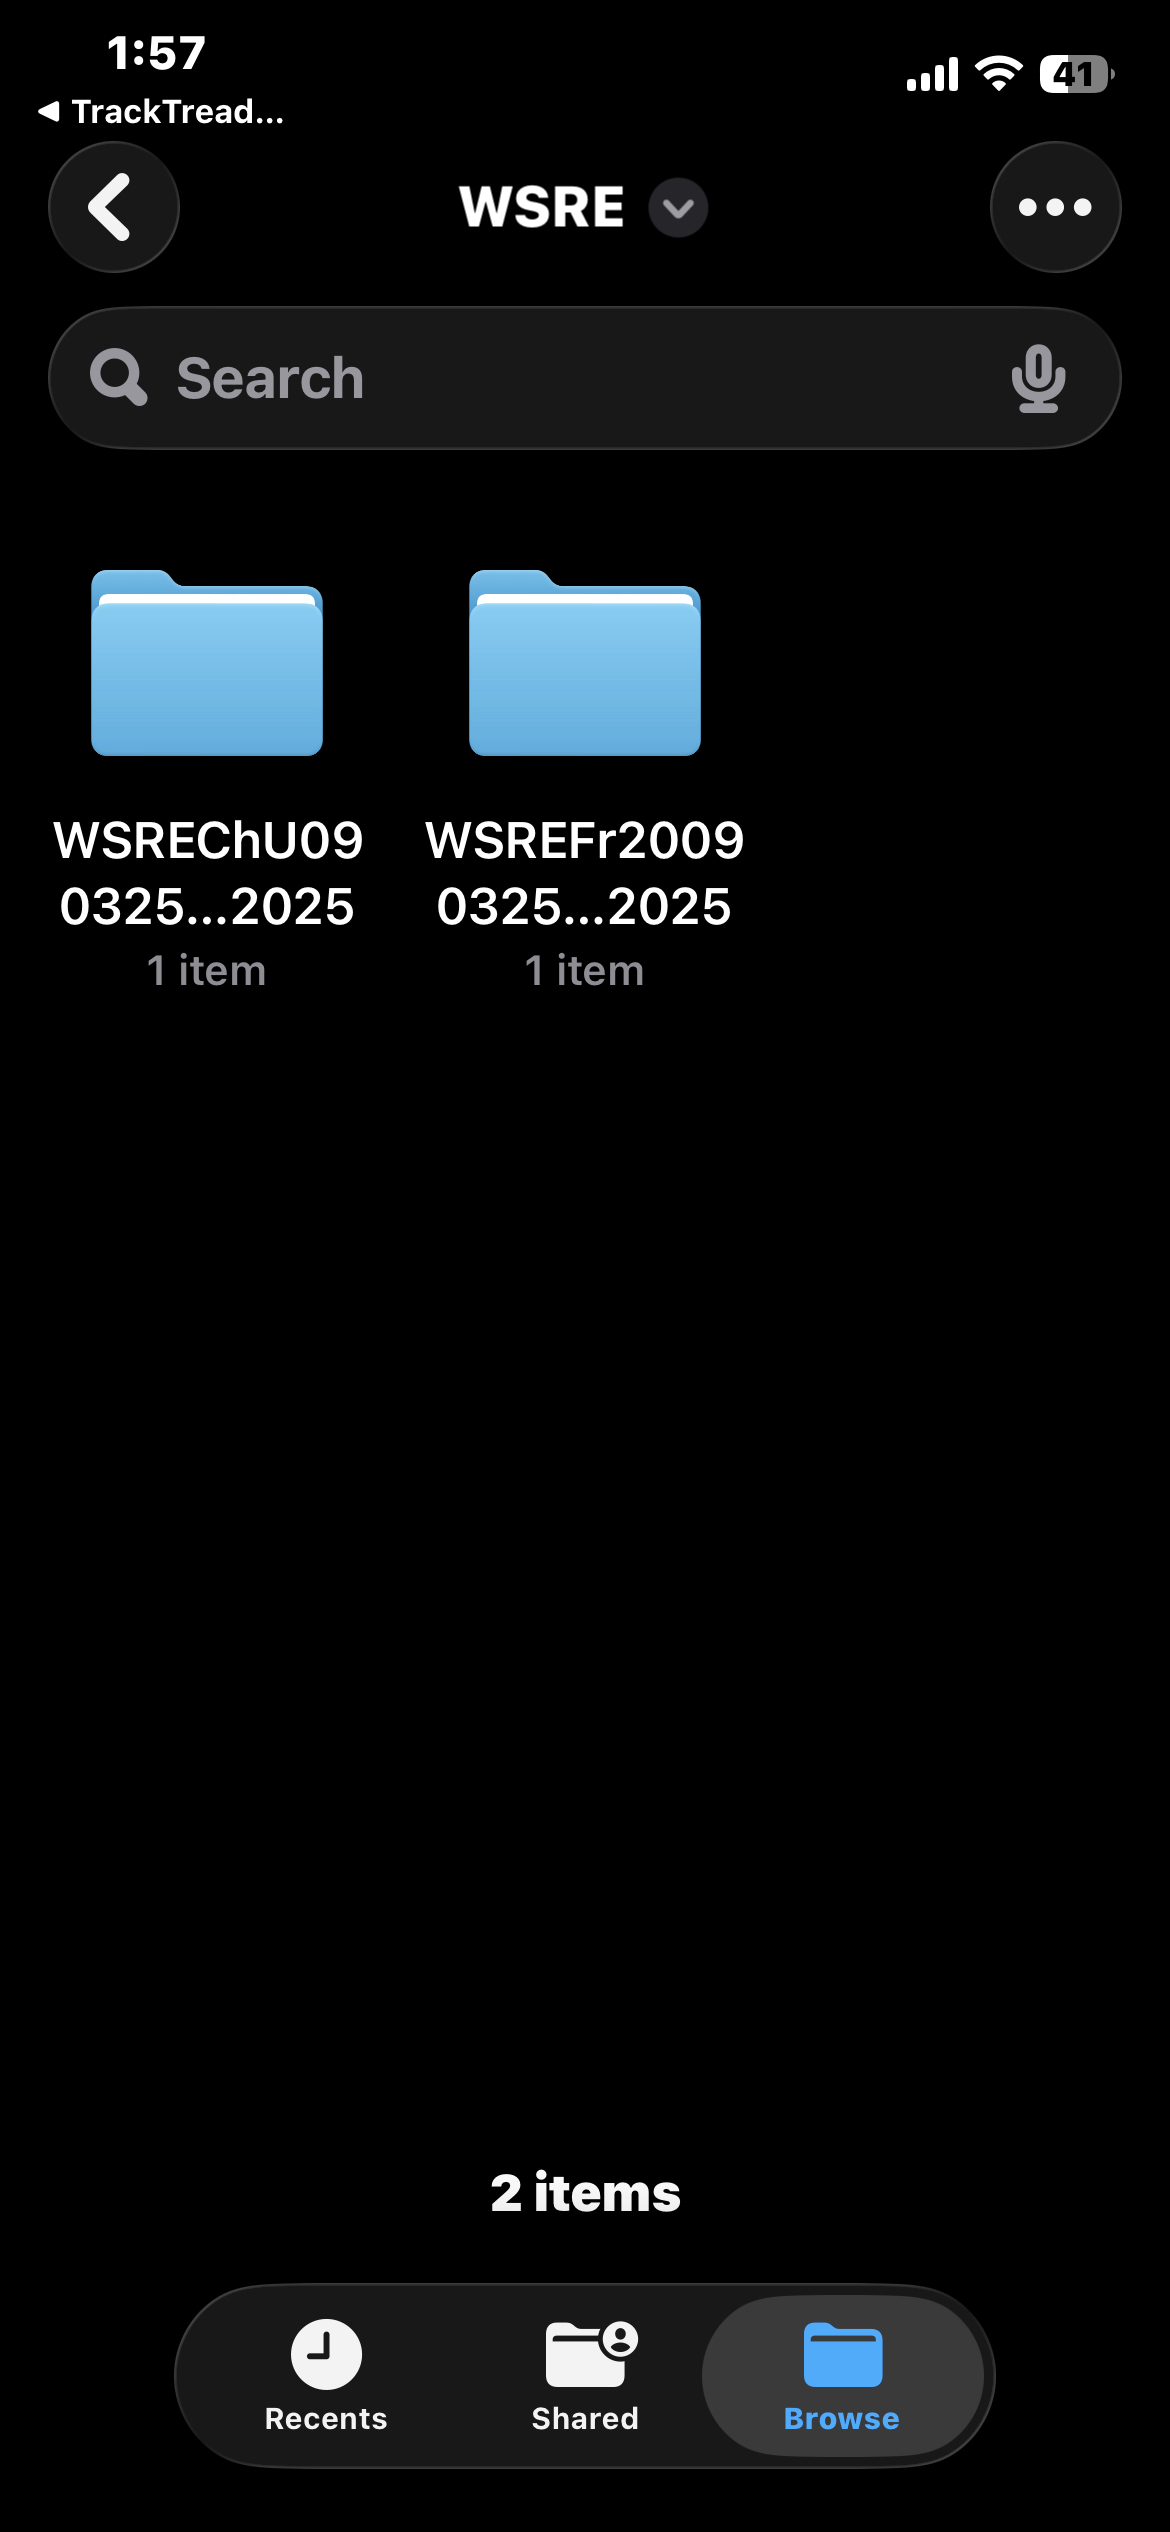
Inside the file you will see the form-sync as well as any pictures you have taken
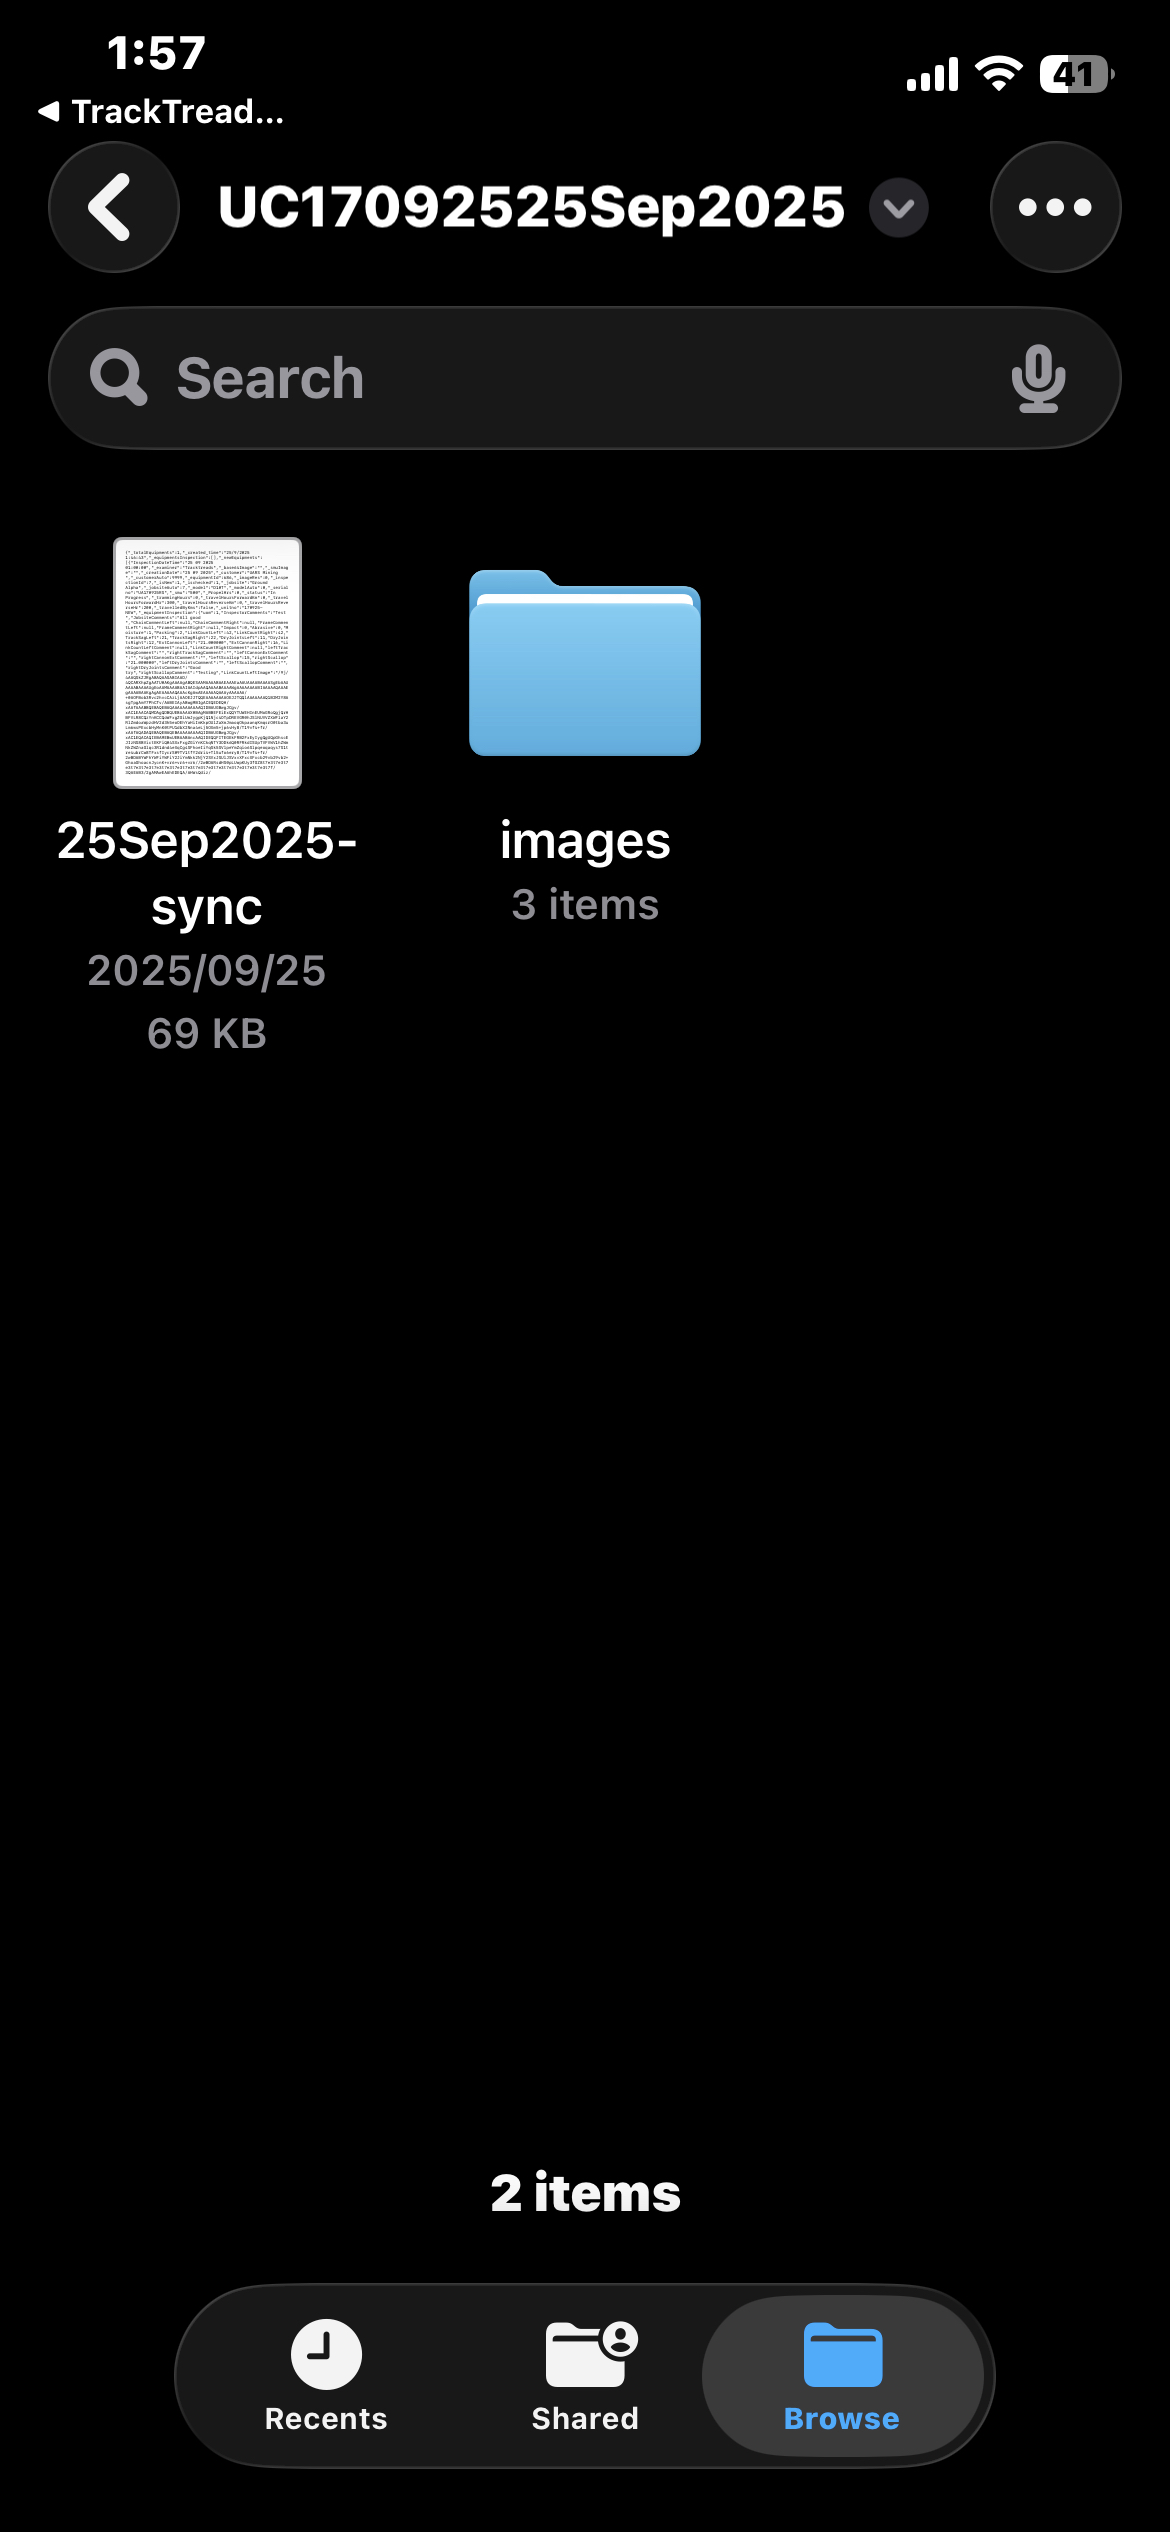
Once you have found that email the file and the pictures to Help@tracktreads.com
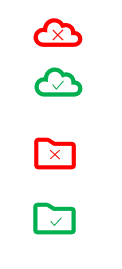
Export Files icon meanings
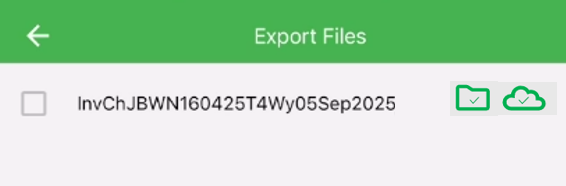
- Sync Successfully and Export File Created – 2 icons both in green with ticks
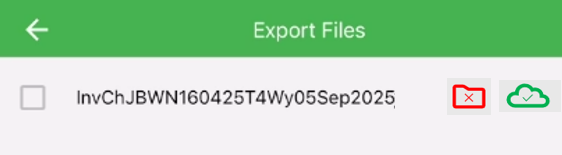
2. Sync Successfully and Export File not created – 2 icons – cloud in green with green tick and folder in red with red cross
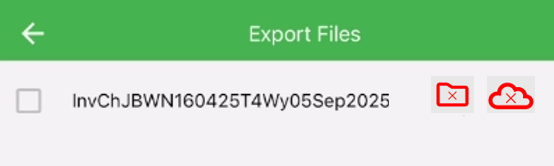
3. Sync and export file failed – 2 icons – red cloud & red folder with red cross.
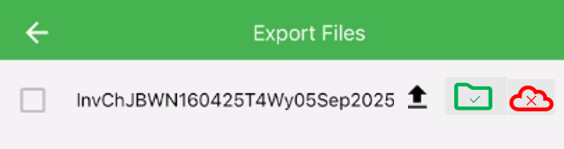
4. Sync failed but export folder created – 3 icons – red cloud with red cross, green folder with green tick, upload icon
Icons if need: