Create Equipment
To setup equipment you will need to have a customer and a jobsite setup in the system. For more details on setting up a customer and jobsite, please refer to the article
“Create and Edit Customers and Jobsites”.
Setup New Equipment
- Navigate to 'New Equipment' in the left hand menu on the Web Application.
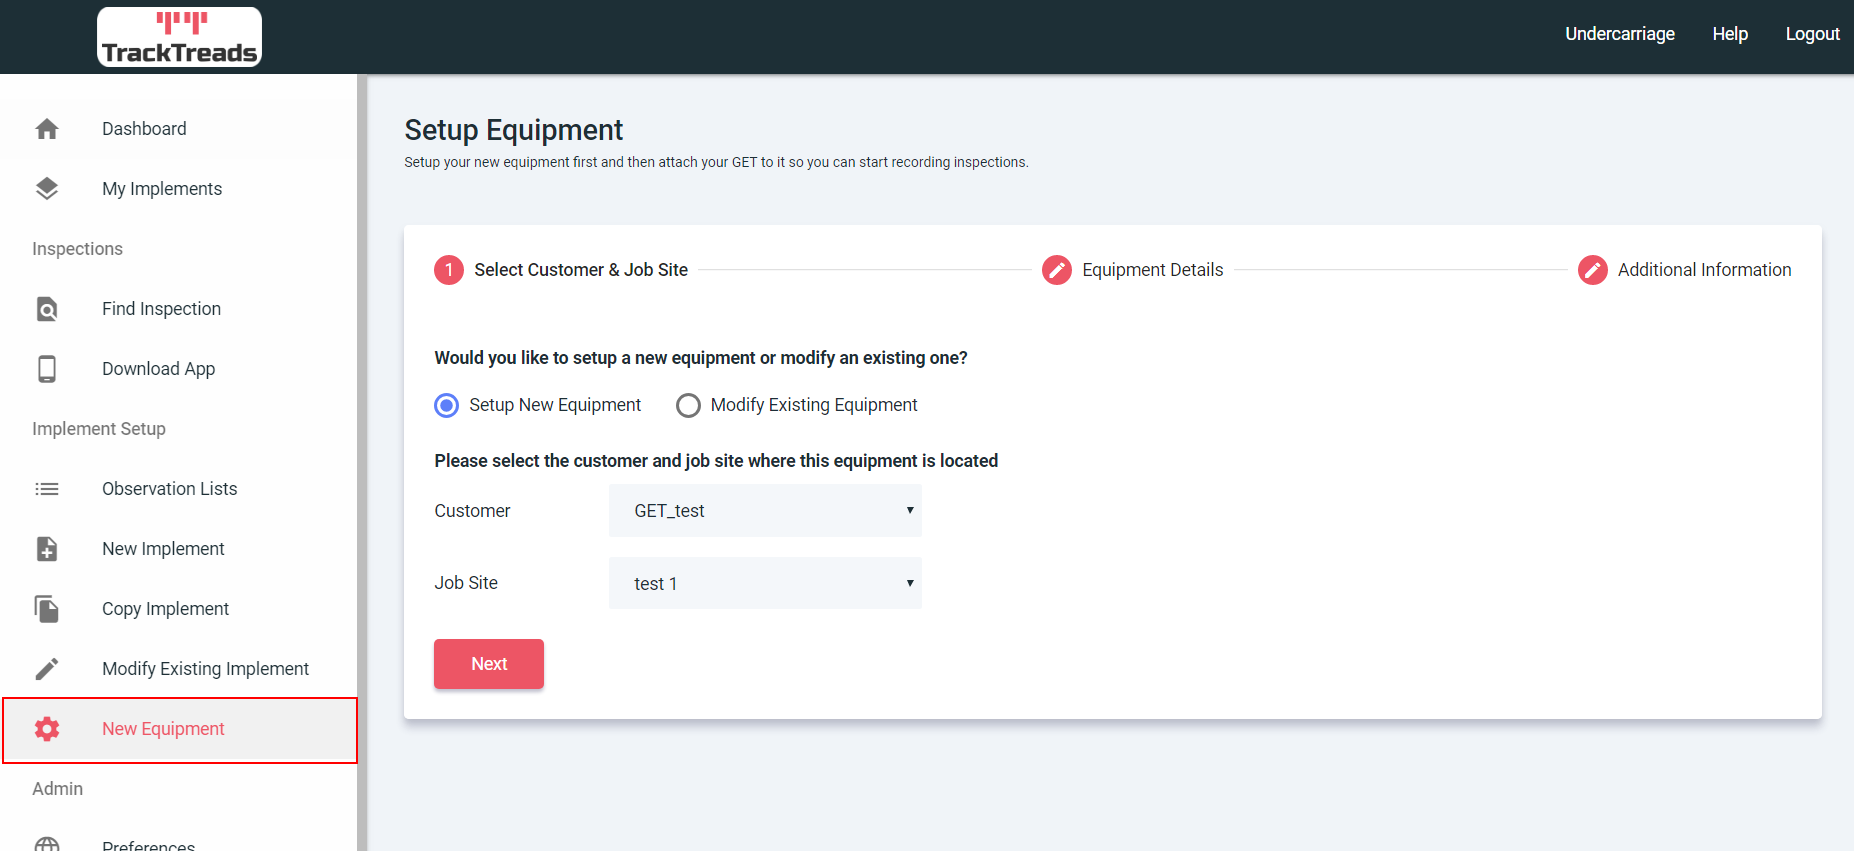
- Select Setup New Equipment or Modify Existing Equipment.
- Select Customer from drop down list.
- Select Job Site Select from drop down list. Press Next.

- Enter Serial # – Serial number of the equipment.
- Enter Unit # – Unit number of the equipment.
- Select Make – Select from drop down list.
- Select Model – Select from drop down list.
- Enter SMU – We recommend this value be from the earliest date
possible, it should be at least before the first inspection you plan on
entering. - Enter LTD – This value is generally the same as the SMU unless there
has been a meter change for this equipment. - Date of Reading – This is the date of the earliest SMU and LTD known
- The BCM and Tonnage are optional fields and used for GET
- Attach a photo of this equipment – This can be seen throughout the
application. Press Next.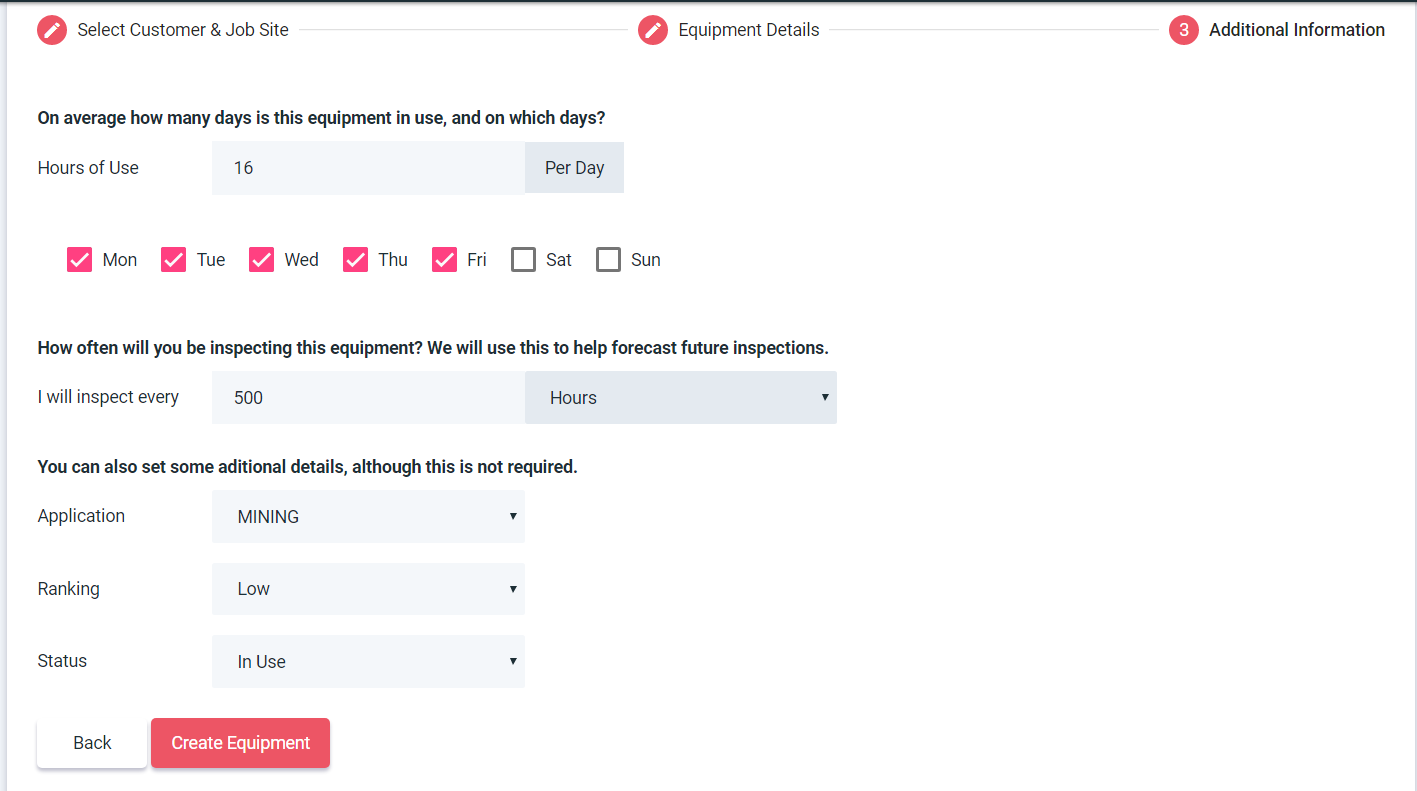
- Hours of Use – This is on average the amount of hours per day the
equipment is in use, and on which days - I will inspect every – This is how often you will be inspecting this
equipment, this is used to help forecast future inspections. - Additional details – Although not required you are able to choose
application, ranking and status of equipment.
Finding Equipment
Finding Equipment
1. Navigate to 'Dashboard' and press 'Search' to collapse the search facility.

2. Search for equipment by Customer, Jobsite, Make, Model, Serial No, Implement Serial No. Unit No. or Eval Code.
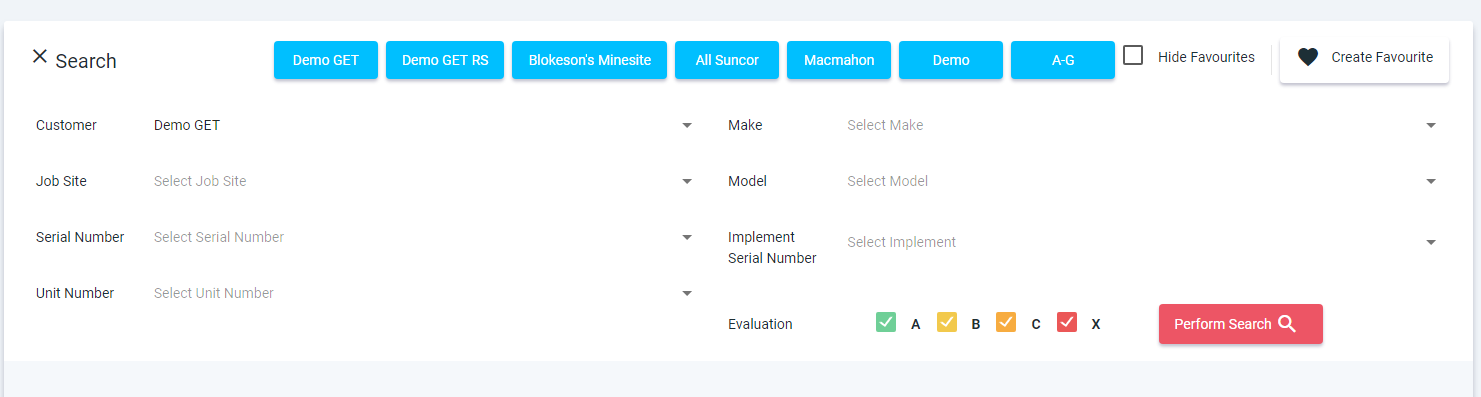
3. Toggle between Cracks, Eval code and Percent worn to view results.
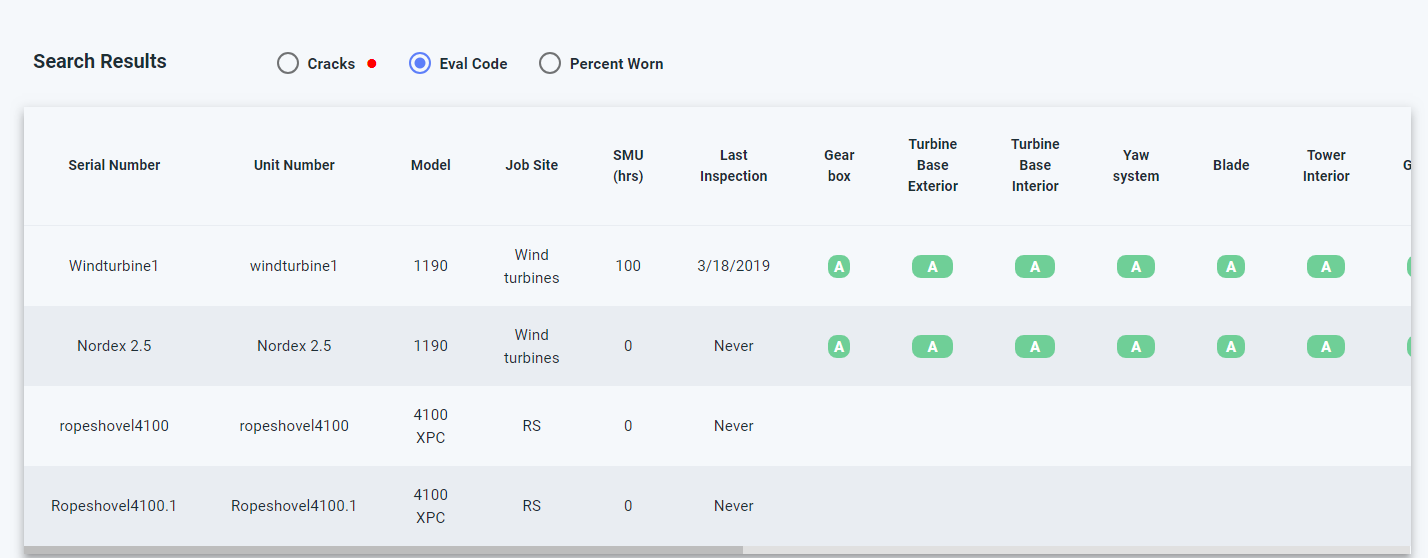
4. Select equipment.
5. You are redirected to the Equipment Details page, all implements attached to equipment are displayed.
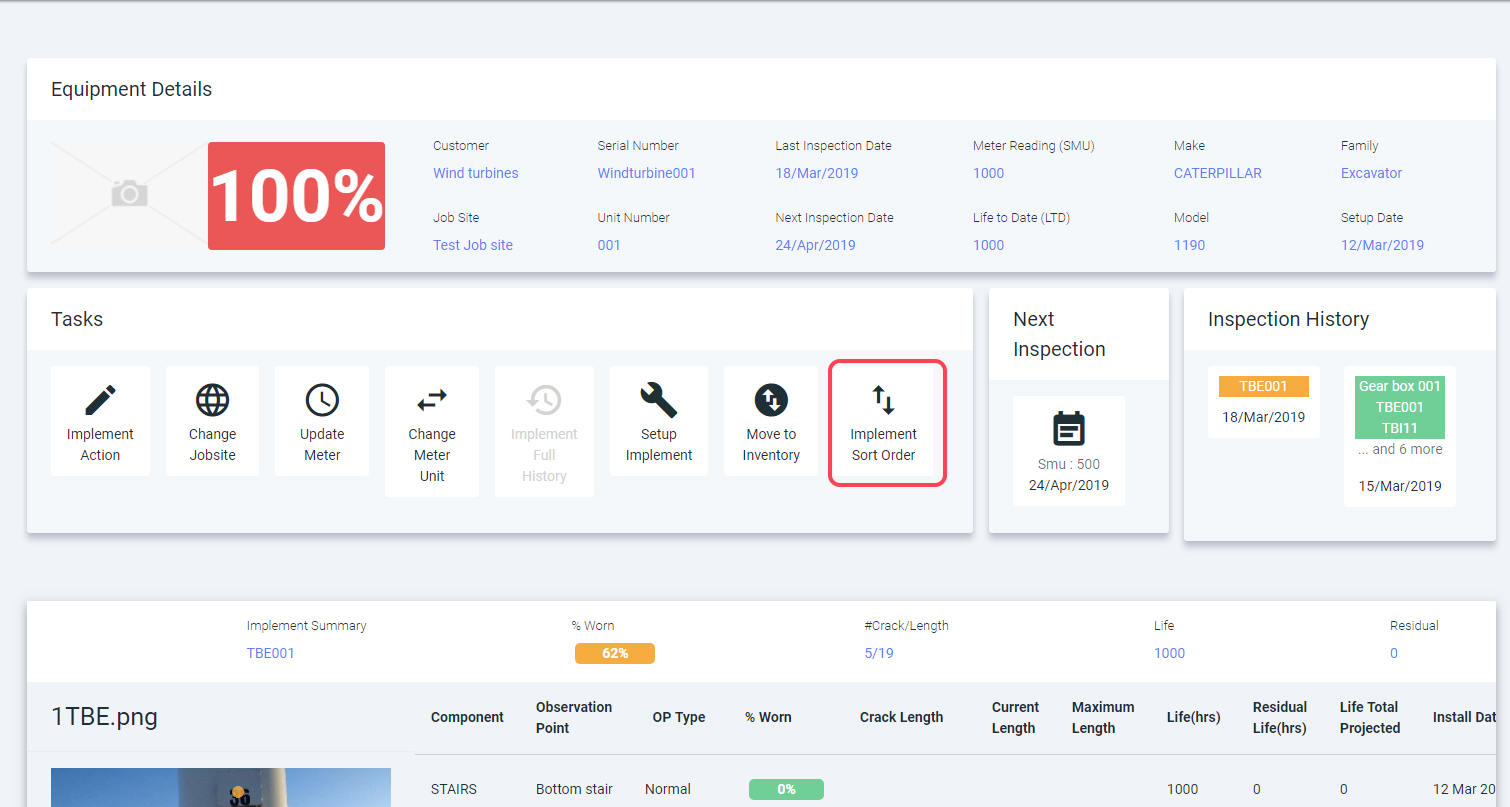
6. Select 'Implement Sort Order' to customize implement order on the page.
7. Use the up and down arrows and save.

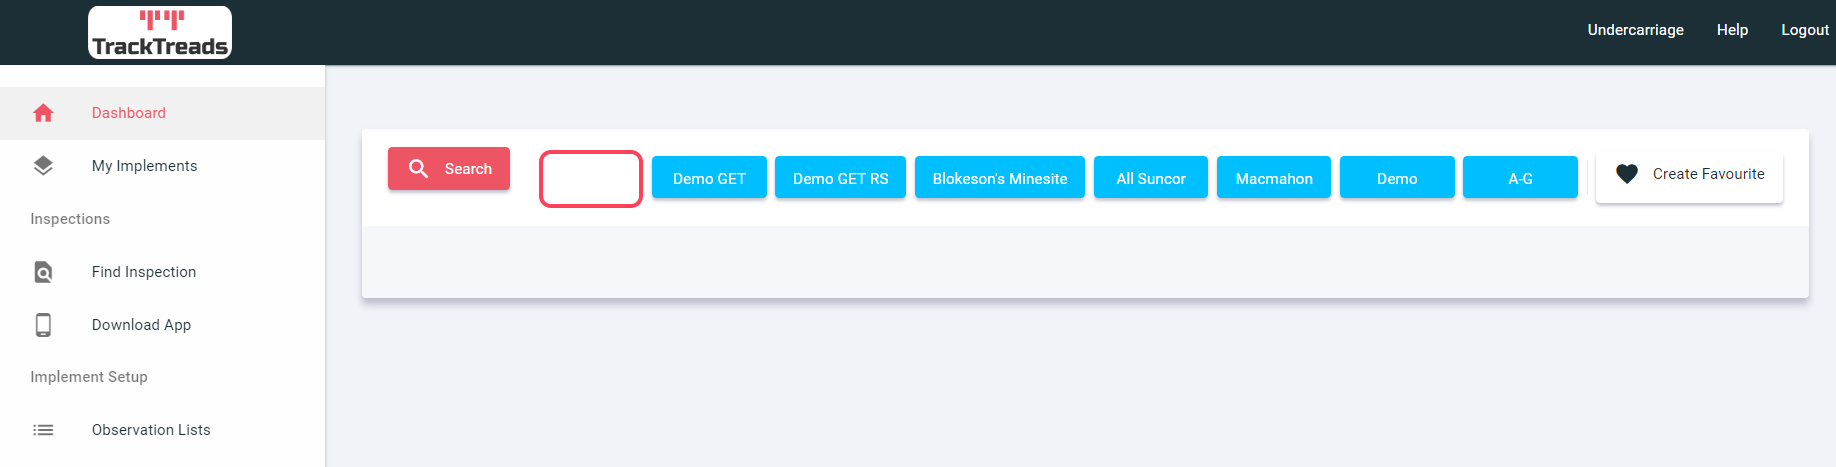
Create Favourites
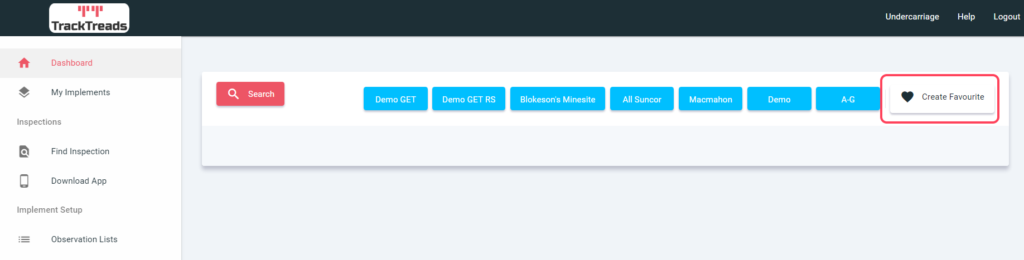
- Navigate to 'Dashboard' and select 'Create Favourite'.
- Enter required information and select which Implements to include in your favourites.
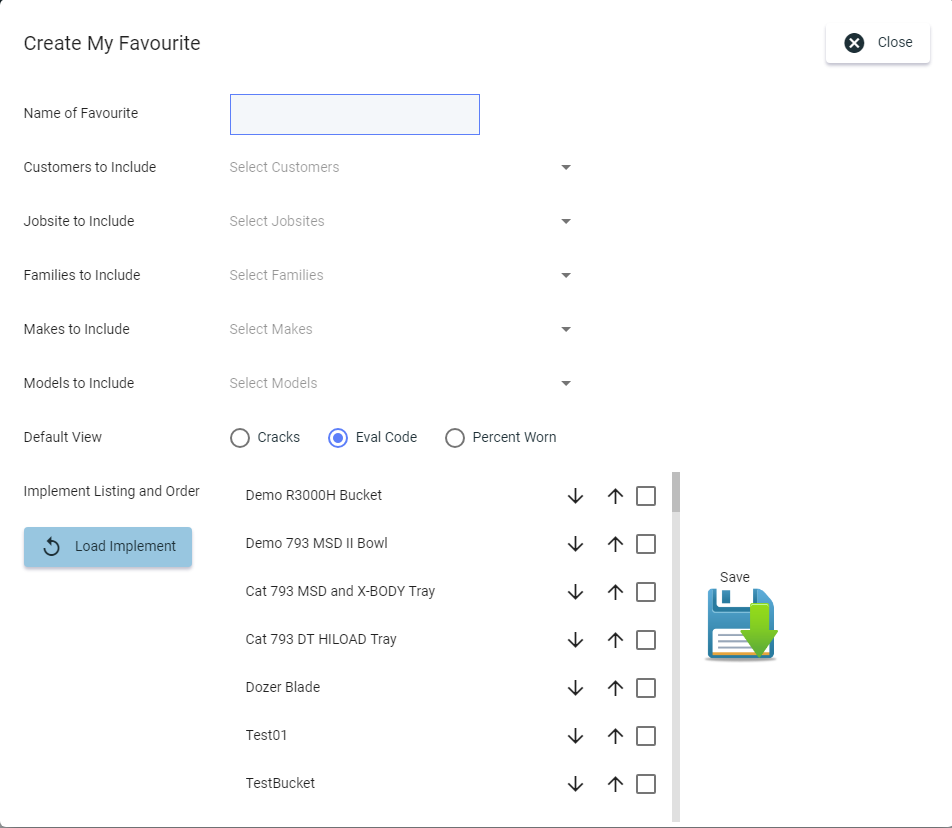
- Save.
- Your new Favourites will appear next to the 'Search' button.