
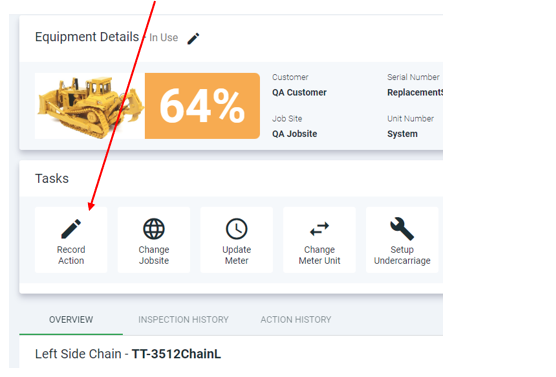
To create an action in the system, select the equipment that has been actioned then select “Record Action” in the Tasks section.
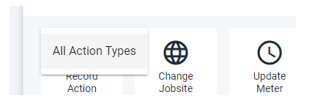
Then click on “All Action Types”
This will open a new screen as shown below
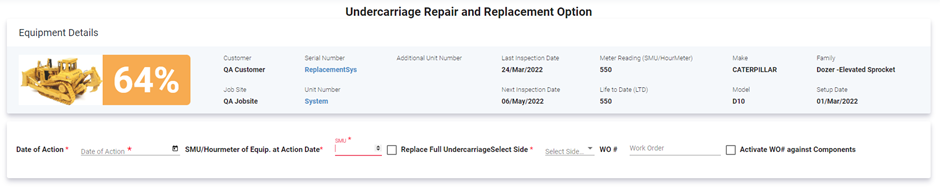
Enter the Date of the Action and the SMU of the Equipment when it occurred.
Please be aware that there are validations in the system and if you are unsure of the SMU – navigate the Inspection History or Action History Tab on the details screen to see what Dates and SMU’s have already been recorded for this equipment.
You will then need to tick “Replace Full Undercarriage” if all components on either the Left or the Right or Both have been replaced. Or leave this blank if any other change has been made.
Select the Side where the action has occurred – Left, Right or Both.
Work Order – this is an optional field and please tick if you would like to add the work order which can then be add to all components (Enter this in the top field) or individual components (enter against the component)

In the example below – I have selected the Left Side only
The screen shows me the details of the Existing Components (Currently Installed) on the Left Hand Side

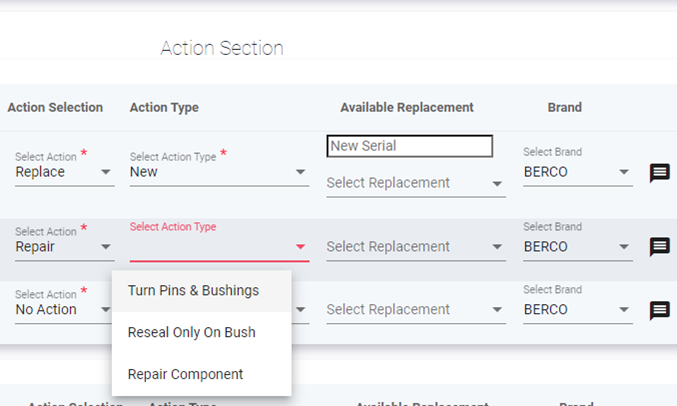
In the centre – Action Section – I enter the action I would like recorded in the system as shown in the example below
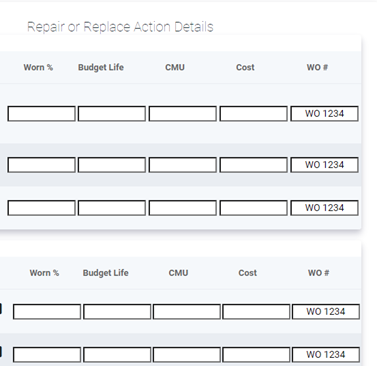
In the final section Repair or Replace Action Details– you can add any details that are required or useful
Once you have recorded any actions that are required scroll to the bottom left of the screen and click on Save/Update.

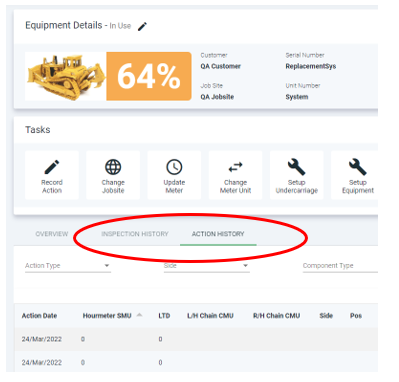
Your actions will then flow through to the Action History Tab on the Equipment Details Screen and the actions will be reflected on the components on the Equipment.