To setup equipment you will need to have a customer and a jobsite setup in the system. For more details on setting up a customer and jobsite, please refer to the article
“Setup a customer and a jobsite”.
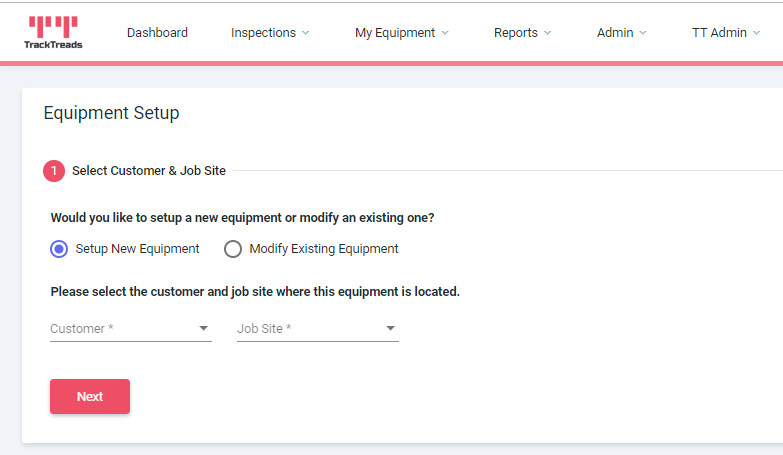
Navigate to Setup New Equipment : My Equipment > Setup New Equipment

- Select Customer - Select from drop down list or begin typing the name of the Customer you wish to select in the drop down box.
- Select Jobsite - Select from drop down list or begin typing the name of the Jobsite you wish to select in the drop down box.
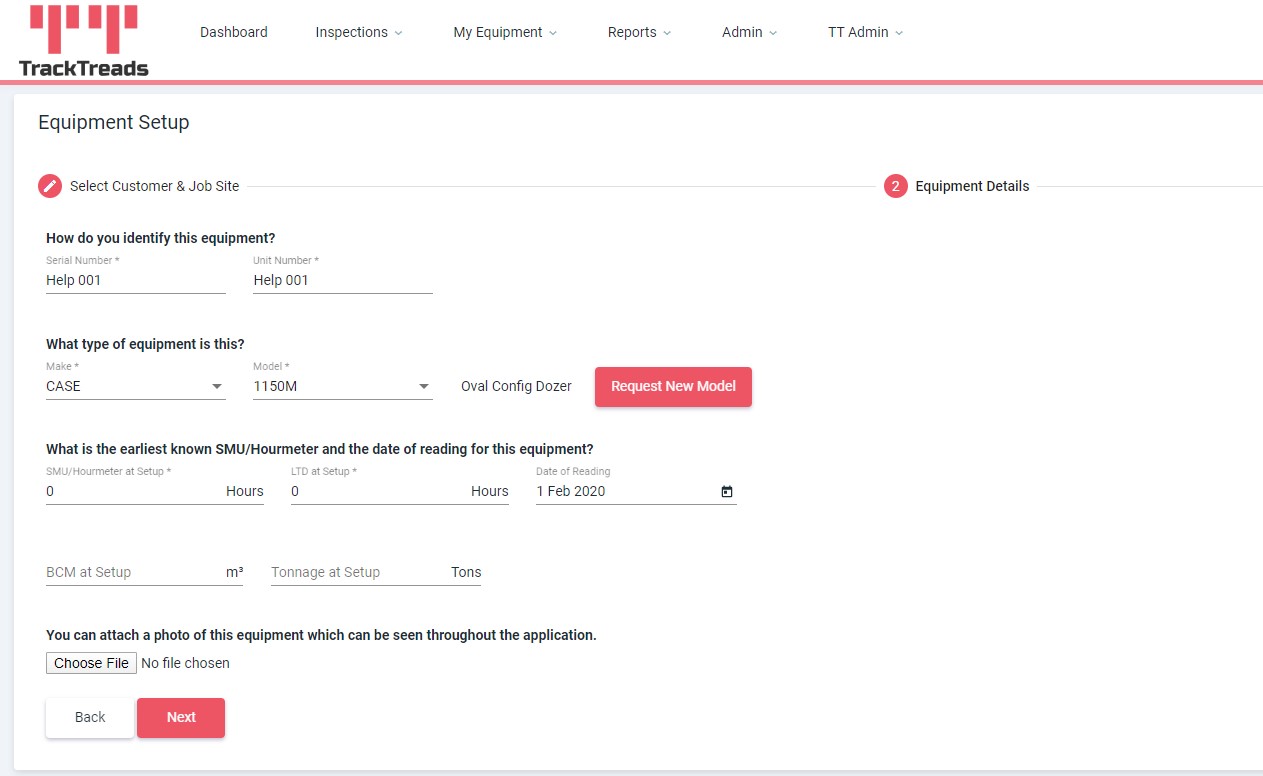
- Enter Serial # - Serial number of the equipment
- Enter Unit # - Unit number of the equipment
- Select Make – Select from drop down list or begin typing the name of the Make you wish to select in the drop down box.
- Select Model – Select from drop down list or begin typing the name of the Model you wish to select in the drop down box. This is the manufacturer’s model designation. All undercarriage components/part numbers are linked to this model number, so it needs to be correct.
- Enter SMU - We recommend this value be from the earliest date possible, it should be at least before the first inspection you plan on entering.
- Enter LTD - This value is generally the same as the SMU unless there has been a meter change for this equipment.
- Enter Date at Setup
- There are optional fields of BCM and Tonnage - however these are used primarily in GET Inspector.
- Attach Equipment Image - Select image from computer to upload.
- Enter SMU Forecast Data - Enter weekly average machine operation hours and inspection intervals.
- Add additional field data - If available or required by you.
- Click Create Equipment
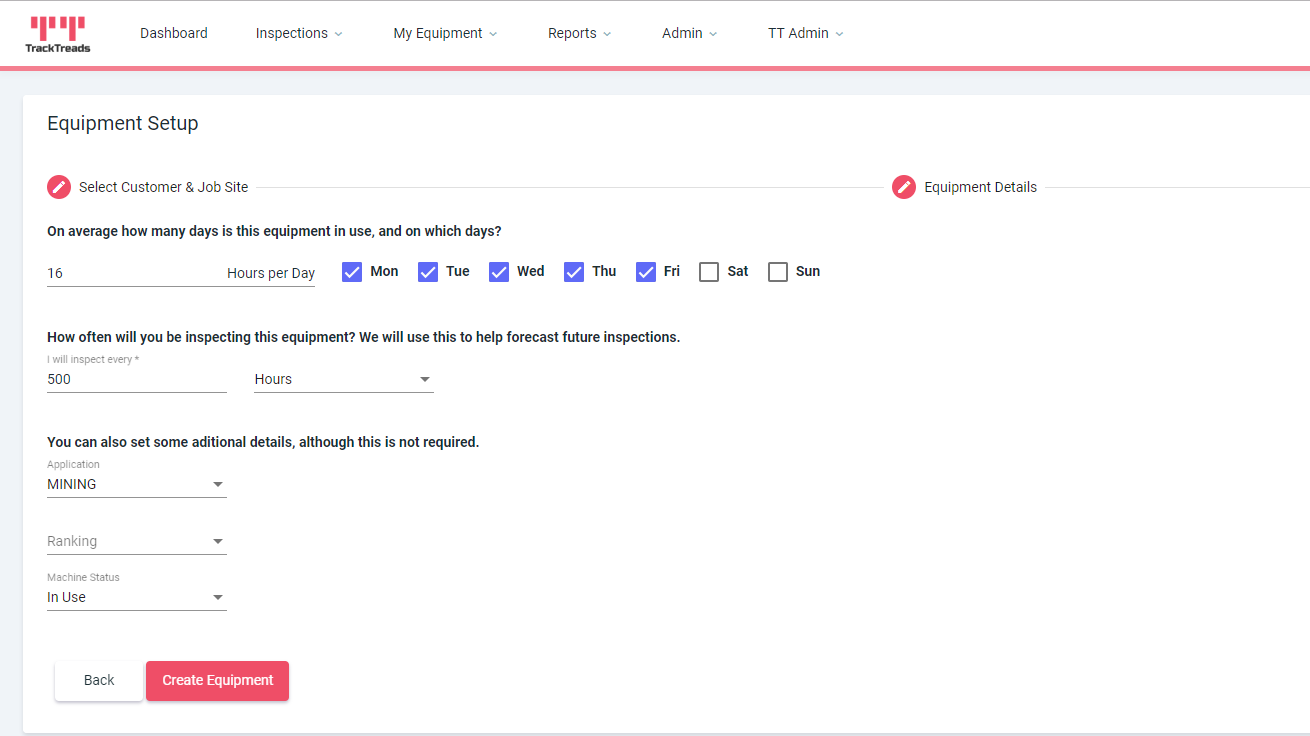
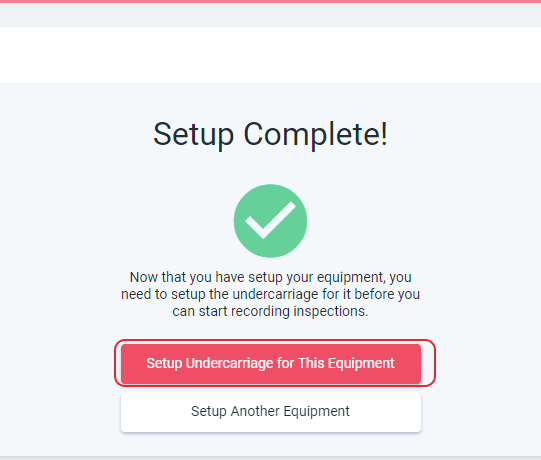
Following this you will be asked to setup either another equipment or the undercarriage for the equipment you have just setup.

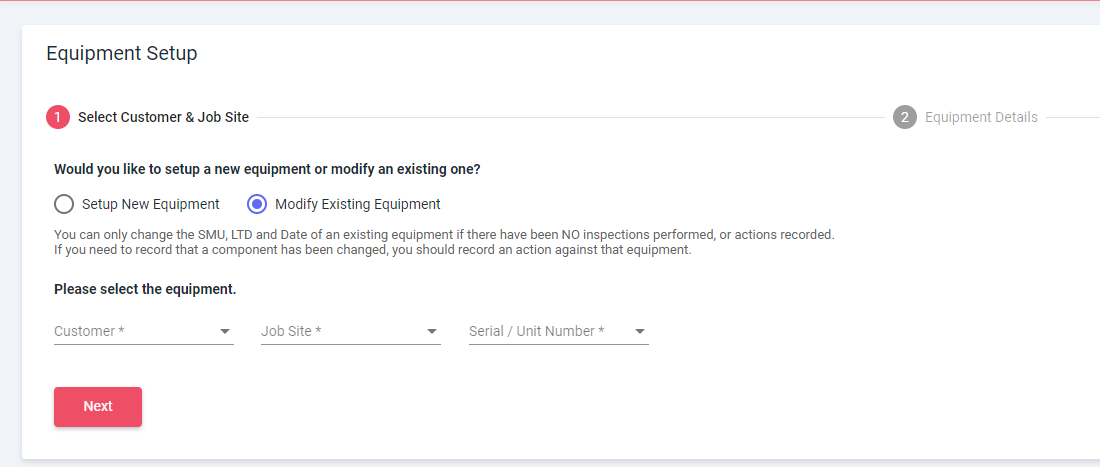
To Edit Equipment Previously Created
- Navigate to Setup Equipment: My Equipment > Setup New Equipment
- Select Modify Equipment

Once your equipment has been set up, you will need to add Undercarriage components to it. For more details on setting up an Equipment, please refer to the article “Setting up, Searching for and Editing Equipment”.
There are small differences between initial setup and subsequent editing. Initial setup is covered first and editing is further down the page.
Step 1: Navigate to Equipment Undercarriage:
Option 1 – From the Equipment Setup Screen: After successfully having setup your equipment you will be asked if you want to setup the undercarriage.
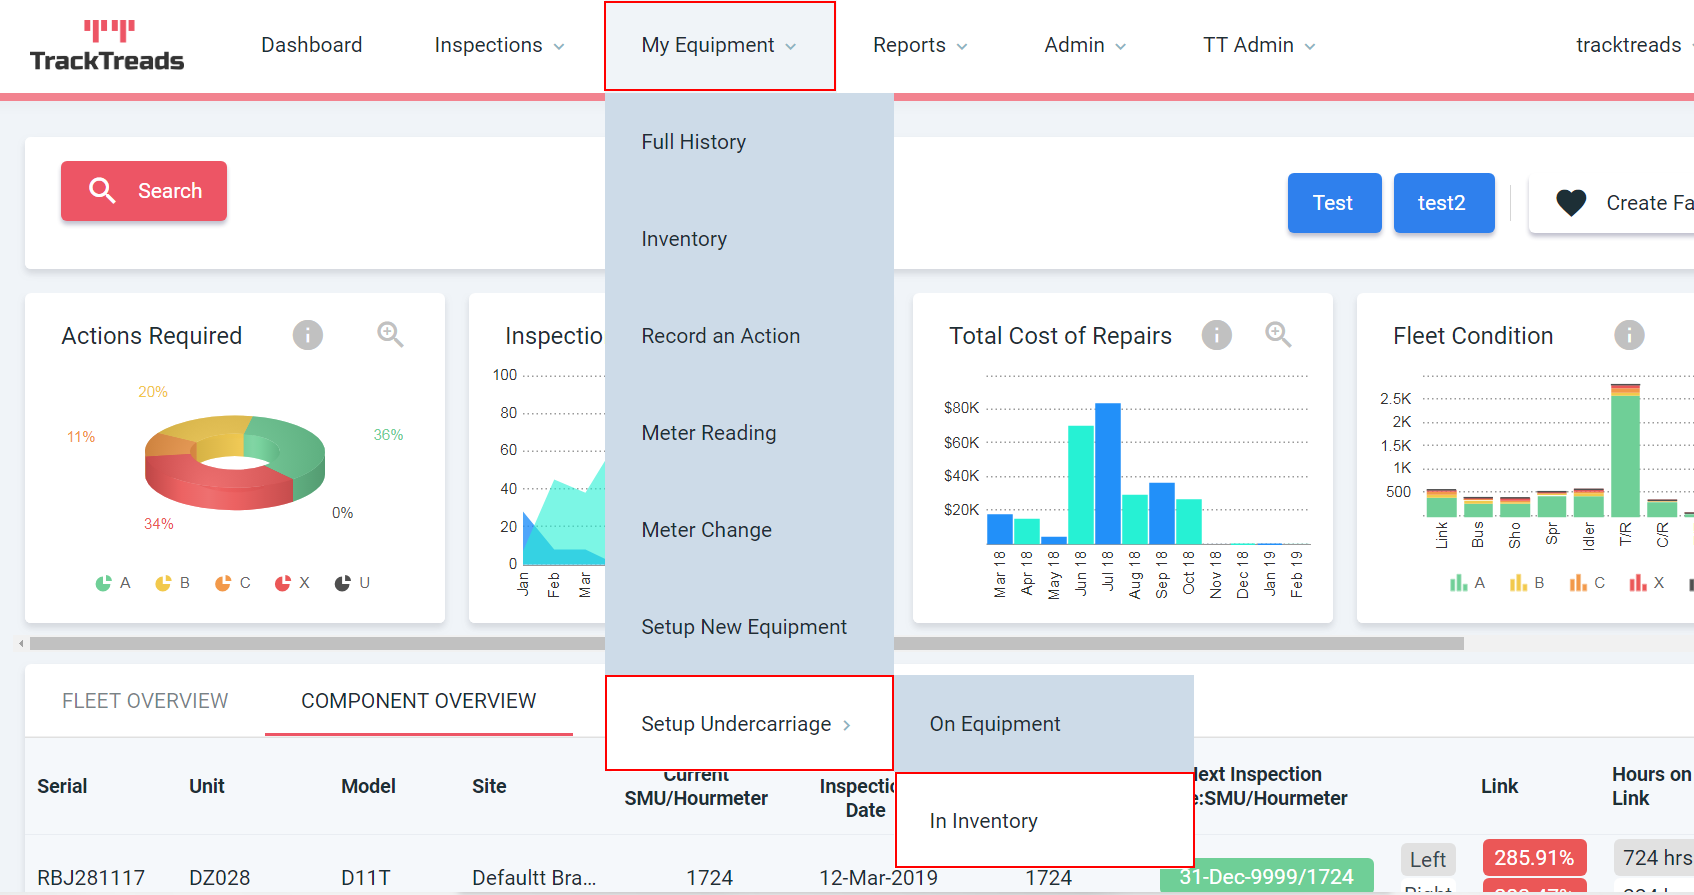
Option 2 – From the menu: My Equipment > Setup Undercarriage > On Equipment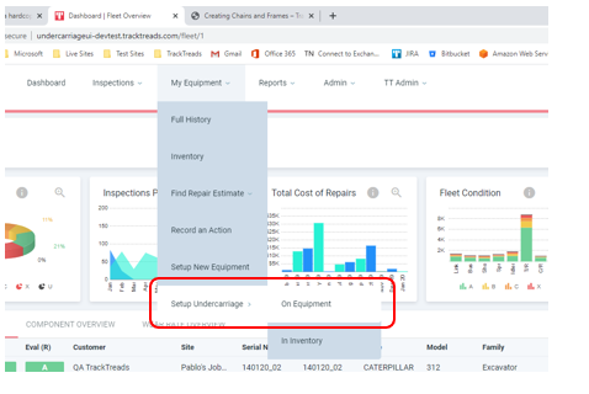
Select either On Equipment or In Inventory – In this first example you will see setting up Undercarriage on Equipment
Initial Setup
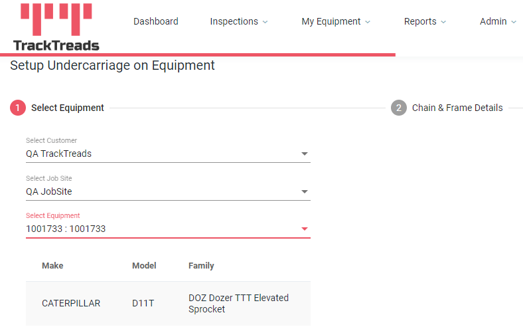
Before you are able to setup undercarriage components, you must first setup or select an equipment. If you select option 1 then you will have setup up a new equipment already. Selecting option 2 will result in you being asked to select equipment via the following screen.
Select Customer - Select from drop down list or begin typing the name of the Customer you wish to select in the drop-down box.
Select Jobsite - Select from drop down list or begin typing the name of the Jobsite you wish to select in the drop-down box.
Select Equipment – Select from the drop-down list

The Make, Model and Family will appear below – then click next
After the equipment is selected, the steps are the same for both option 1 & 2 are the same.
- Enter ‘Chain & Frame Details’ and press next - this will not appear for all families
Serial numbers for Chains and Frames on each side can be entered on this screen, or they can be left blank and the system will generate a unique serial number for them automatically.
Enter the life & date of the chain/frame when installed on the equipment and the equipment SMU at install of the chain/frame.

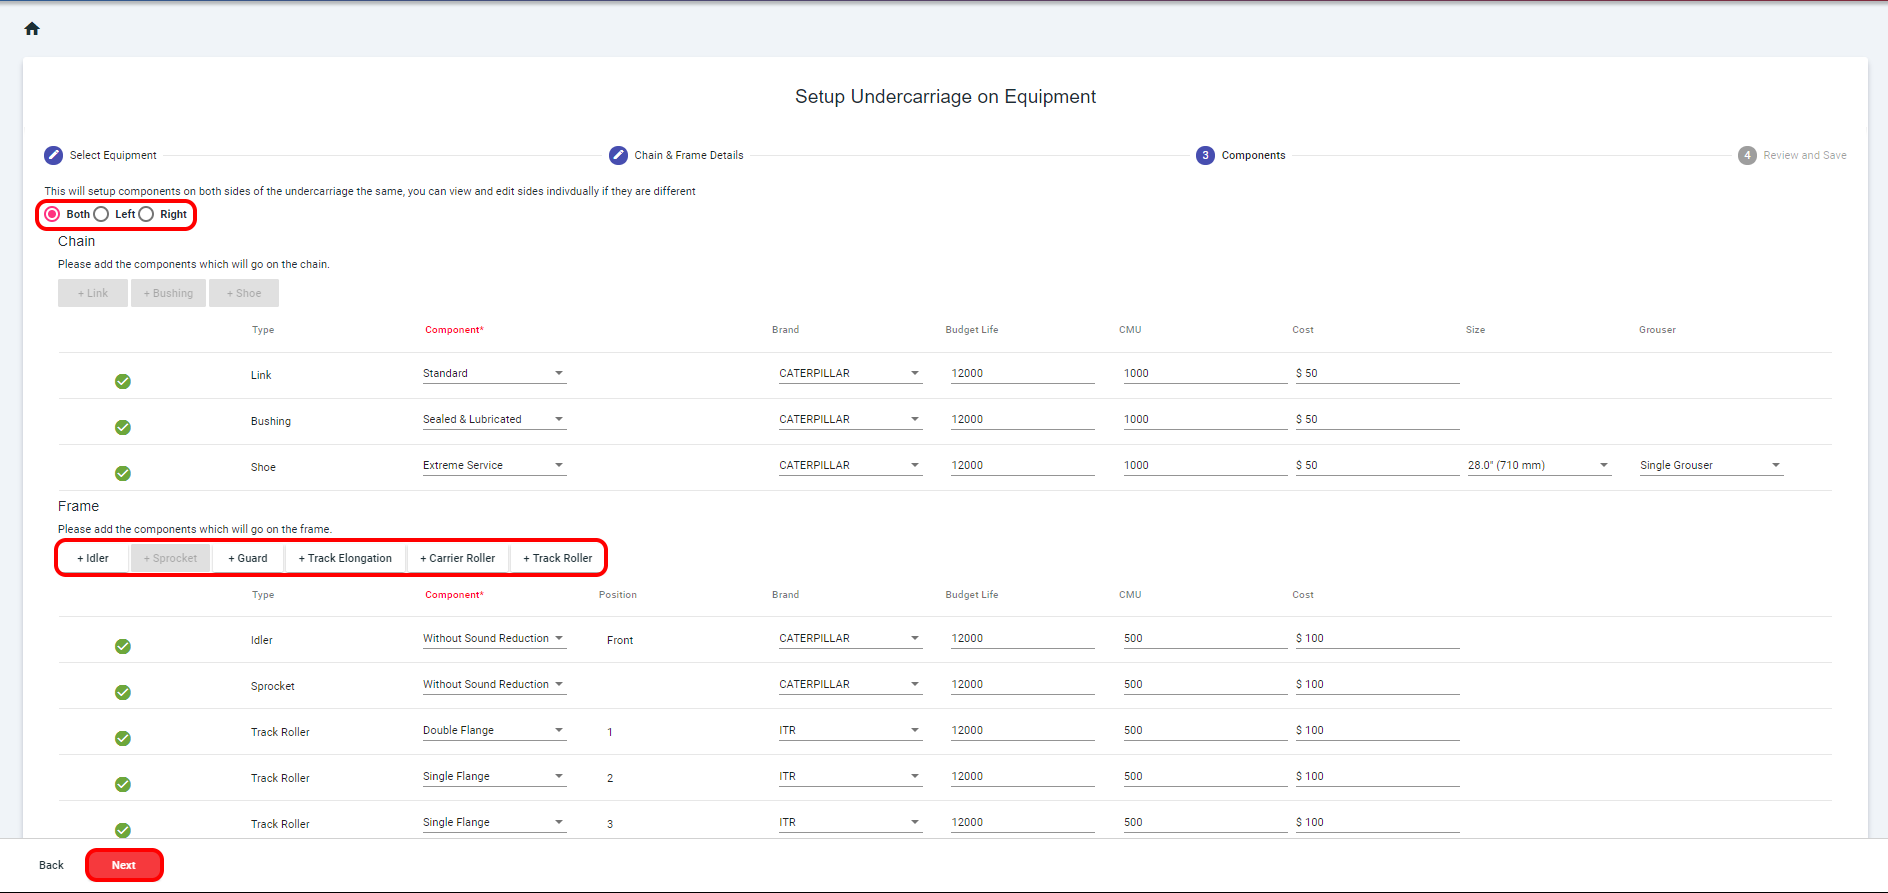
- Add all components to equipment. Each component will display a green tick when the row is validated. Press next when done.
A number of components will be pre-selected by default because they are always on the equipment you are setting up.
There will also be the option to add further components. *NOTE* You will need to know what components the equipment has before setting up.
Fill in all other required fields; Position, Brand, Budget Life, CMU, Cost & if required Size & Grouser.

To view component notes mouse over the component when in the drop down menu.
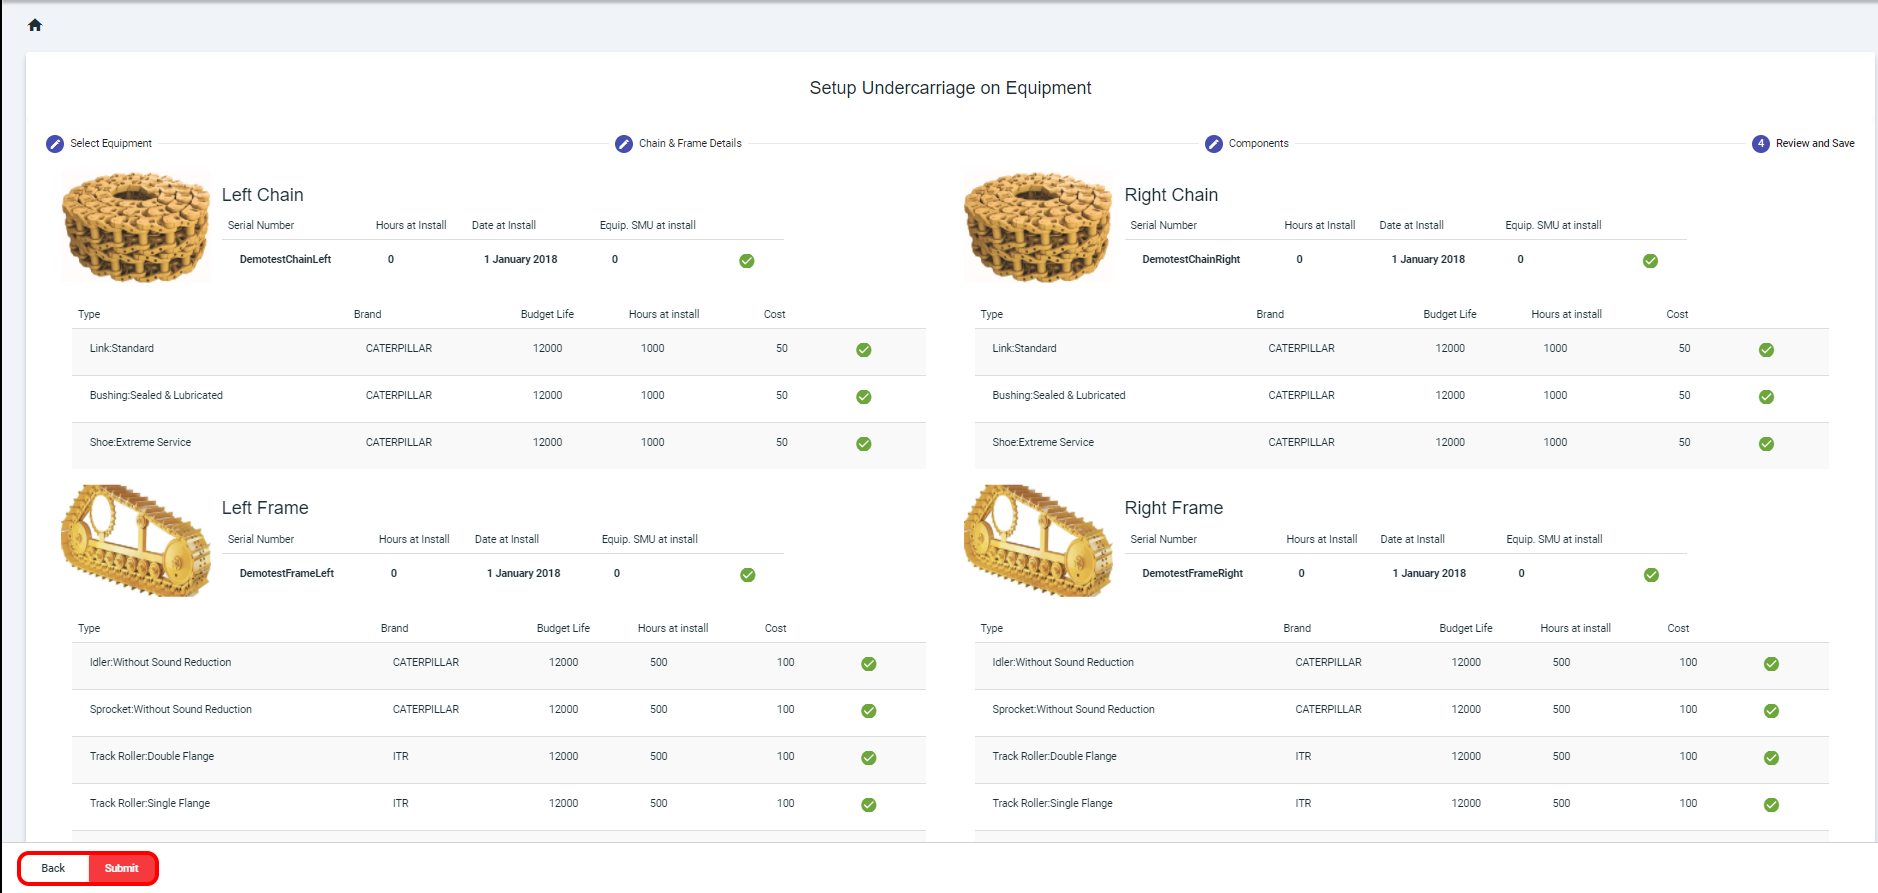
- Review all information, if it’s all correct press ‘Submit’, if not press ‘back’ and edit accordingly.


The process is the same for all equipment; dozers, mining shovels, excavators & drill rigs.
Mining shovels will not display child components during setup of equipment, but will be visible on the ‘Inspection’ screen.
Setting up New Undercarriage and place into inventory
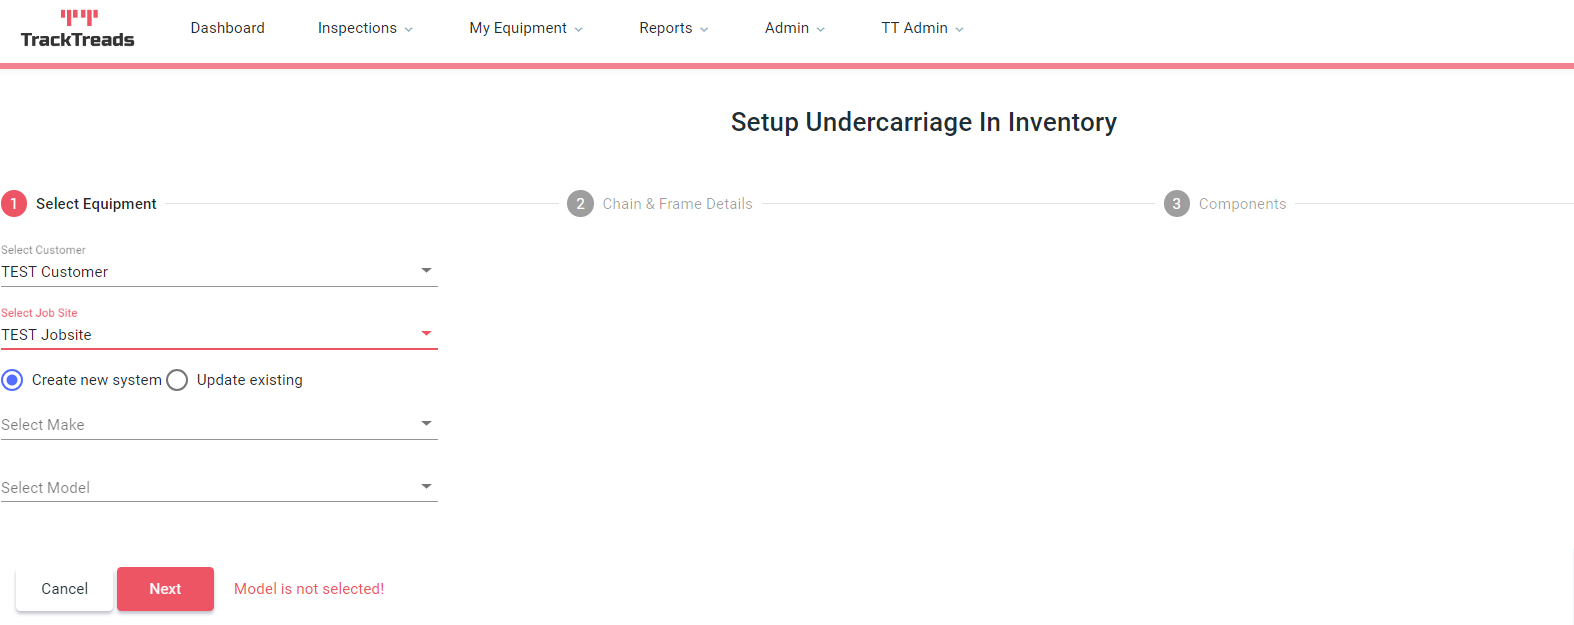
Navigate to Setup New Undercarriage: My Equipment > Setup Undercarriage > In Inventory
- Select Customer - Select from drop down list or begin typing the name of the Customer you wish to select in the drop down box.
- Select Job Site - Select from drop down list or begin typing the name of the Job Site you wish to select in the drop down box.
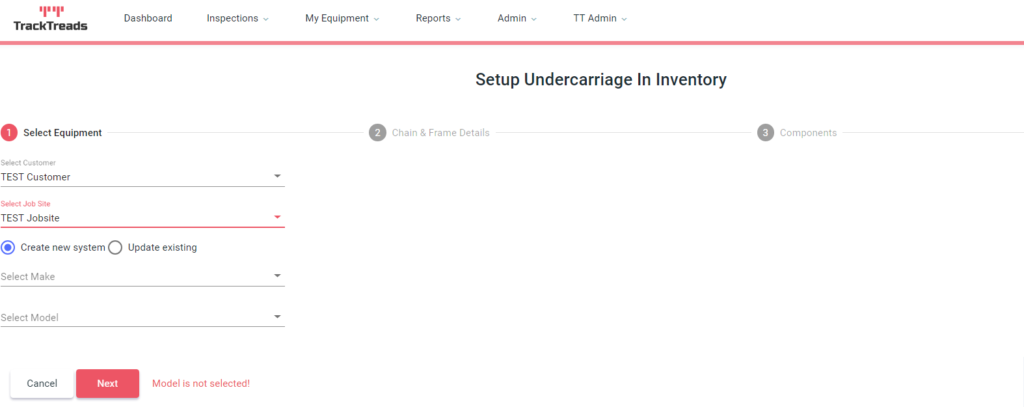
- Select Make - Select from drop down list or begin typing the name of the Make you wish to select in the drop down box.
- Select Model - Select from drop down list or begin typing the name of the Model you wish to select in the drop down box.
- Choose either Chain or Frame.
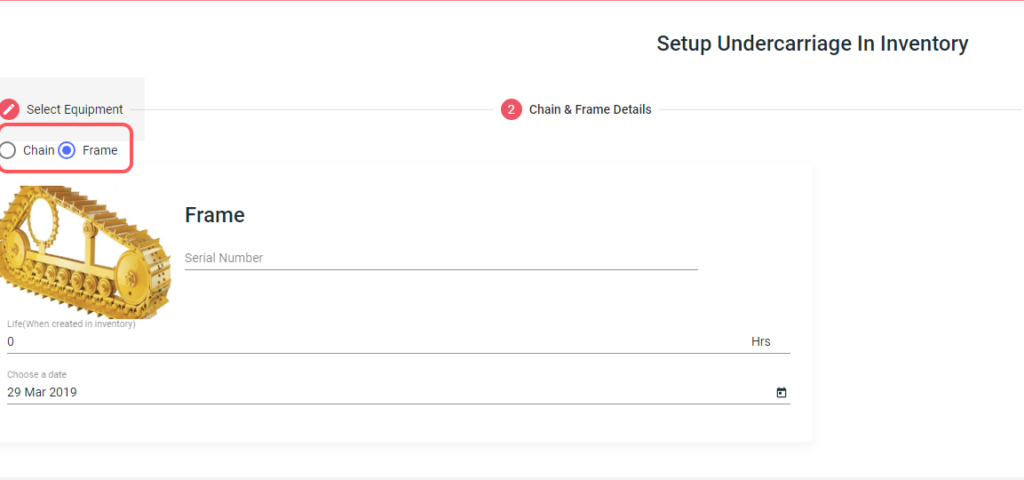
- Enter Chain or Frame Details - Serial numbers for Chains and Frames on each side can be entered on this screen, or they can be left blank and the system will generate a unique serial number for them automatically.
Enter the life & date of the chain/frame when installed on the equipment. - Add all components - Each component will display a green tick when the row is validated. Press next when done.
A number of components will be pre-selected by default because they are always on the equipment you are setting up.
There will also be the option to add further components. *NOTE* You will need to know what components the equipment has before setting up.
Fill in all other required fields; Brand, Budget Life, Hours at install, Cost & if required Size & Grouser.
To view component notes mouse over the component when in the drop down menu

- Review all information - if its correct press 'submit', if not press 'back' and edit accordingly.


Editing previously setup equipment
Navigate to Find & Edit Equipment: My Equipment > Find & Edit Equipment
The main difference between initial setup and editing, is that during initial setup, components are added to both sides simultaneously. Once saved, Left and Right sides are handled independently.
Once an inspection has been recorded on a piece of equipment, you cannot edit components from this screen. Component changes are then handled through the popup on the ‘Inspections’ page.
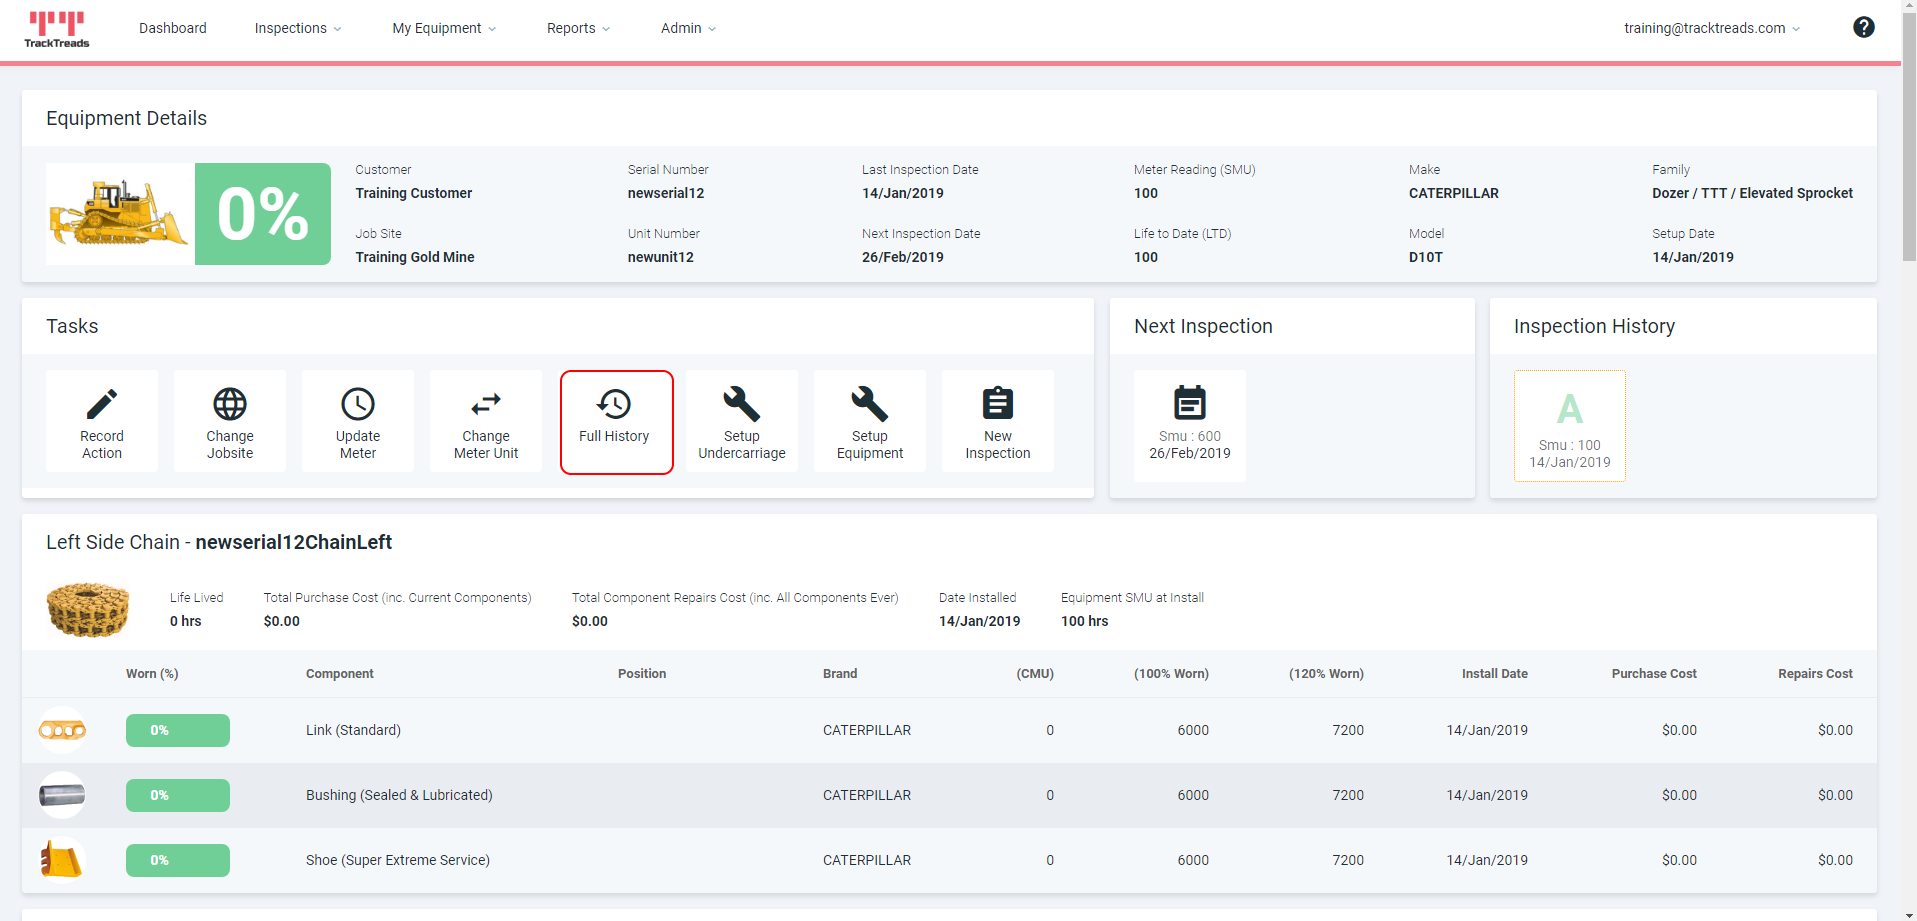
The ‘Equipment History’ screen gives you an in depth view of your equipment and the systems and components it has. It shows full details, wear rates, costs, projections, part numbers and more. From this screen you can also enter component events such as replacements, turns, welds, tension adjustments etc.
Navigate to Full history:– My Equipment > Full History

- Select the Equipment you wish to view by selecting ‘CUSTOMER’, ‘JOBSITE’, ‘EQUIPMENT’
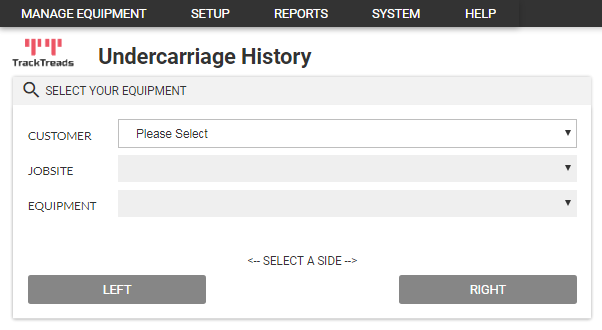
- Once equipment is selected, the page will load the ‘Equipment Details’ and ‘System Details’ on the right and the the ‘Component Current Condition’ will be displayed below. ‘Component Current Condition’ defaults to the LEFT side, to view the RIGHT side, click the ‘RIGHT’ button.
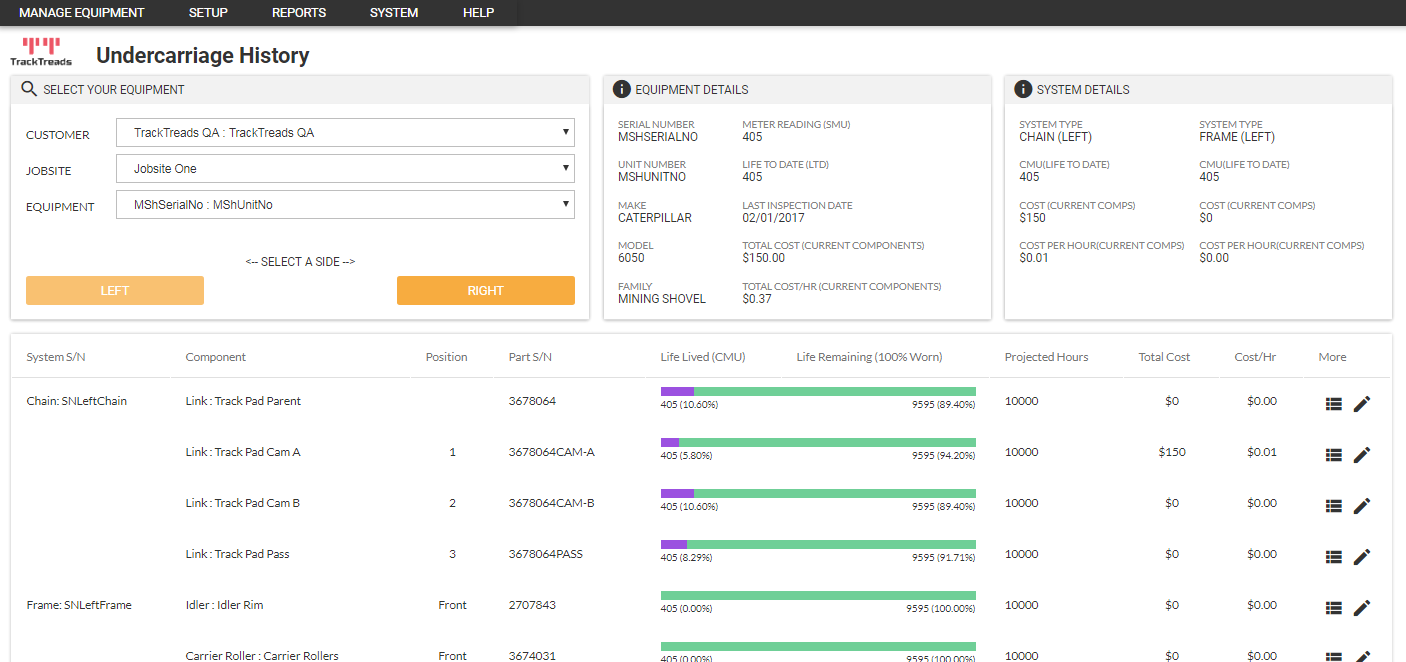
- There are 3 sections on the screen
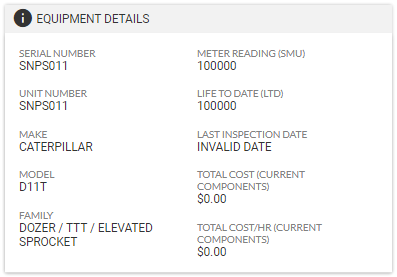
- Equipment Details – Equipment overview including current meter reading, last inspection date and cost total and per hour of running.
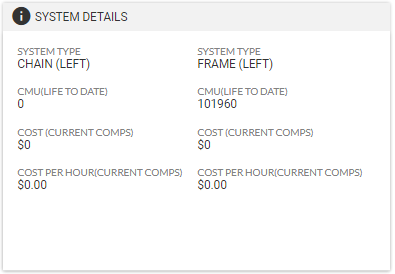
- System Details – Chain and Frame system details for the side (left or right) that you have selected. Includes CMU and cost total and per hour of running.
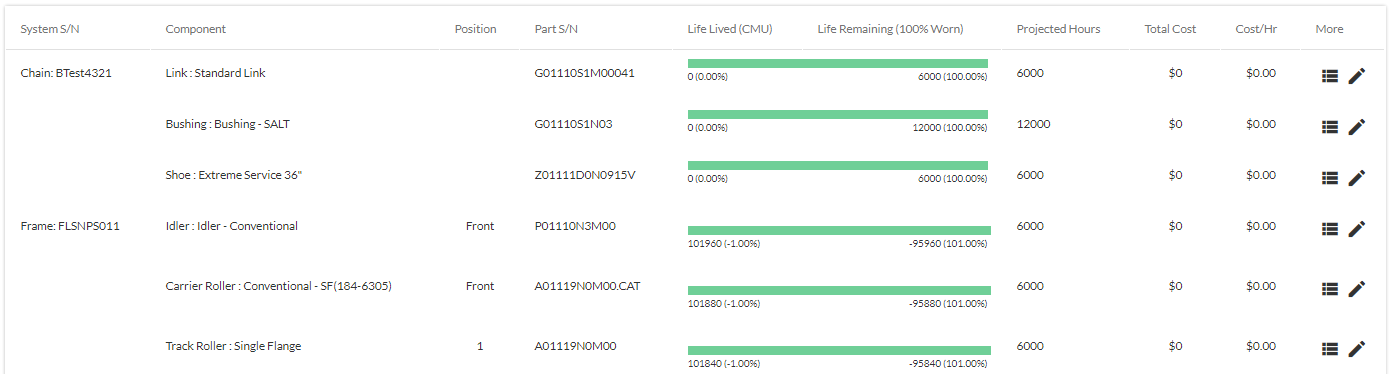
- Component Current Condition – A list of all components grouped by System, showing a visual guide to component life lived and remaining along with data showing projected hours and cost total and per hour of running.
- Equipment Details – Equipment overview including current meter reading, last inspection date and cost total and per hour of running.
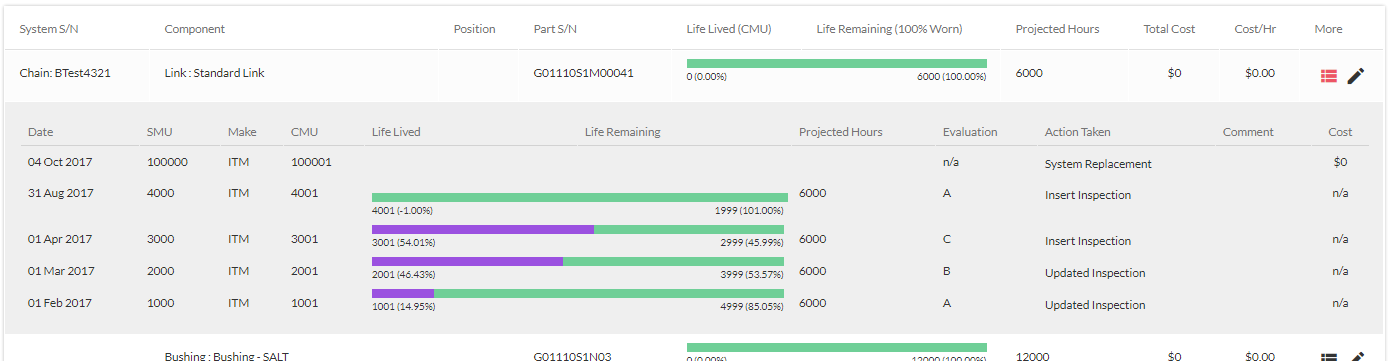
- The full history of a specific component can also be displayed by clicking the menu icon on the right. The component history shows all inspections and events recorded against that component; the SMU and CMU when the evnt occured, a visual guide of current life, projected hours, the evaluation for each inspection, the event/action type and the cost.
 Menu Icon
Alternatively, Full History of a specific equipment can be found on the Equipment Details page: